|
Lunches looked a lot different when I went to school. My sandwiches were put in a ziplock bag and tossed into a brown paper bag along with a piece of fruit and a granola bar. When it was time to retrieve my lunch from my backpack, the sandwich was usually smushed, the banana was beaten up and oozing and the granola bar.. well, thank goodness for the granola bar!
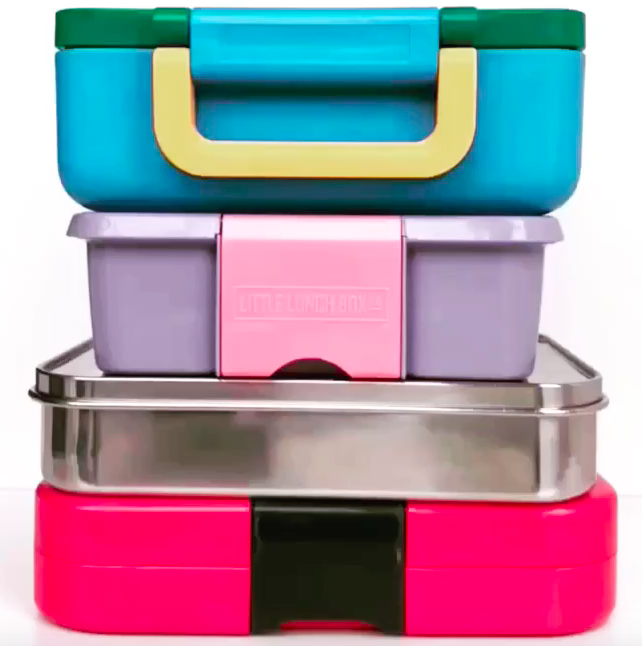
Now, kids go to school with their lunches packed in all sorts of fancy lunch boxes which I love not only because they’re great for the environment but because they make lunch FUN! But how do you choose the right one? Well, that depends on a few things...
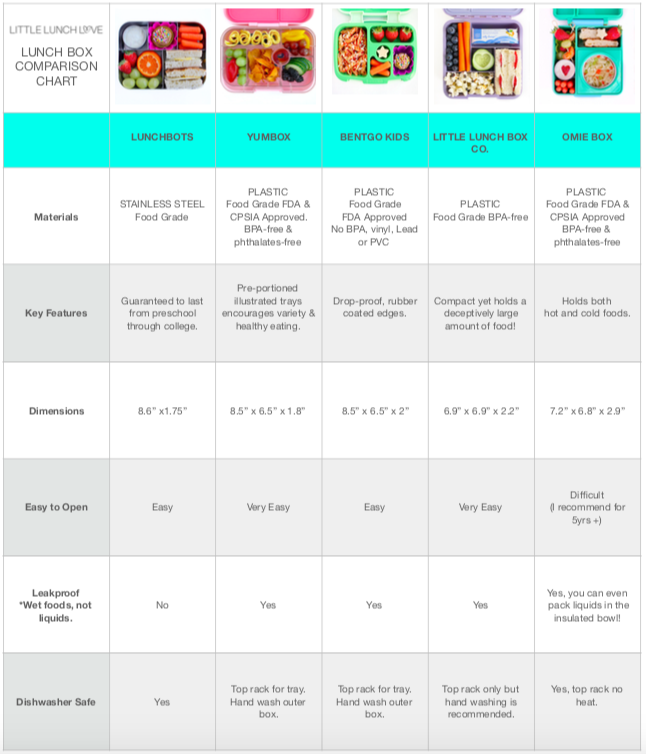
In addition to the tips above, I've created a simple lunchbox comparison chart (below) featuring the 5 lunchbox brands I use. There's additional information about each lunchbox below the chart. I hope this information helps you pick the right lunchbox for your little :) Have a question? Leave me a comment below or send me (Jenny) an email at [email protected]. Lunchbox Comparison Chart
CLICK CHART TO ENLARGE
LITTLE LUNCH BOX CO.
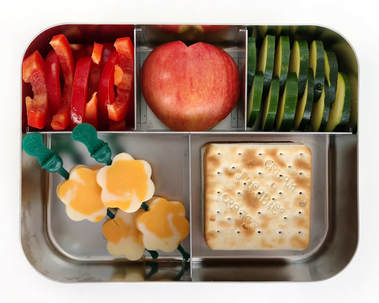
Designed in Australia by a busy mother on the quest for the perfect lunch box, The Little Lunch Box Co lunch box comes in a variety of colours and patterns and is suitable for all ages. They offer two sizes with a couple of compartment options, Bento Two, Bento Three and Bento Five.
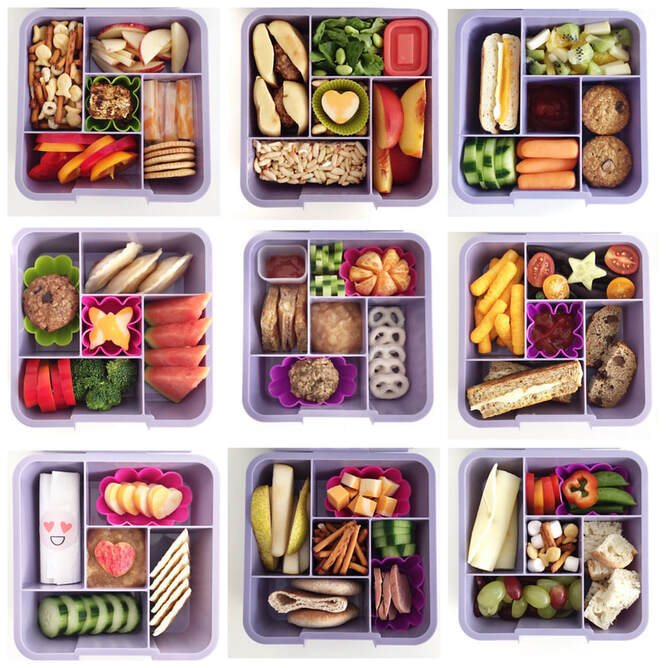
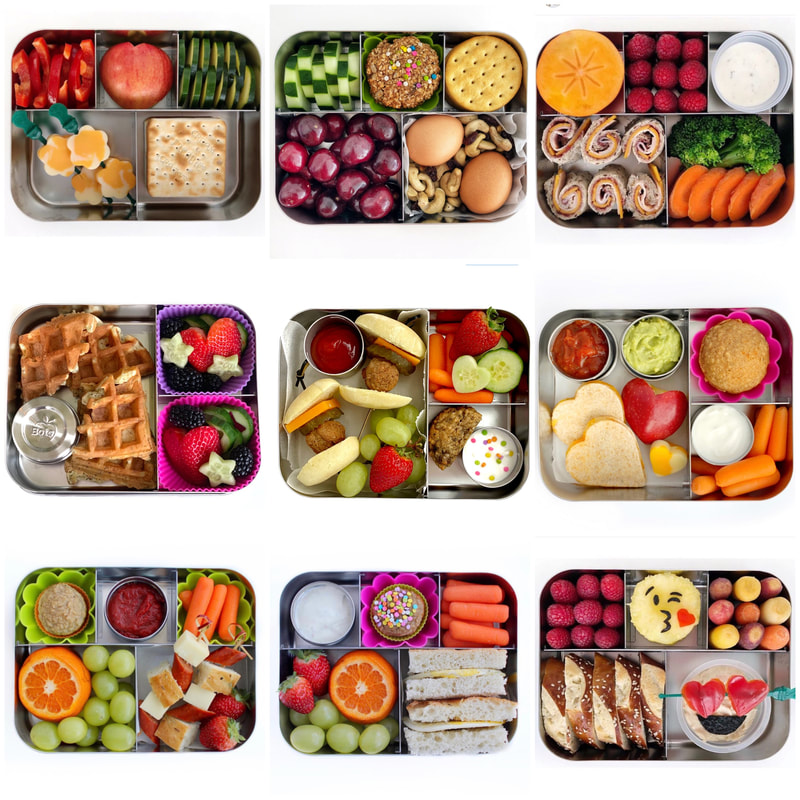
The Bento Five I have The Bento Five that was designed specifically for children who prefer variety or who are fussy eaters. It allows me to pack endless combinations of foods such as fruit, veggies and dip, cheese and crackers and yogurt and granola which can all be packed side by side without the risk of spoiling. This product is BPA Free, dishwasher safe, able to store wet foods * Please refer to their packing instructions for an explanation of wet foods, easy for little hands to open, lightweight medium in size at 17.5cm x 17.5cm x 5.6cm. Little Lunch Box Co. recommends using an insulated bag with an ice pack to keep contents cool. YUMBOX
Designed in France by mama-duo Maia and Daniela who wanted:
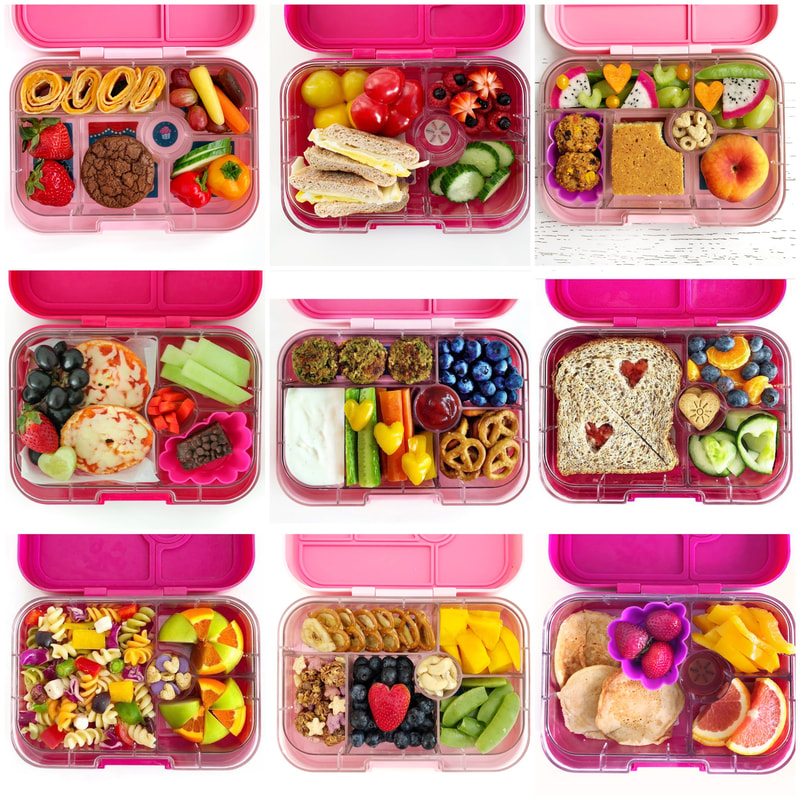
The Yumbox Panino The Yumbox Panino has a 4-compartment food tray and is the box for you if your little loves a sandwich or salad style lunch. It has one large sandwich size section (2 cups) with two smaller 1/2 cup sides plus a 1 oz dip/treat well. The Yumbox Original The Yumbox Original 6-compartment food tray, is perfect for toddlers through age 8 who like variety. It accommodates five 1/2 cup portions plus one dip/treat well. The illustrated trays are a helpful guide if your child wants to pack their own lunch (ya right lol) They are also a helpful guide for me when I’m feeling a bit stumped on what I should pack. This product is BPA-Free, Phthalates-free and are CPSIA and FDA compliant. It is dishwasher safe, able to store wet foods * Please refer to their FAQ page to learn how to pack wet foods, easy for little hands to open, lightweight (1 lbs 1.5 oz.) and compact in size at 8.5 (l) x 6.5 (w) x 1.8 (h) inches. YumBox recommends using an insulated bag with an ice pack to keep contents cool. LUNCHBOTS
The company was started by Jacqueline Linder, a mom who was concerned about chemicals in plastic leaching into her food. So, she started LunchBots and they now offer an extensive collection of stainless steel containers (super strong and super non-toxic) including bento containers with a variety of compartments, leak Proof containers and insulated containers.
Bento Cinco I own the Bento Cinco container because it’s perfect for both children and adults who have a healthy appetite. The two larger compartments are perfect for a sandwich/salad, chicken/rice combos and the three smaller compartments fit fruits, veg, trail mix, baked goods etc. So basically, it can fit enough food in it to satisfy anyone for the entire day. I also love that it's slim enough to fit in almost every lunch bag and that it's lightweight & extremely durable. This product is made from durable food-grade 18/8 stainless steel with no linings, no toxins, no BPA and no phthalates. The Large Bento Container is NOT able to store wet foods, however they have other options available that can accommodate wet foods. It is dishwasher safe, weighs 17 oz and compact in size at 8" x 6" x 1.75" | Large sections: 4" x 3.5" | Small sections: 2.7" x 2.5" *LunchBots recommends using an insulated bag with an ice pack to keep contents cool. OMIEBOX
Created with love by two parents on opposite sides of the world, Nancy Yen (Founder & CEO) and Robin Big (Creative Director) set out to create a new kind of lunch system that would help kids eat better.
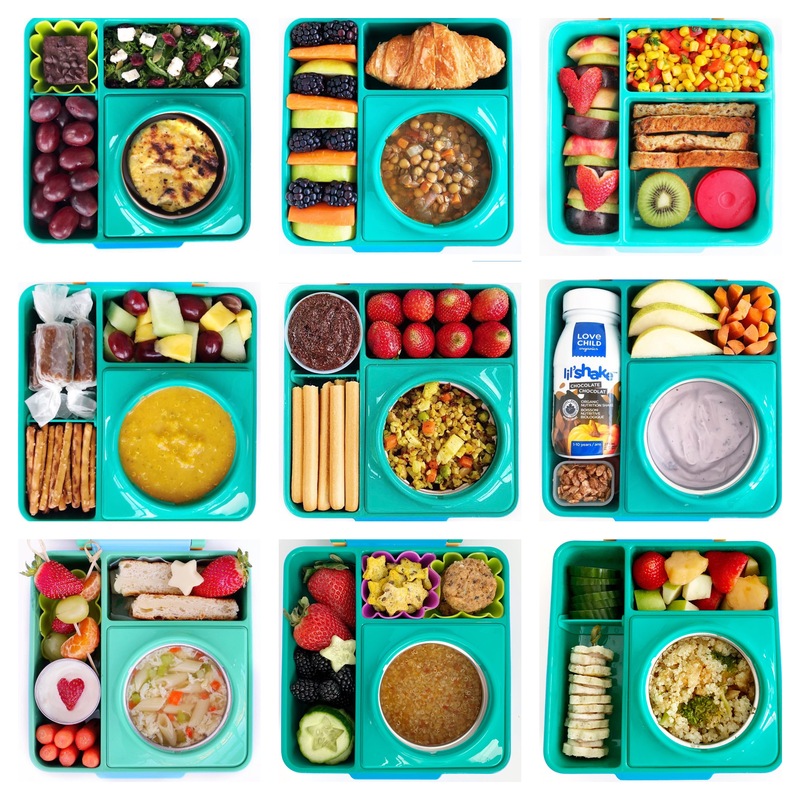
OmieBox is the first insulated bento lunch box for kids that stores hot and cold food together. The bento compartments are double walled, air insulated and leak-proof, so it keeps fruits and vegetables cool and fresh. Hot items go inside the thermos (which is wide a low for little fingers) but what’s cool is you can remove the thermos compartment and pack a sandwich if you wish instead! It also has a handle so it’s the only container you need to store and transport food to school. Oh and its available in 5 super beautiful colours. I have the green one Yay! OmieBox is made of ABS, PP, silicon, and 18/8 food grade stainless steel. It is is BPA‐free, Phthalates‐free. It is also CPSIA and FDA compliant. It is dishwasher safe leak‐proof *Please refer to their FAQ page to learn how to pack wet foods* but it weighs a touch heavy at 1.9 lbs with the vacuum insulated container, and 1.2 lbs without. It’s a small price to pay for an insulated hot/cold lunchbox and so worth it! BENTGO KIDS
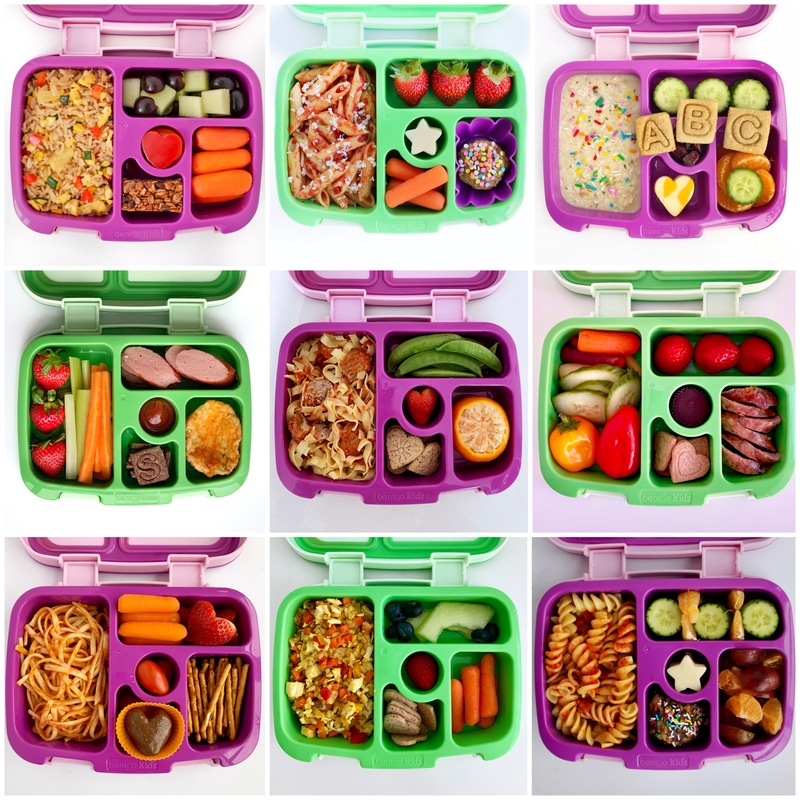
This bento-style lunch box is designed specifically for kids who are on the go thanks to its drop-proof, rubber-coated edges and sturdy design! It also features 5 practical compartments portioned perfectly for a child’s appetite which are sealed and leak-proof, meaning you can fill them with both dry and wet foods without worrying about them leaking into each other.
This Bento Kids lunch box is perfect for sending a half sandwich or salad along with some veggies, cheese and crackers and dip! I also love it to send leftovers (if your kids don't mind eating them cold). The Bento Kids lunchbox features two easy to open and close latches and rubber coated edges for a sturdy drop-proof design. It also features a removable, dishwasher-safe (top-shelf), microwave and freezer safe tray for convenient packing and cleaning. It is made from Food grade plastic and contains no BPA, Vinyl, Lead, or PVC.
2 Comments
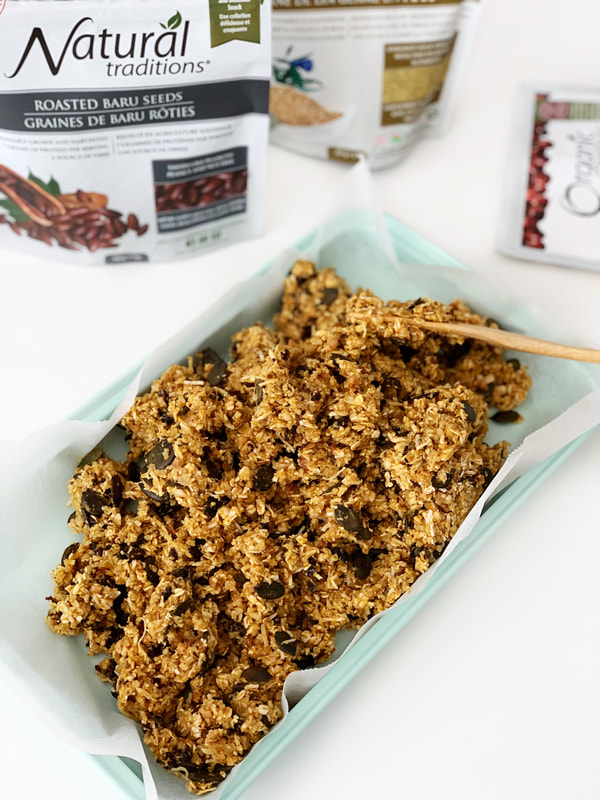
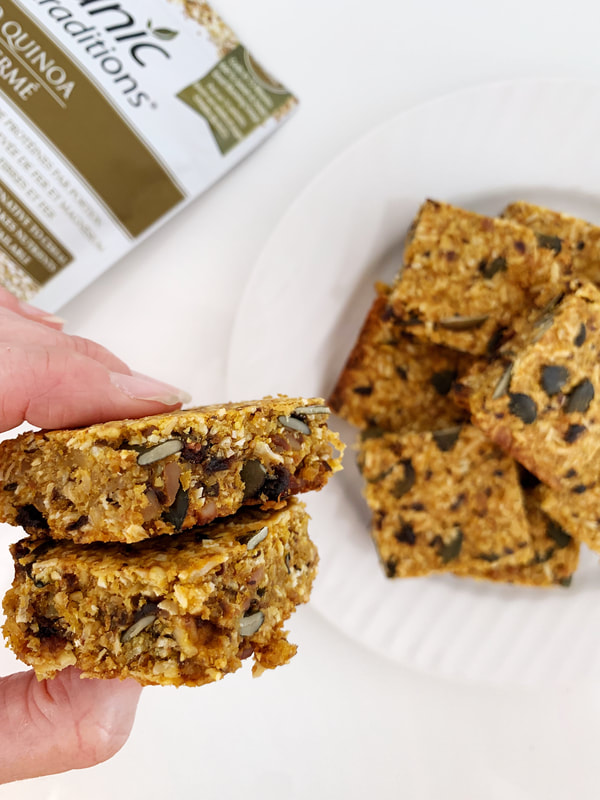
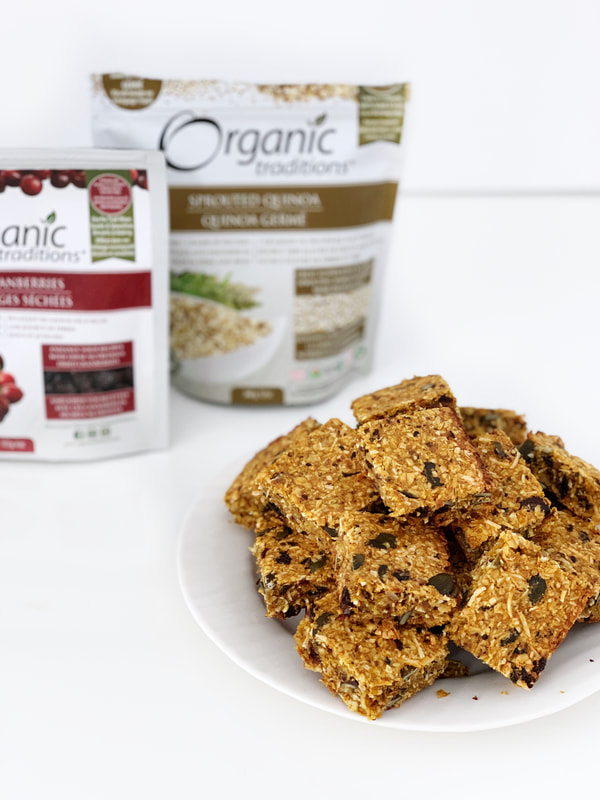
These healthy homemade granola bars are perfect for kids because they taste great and they're packed with nutritious superfoods like Sprouted Quinoa, Flax powder, pumpkin seeds and cranberries from Organic Traditions.
I chose Organic Traditions ingredients for for this recipe because they offer the highest quality of ethically sourced, organic superfoods including Roasted Baru Seeds, a peanut tasting legume that is 100% peanut free. I've chopped the Baru Seeds into small piece and added them to these healthy granola bars to give them a yummy nutty flavour!
Each ingredient I've used is completely nut free which means these healthy homemade granola bars are safe to pack in your kids lunchbox for school! They freeze like a dream too so pop half the batch into the freezer for days when you're low on snacks.
Ingredients
Directions
*Recipe slightly adapted from The Looneyspoons Collection: Janet & Greta's Greatest Recipe Hits Plus a Whole Lot More!
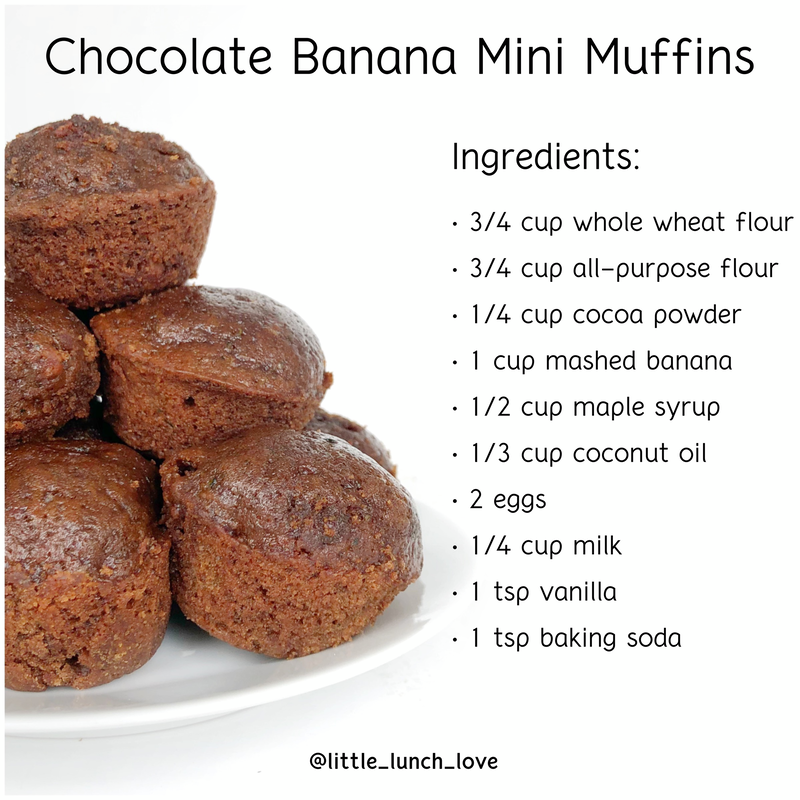
Meet the mini muffins of my dreams! They’re NATURALLY SWEETENED, whole grain, and made in one bowl. They pack perfectly in a lunchbox and make an awesome after-school snack. You’re going to love them.
Ingredients: 3/4 cup whole wheat flour 3/4 cup all-purpose flour 1/4 cup cocoa powder 1 cup mashed banana 1/2 cup maple syrup 1/3 cup coconut oil 2 eggs 1/4 cup milk 1 sp vanilla 1 tsp baking soda Instructions: Preheat the oven to 325°F (165°C) Grease mini muffin tin with coconut oil or cooking spray. In a large bowl, mix the coconut oil and maple syrup together with a whisk. Add the eggs and mix again. Mix in the mashed bananas and milk, then add the baking soda and mix again. Add the flour and cocoa powder to the bowl and mix with a large spoon, just until combined. Divide the batter evenly between the muffin cups Bake muffins for 12 to 15 minutes, or until a toothpick inserted into a muffin comes out clean. Store in an air-tight container lined with paper towels (top and bottom) at room temperature for 3-4 days. The paper towels absorb moisture and help prevent muffins from getting soggy. Change them when you feel they're getting too damp.
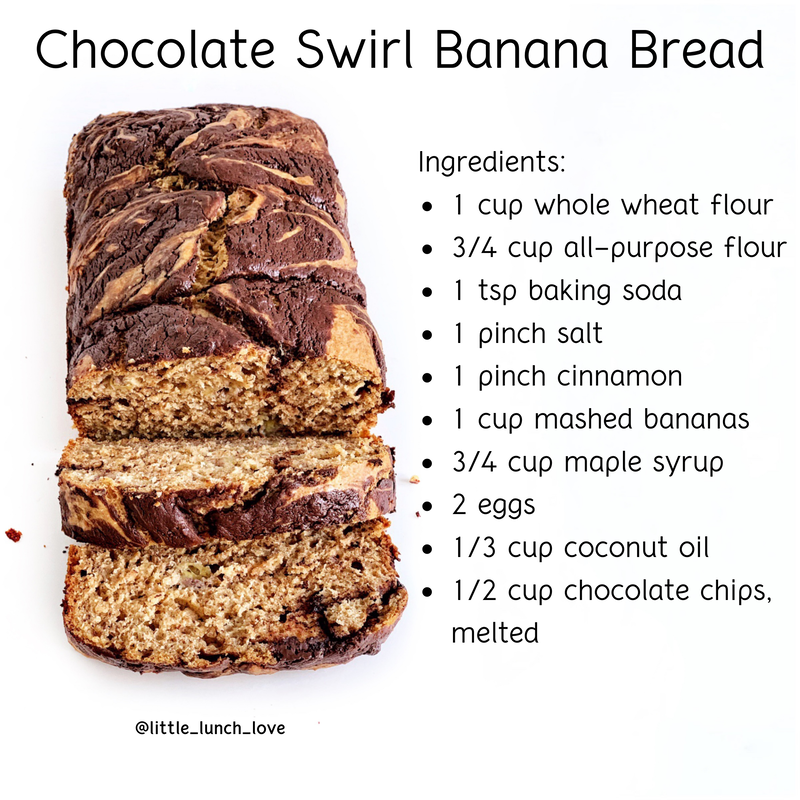
Here’s a delicious (and pretty ✨) banana bread recipe that the whole family will love ??❤️ It’s naturally sweetened with maple syrup and full of flavour & fibre ?
To achieve the ? swirl on top, simply melt chocolate chips and pour the melted chocolate on top of the batter. Then gently swirl the chocolate around with the tip of a butter knife. Voila! Ingredients: 1 Cup whole wheat flour 3/4 cup all-purpose flour 1 tsp baking soda 1 pinch salt 1 pinch cinnamon 1 cup mashed bananas 3/4 cup maple syrup 2 eggs 1/3 cup cocnut oil 1/2 cup chocolate chips, melted Instructions: Preheat oven to 350 F. Rub coconut oil on a 9×5 inch loaf pan and dust with flour. This will keep the bread from sticking! In a large bowl, whisk flours, baking soda, salt, and cinnamon together. In a medium bowl, beat bananas, syrup, eggs, and oil together. Add wet mixture to dry mixture (or vice versa) and stir until combined. Pour batter into the greased loaf pan and set aside. In a small microwave safe bowl, melt chocolate chips with 1 tsp coconut oil on high until melted. * Stop every 25 seconds to stir chocolate. Drizzle melted chocolate on top of the batter and swirl with the tip of a butter knife for a marbled effect. Bake for 45 minutes or until a toothpick inserted in the middle of the loaf comes out clean. Let the bread cool in the loaf pan for 5 minutes, then transfer it to a wire rack to completely cool before slicing. Heading on a family road trip? Read this article first for four easy to pack, kid approved snack ideas!
Our family is heading to the cottage this long-weekend and I’m packing snacks, snacks and more snacks because there’s something about a road trip that makes everyone hungry, even if you’ve just finished a meal at home!
And over the years my kids have become conditioned to expect a sweet snack at the halfway point because it gives them something to look forward to and helps break up the trip. However, I look for 'healthier' sweet snacks like Surf Sweets Organic Candies because they're sweetened with organic natural sweeteners and fruit juice and made without synthetic colors, and flavors. They also come in adorable shapes like bears and worms so the kids have a lot of fun eating them! Because Surf Sweets has become such a big part of our family road trips, I've partnered with them to create four easy and fun travel snack ideas your kids (and you) will love! Each snack includes a balance of whole foods including eggs, cheese, fresh fruit, veggies and of course... a touch of Surf Sweets. Enjoy and happy snack packing & road tripping this friends! easy to pack Snack #1 - Boiled Eggs
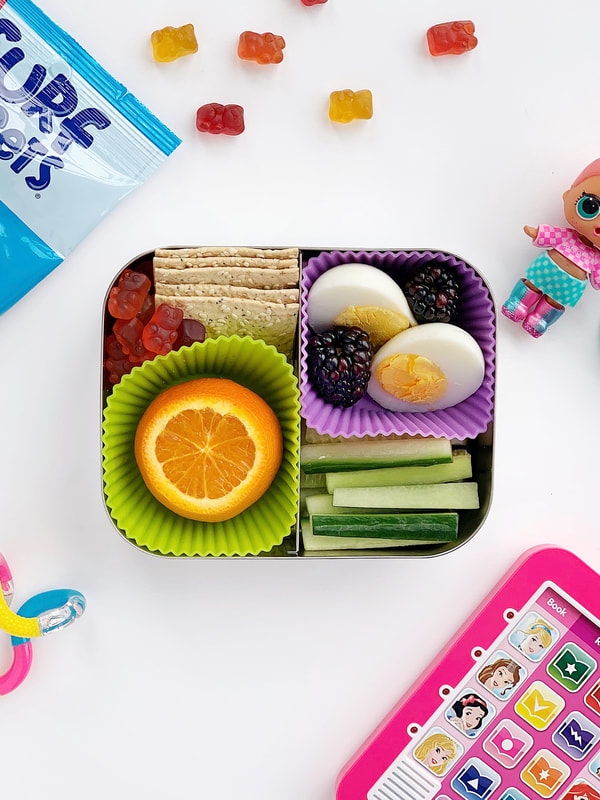
Boiled eggs are one of my favourite protein rich snacks to pack because they travel well and kids can eat them with their hands. And if you don't have time to boil them at home you can buy them prepared at most grocery stores and select road stop stations.
I suggest serving boiled eggs with crackers, an assortment of fresh fruit & veggies and Surf Sweets Organic Fruity Bears. Organic Fruity Bears are made with organic fruit juice and organic cane sugar. They are also free from artificial colors, flavors, high fructose corn syrup and are also free of the Top 10 most common food allergens. Easy to pack snack #2 ~ Hummus
Hummus is an easy, healthy snack to pack especially now that it's sold in small to-go containers with crackers. Because these to-go hummus snacks are sold at most grocery stores and road stop stations they're a great snack to pick up along your travels.
Try to pair it with veggies sticks, a piece of fresh fruit and keep an eye out for Surf Sweet Organic Jelly Beans because they're drenched with fruit flavor, and made with organic cane sugar and organic fruit juice. Easy to pack snack #3 ~ Meat & cheese
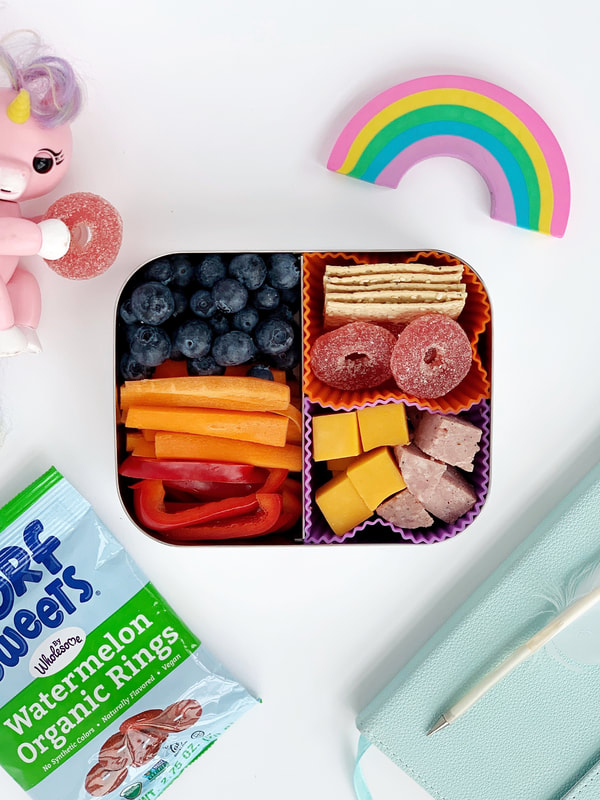
Here's a snack box that includes a little bit of everything. Fresh blueberries, carrot sticks, bell peppers, cheddar cheese, crackers and yummy Surf Sweets watermelon organic rings.
This snack box is super easy to customize with you kids favourite cheese or meat (sometimes i sub kielbasa for rolled turkey slices or strips of chicken breast) and it's a great snack for mom & dad too so make sure you pack extras! Surf Sweets Organic Watermelon Rings are lightly sugared and made with organic sweeteners and organic fruit juice. They're made without corn syrup, artificial colors or flavors. easy to pack snack #4 ~ 1/2 sandwich
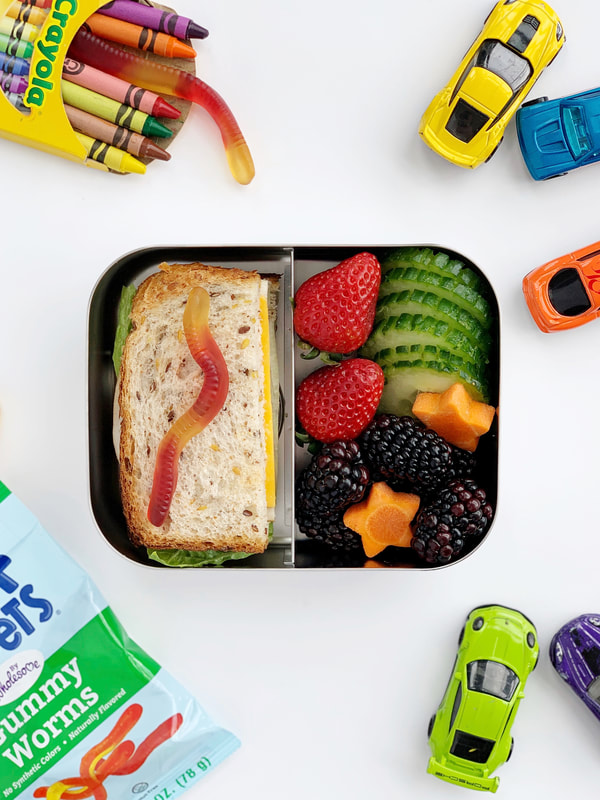
Sandwiches are a great snack to pack and the variety of sandwiches you can make are endless! Here I've packed a turkey and cheese sandwich with lettuce and mayo but my kids always love the classic pb&j sandwich or even a cream cheese & cucumber sandwich.
I've paired the sandwich with fresh berries, carrot stars (I made these with a super small metal cookie cutter), cucumber slices and a few Surf Sweets Gummy worms for a sweet and fun treat! Surf Sweets eliminated the artificial flavors and colors found in most gummy candies and made their Gummy Worms allergy-free and with organic fruit juice and organic sweeteners.
|
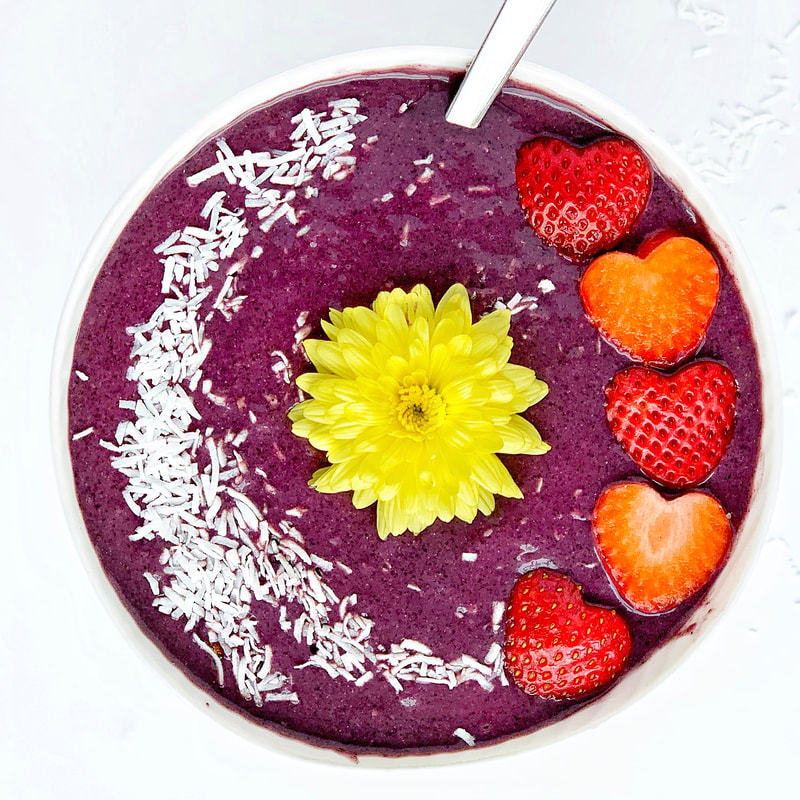 ACAI –BEET-BERRY SMOOTHIE BOWL WITH HOMEMADE ALMOND MILK + NUT BUTTER, GRANOLA CRUMBLE, TOASTED COCONUT + FRUIT | INGREDIENTS: 2 ½ Tbsp acai powder (I like this one by Organic Traditions) 3 cups frozen blueberries 3 frozen bananas 4 tbsp almond butter (recipe below) 2 tbsp chia seeds 1 small beet, peeled and cut into thin slices 2 cups almond milk (recipe below) or coconut milk TOPPINGS: Coconut Hemp Seeds Granola Fresh Fruit |
INSTRUCTIONS
Blend all the ingredients together in a high speed blender or food processor. Blend until creamy and smooth. The trick to a thick smoothie bowl is being patient and blending slowly, adding only as much liquid as necessary, and using a smoothie wand (or something comparable that's blender safe) to scrape the sides down as it blends.
Scoop into a bowl and add your toppings of choice.
ALMOND MILK
Ingredients:
1 cups whole almonds, soaked
4 cups water
¼ tsp sea salt
1 date, optional
Instructions:
Place all ingredients into a high speed blender, blend for 1 min. Pour milk through a nut milk bag or double lined cheesecloth into a bowl, squeezing out all the liquid, set aside.
Ingredients:
1 cups whole almonds, soaked
4 cups water
¼ tsp sea salt
1 date, optional
Instructions:
Place all ingredients into a high speed blender, blend for 1 min. Pour milk through a nut milk bag or double lined cheesecloth into a bowl, squeezing out all the liquid, set aside.
ALMOND BUTTER
Ingredients:
1 ½ cups raw almonds
¼ teaspoon salt
Optional: 2 tablespoons maple syrup or honey
Instructions
Preheat the oven to 350F. Spread the almonds across a large, rimmed baking sheet and toast the almonds for 8-10 minutes, stirring halfway.
Let the almonds cool until they’re just warm (not hot), about 5 minutes.
Transfer the almonds to a food processor. Blend until creamy, pausing to scrape down the sides as necessary. You’re going to think it’ll never blend, but be patient! The almonds will go from flour-like clumps, to a ball against the side of the food processor (keep scraping down the sides and breaking up the ball), and finally, it will turn creamy. If the mixture gets crazy hot along the way, stop and let it cool for a few minutes. If adding sweetener, add once creamy, and blend again for 1 minute.
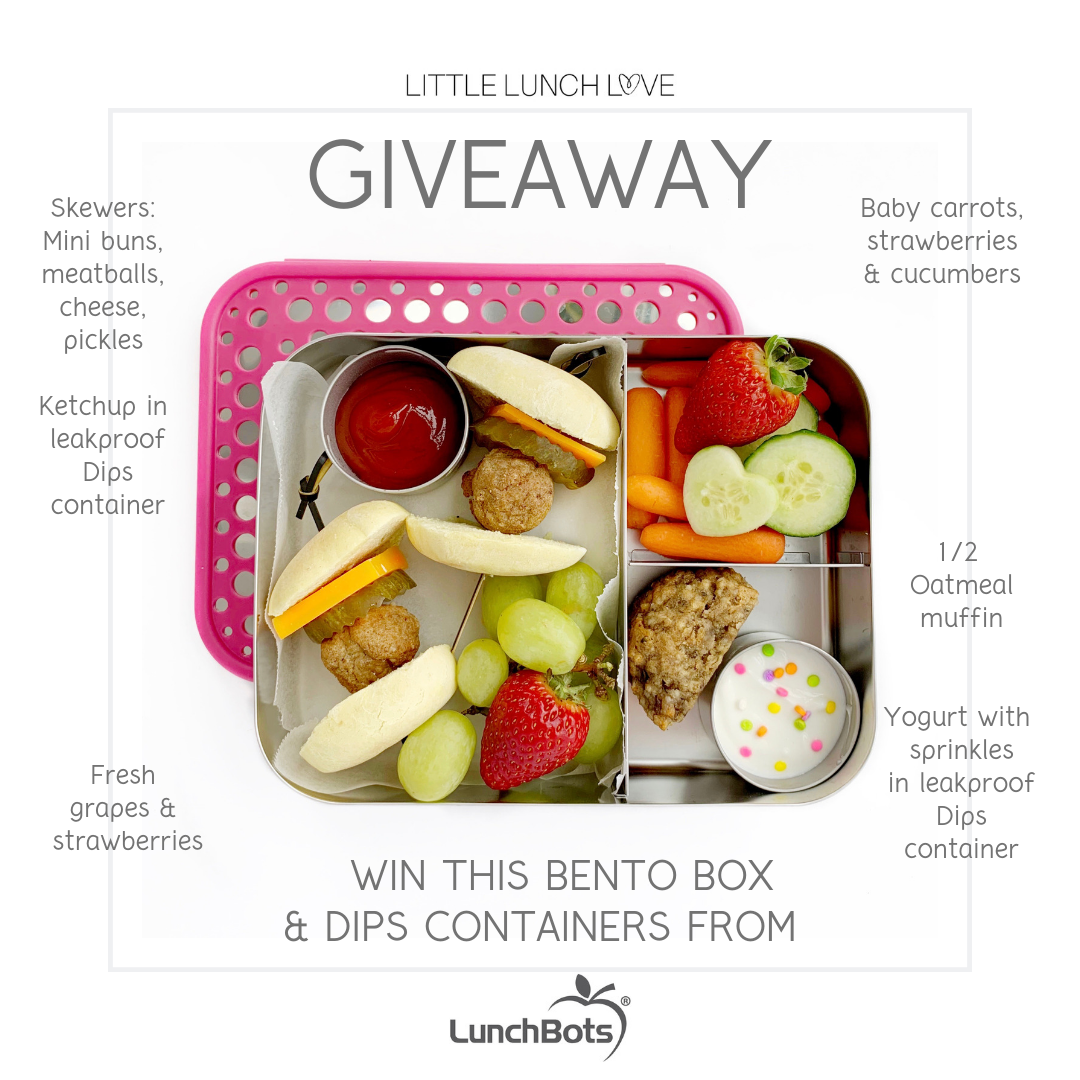
LunchBots and Little Lunch Love have partnered to give one lucky winner:
ONE LARGE BENTO TRIO
ONE SET OF 3 DIPS CONTAINERS
Value $100 USD
LunchBots food containers are made with high-quality food grade stainless steel so they’re super strong and super non-toxic! They offer an extensive collection of containers including bento boxes with a variety of compartments, leak proof container and insulated containers.
This giveaway closes on Mar 3rd 11:59pm EST and is open to US and Canadian residents. The winner will be notified the following week and announced on Instagram and Facebook. GOOD LUCK! Just a reminder we do not ship to PO boxes. This contest is in no way endorsed or sponsored by Instagram.
How to enter
YOU MUST COMPLETE EACH STEP TO QUALIFY
1. ENTER on Instagram OR Facebook
**or both for extra entries**
2. FOLLOW BOTH
Little Lunch Love & LunchBots
3. LIKE each Giveaway Post
4. COMMENT what you'll pack in your new lunchbox!
5. TAG a Friend
1. ENTER on Instagram OR Facebook
**or both for extra entries**
2. FOLLOW BOTH
Little Lunch Love & LunchBots
3. LIKE each Giveaway Post
4. COMMENT what you'll pack in your new lunchbox!
5. TAG a Friend
Enter now on instagram
* Click both links*
Follow each account, Like each post, Comment what you'll pack & TAG a friend.
Follow each account, Like each post, Comment what you'll pack & TAG a friend.
on facebook
* Click both links*
Follow each account, Like each post, Comment what you'll pack & TAG a friend.
Follow each account, Like each post, Comment what you'll pack & TAG a friend.
BONUS ENtry
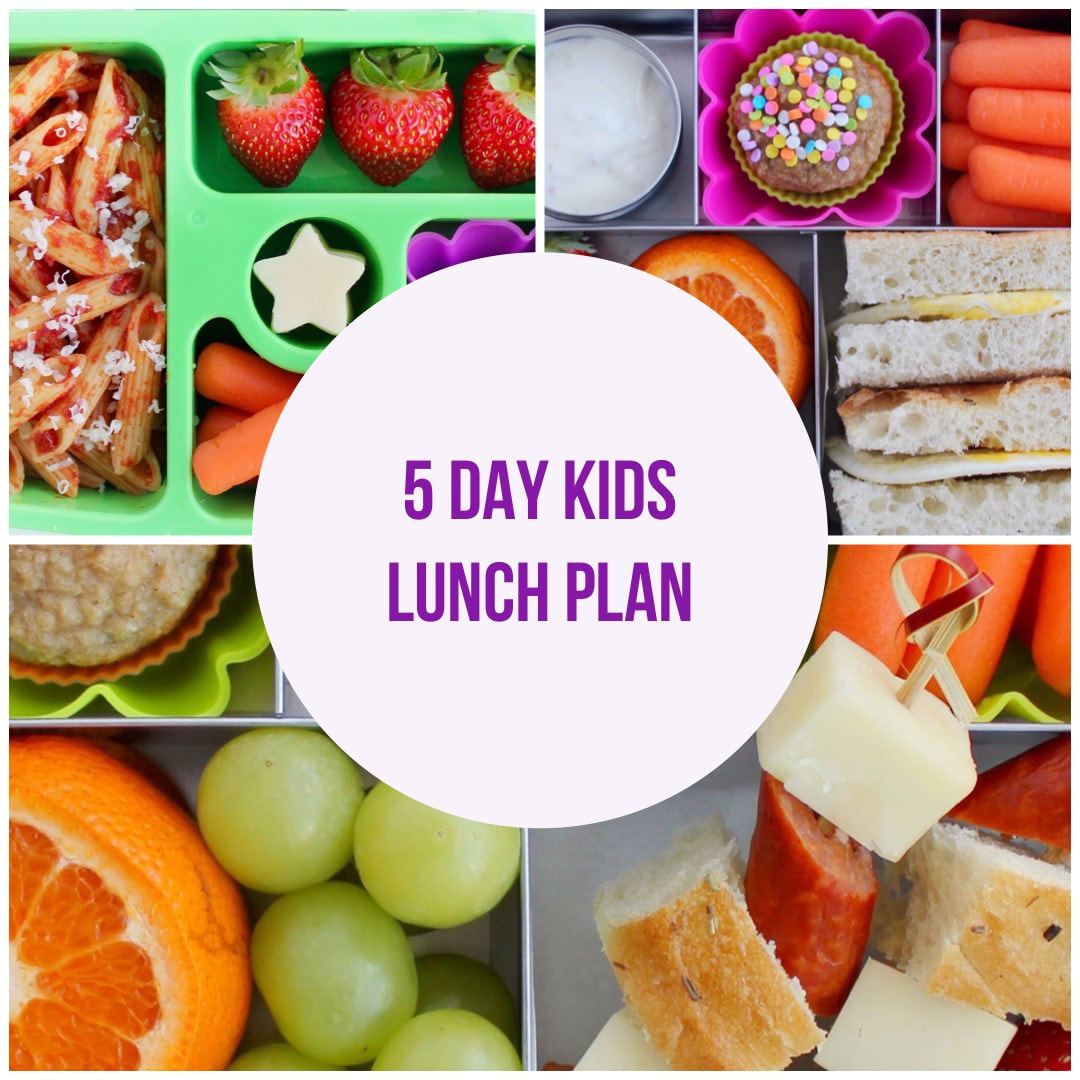
Sign up for the FREE Little Lunch Love '5 Day Kids Lunch Plan!
I’m so excited to share my second '5 Day Kids Lunch Plan' with you! If you loved the first (visit here to download my first Lunch Plan) you're going to love the second because it includes new recipes, detailed photos and prep tips!
I created this plan to inspire you to try new recipes and pack foods in a new (but simple) way that will make lunch exciting for your kids.
The plan includes:
Click here to sign up for your FREE copy now.
Enjoy and happy lunch packing friends!
~ Jenny
I created this plan to inspire you to try new recipes and pack foods in a new (but simple) way that will make lunch exciting for your kids.
The plan includes:
- 5 Kid Approved Lunch Ideas
- Lunchbox Photos
- Grocery List
- Prep Tips
- Easy Recipes
Click here to sign up for your FREE copy now.
Enjoy and happy lunch packing friends!
~ Jenny
My kids love sandwiches and I love them too because they're quick and easy to make. However, on occasion I find the need to change up the sandwich design to keep them interested in eating them.
Changing the design of your kids sandwich is also a great way to spice up your kids lunchbox. These fun designs will pretty much fit in any and every bento box too!
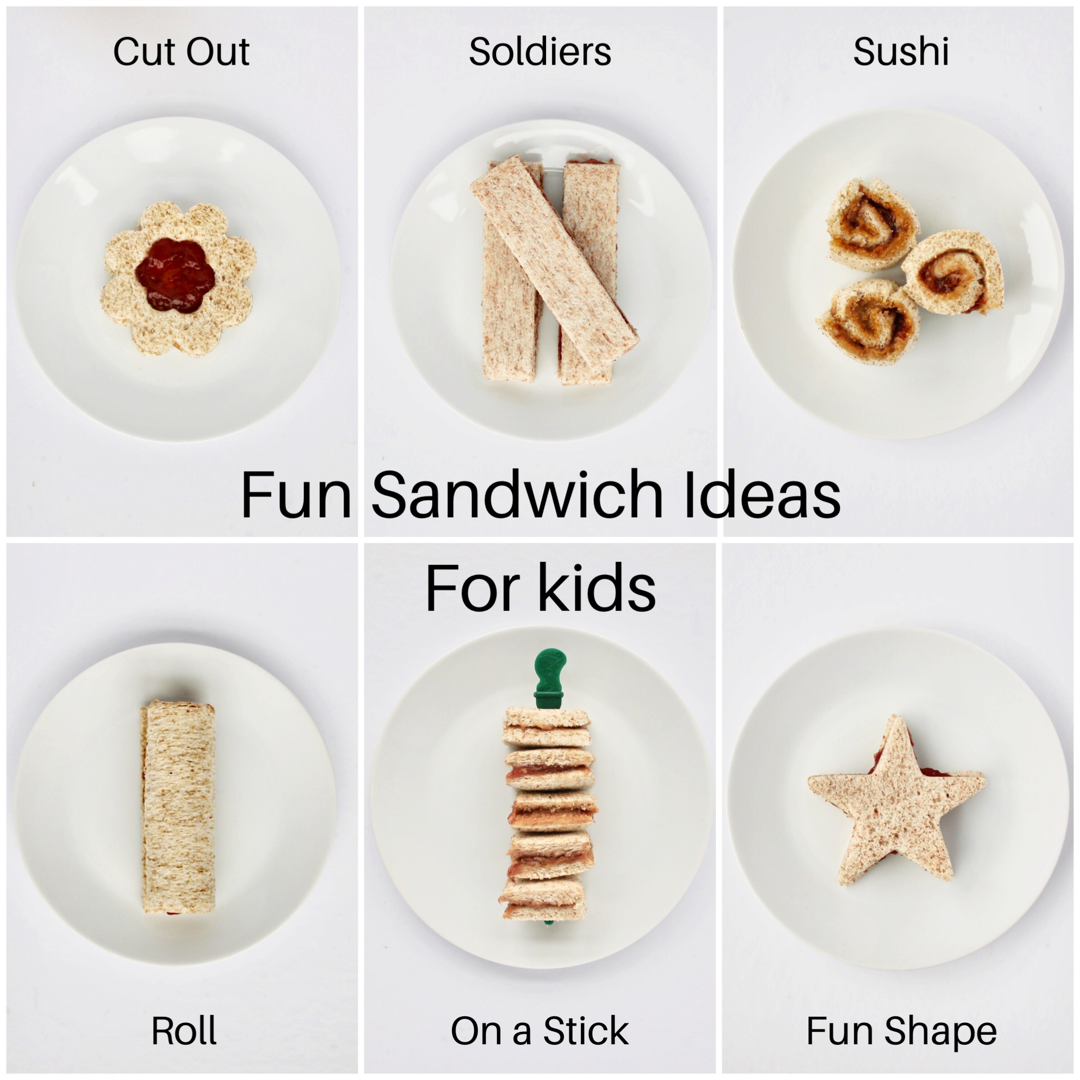
Here are 6 Fun & Easy ways to cut, slice and skewer your kids sandwiches so that they’re fun and exciting EVERY time:
Do you know of any other fun sandwich ideas for kids? Let me know in the comments below!
Changing the design of your kids sandwich is also a great way to spice up your kids lunchbox. These fun designs will pretty much fit in any and every bento box too!
Here are 6 Fun & Easy ways to cut, slice and skewer your kids sandwiches so that they’re fun and exciting EVERY time:
- Cutout - simply cut a fun shape out of the top slice of your sandwich. Whatever you fill your sandwich with will peak through the top!
- Soldiers - these sandwich solders are easy to eat and perfect for little hands. All you have to do is make your sandwich and cut it into 3 sticks!
- Sushi - cut crusts off bread (or buy crustless bread), roll bread with a rolling pin to flatten, spread or layer with toppings, roll into a log and slice into bite size pieces!
- Roll - cut crusts off bread (or buy crustless bread), roll bread with a rolling pin to flatten, spread or layer with toppings, roll into a log. That's it! It's easy to eat and perfect for little hands.
- On a stick - make your sandwich, cut it into bite-size pieces then thread it on a sandwich skewer.
- Fun Shape - using a cookie cutter, cut both slices of bread and then make your sandwich of choice! If you're using soft fillings such as PB&j, cheese or deli meats you can assemble your sandwich first, then cut through the bread and filling together.
Do you know of any other fun sandwich ideas for kids? Let me know in the comments below!
Happy New Year Friends!
I'm SO excited to announce that my '5 Day Kids Lunch Plan' is ready and I know you're going to love it!
The plan includes:
5 kids lunches
Grocery list
Easy kid-approved recipes
Lunchbox Photos
I designed it to help you pack your kids lunches from start to finish! They can even help you pack it too if you prepare the recipes and they pack their lunchbox copying the lunchbox photo!
And you don't have to use the same lunchbox that I do. I've used a few different boxes throughout the plan to show you the various ways to pack a kids bento style lunchbox.
Click the link below to download your '5 Day Kids Lunch Plan' now and make sure to subscribe to my newsletter here to receive all future lunch plans!
Enjoy and happy lunch packing friends!
~ Jenny
|
|
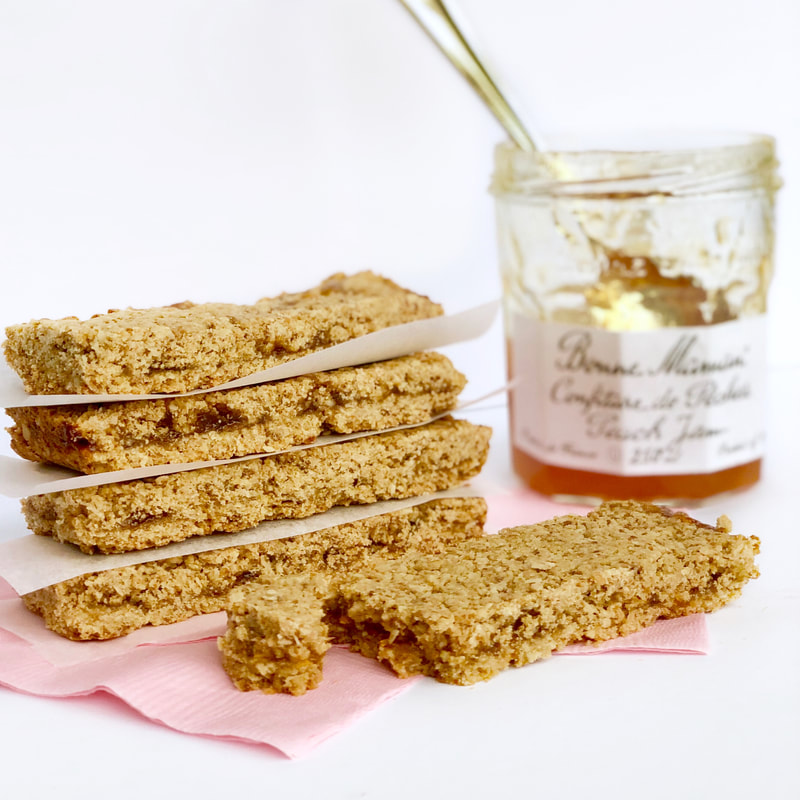
If your kids are like mine they love those fruit-filled bars you can find at Costco or the grocery store. They're soft, chewy, and sweet... and I'm happy to buy a box once in a while because the bars would be too darn hard to make myself. Right? Wrong!
Fruit-bars are easy to make and you probably already have all the ingredients you need to make them. These bars are made in a food processor (YIPPY) and include healthy ingredients like whole wheat flour, oats and you can include your favourite local fruit preserves like Bonne Maman. YUM!
This recipe is from Catherine McCord from Weelicious and you're gonna love it. Happy baking friends.
Hugs
~ Jenny
Whole Grain Fruit-filled Bars
Ingredients
1 1/2 cups whole-wheat flour *I used Ivory wheat flour (my fav)
1 1/2 cups quick cooking or old-fashioned rolled oats
1/2 cup packed packed brown sugar *I used organic coconut sugar
1/2 teaspoon salt
3/4 cup (1 1/2 sticks) cold, unsalted butter, chopped into 1/2-inch cubes
2 tablespoons cold water
3/4 cup fruit preserves
Preparation
1. Preheat the oven to 350 degrees F.
2. In a bowl of a food processor, combine the flour, oats, brown sugar, and salt. Pulse for 30 seconds.
3. Add the butter and cold water and use until the dough holds together when pressed.
4. Grease a 9 x 13-inch baking dish, line it with parchment paper, and grease the parchment paper.
5. Divide the dough mixture in half and press half into the prepared baking dish, using the back of a spatula to press down evenly.
6. Spread the preserves evenly on top of the dough. Sprinkle the remaining dough evenly on top of the preserves and gently press down using the back of a spatula.
7. Bake for 45 minutes, or until golden brown. *I baked for 30min
8. Cool, cut into 1 1/2 x 4-inch bars, and serve.
TIP: Bars can be stored at room temperature up to 3 days or refrigerated up to a week.
Which lunch would your child choose? Let me know in the comments below??
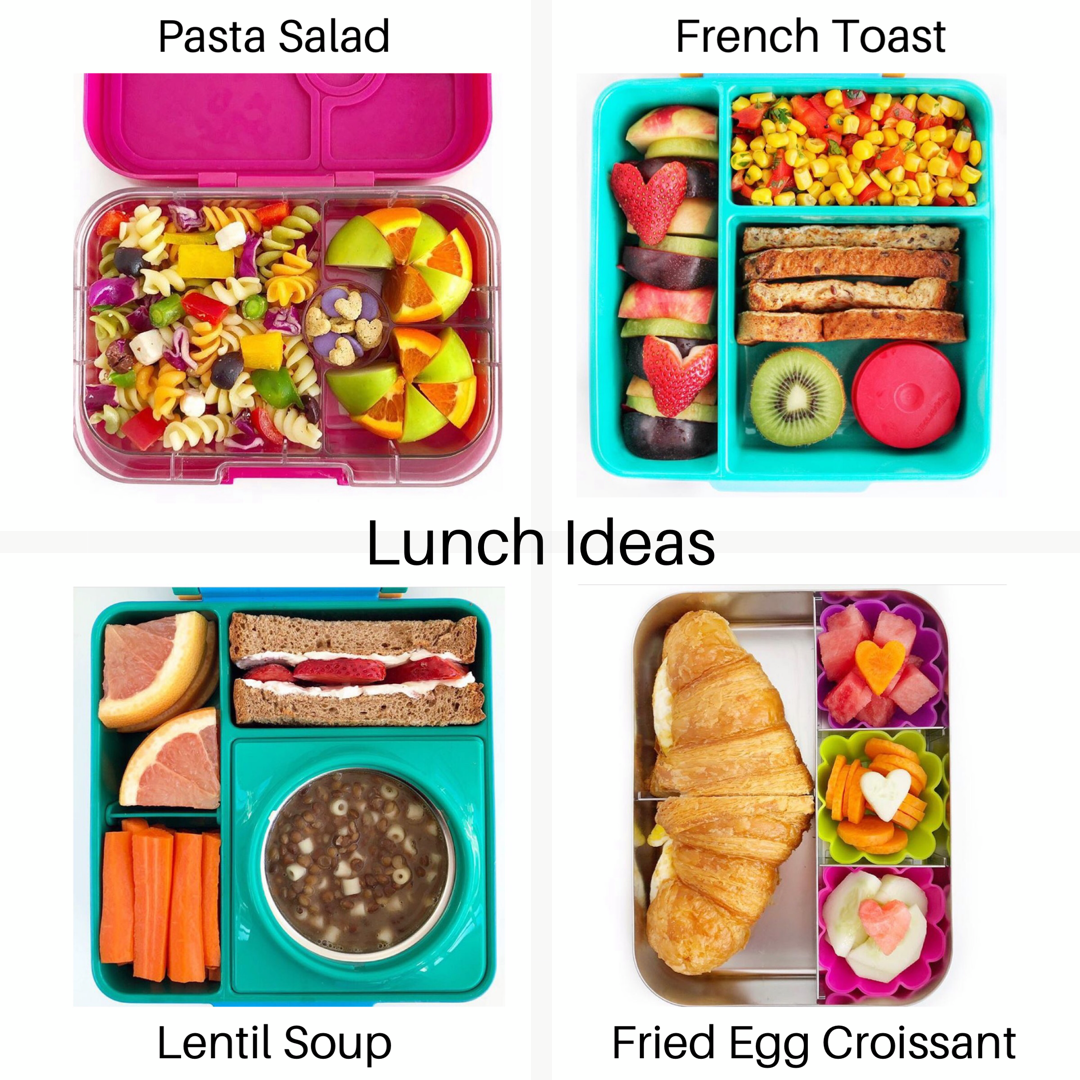
Here are my top four favourite lunches to pack Abi because they're easy to make and... delicious! Just add some colourful sides to each and Voila! Lunch is served :)
Check out my time-saving prep tips for each lunch below:
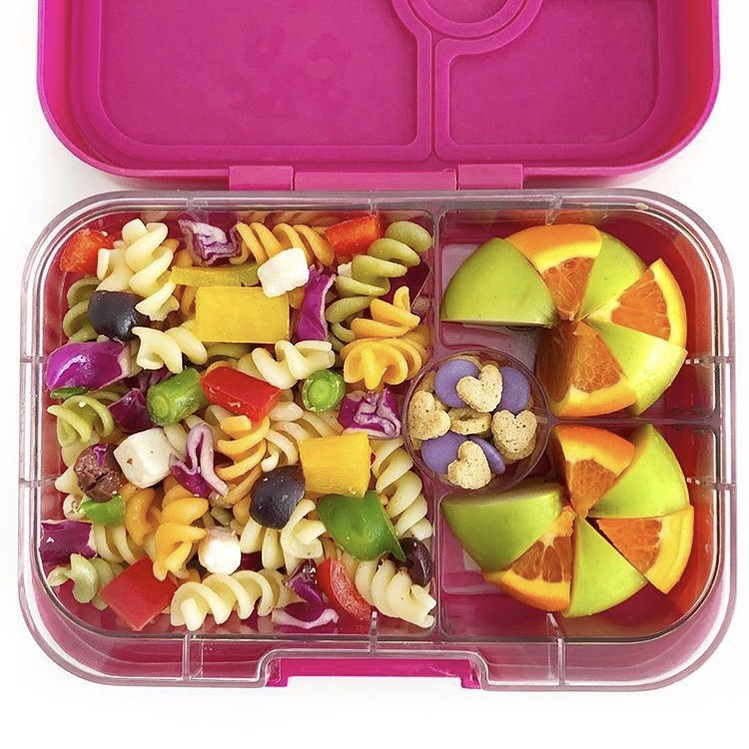
?? Pasta Salad
I always have cooked pasta noodles in my fridge. When I want to send them to school for lunch, I add my kids favourite veggies and toss in olive oil, grated parmesan, salt & pepper.
I always have cooked pasta noodles in my fridge. When I want to send them to school for lunch, I add my kids favourite veggies and toss in olive oil, grated parmesan, salt & pepper.
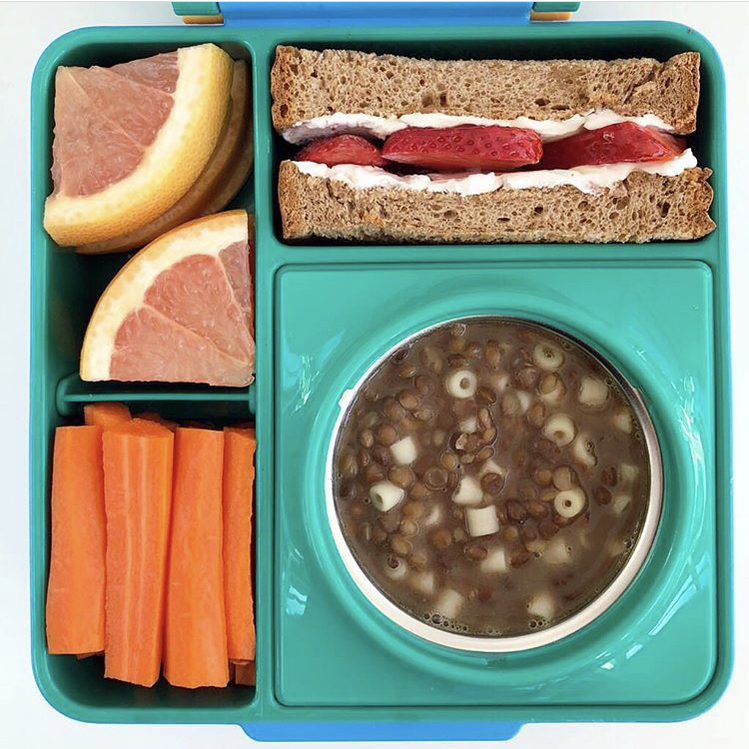
?? Lentil Soup
This is a lunchtime favourite especially during the cooler months. It's also the one meal I can make for dinner AND serve as leftovers for lunch the next day.
Because the lentils will continue to absorb the liquids overnight, I suggest separating them from the broth before storing. Simply combine them back together the next day, reheat and pack in a thermos for lunch!
?? Fried Egg Croissant
I store croissants in the freezer to keep them fresh. When I’m ready to use one I remove it from the freezer and make the sandwich on the frozen croissant. It will defrost by lunch AND keep lunch cool throughout the day.
I store croissants in the freezer to keep them fresh. When I’m ready to use one I remove it from the freezer and make the sandwich on the frozen croissant. It will defrost by lunch AND keep lunch cool throughout the day.
?? French Toast
I love packing French toast for lunch because I can make it the night before and send it to school cold the next day. I cut the toast into sticks so the kids can eat with their hands and easily dip the toast into their honey or maple syrup (a must).
I love packing French toast for lunch because I can make it the night before and send it to school cold the next day. I cut the toast into sticks so the kids can eat with their hands and easily dip the toast into their honey or maple syrup (a must).
Which snack would your child choose? Let me know in the comments below??
.
My kids want snacks over meals and because of this dinner time is a real challenge. When I give them ? dinner they’re not hungry, but after the dinner has been cleared they’re hungry for a snack ???♀️
.
So in an attempt to win this daily food battle, I started making my snacks look like meals and I’ve tried to plate them as I would plate their dinner. The snack is the main course and it comes with various sides (mostly fruits and veggies) but I've tried to include a bit of everything, healthy fat, protein and fibre so that they’re getting a balanced meal.
By making "snacks" look more like a meal I'm helping my kids see snacks and meals as the same so that they can hopefully eat and enjoy both the same.
.
My kids want snacks over meals and because of this dinner time is a real challenge. When I give them ? dinner they’re not hungry, but after the dinner has been cleared they’re hungry for a snack ???♀️
.
So in an attempt to win this daily food battle, I started making my snacks look like meals and I’ve tried to plate them as I would plate their dinner. The snack is the main course and it comes with various sides (mostly fruits and veggies) but I've tried to include a bit of everything, healthy fat, protein and fibre so that they’re getting a balanced meal.
By making "snacks" look more like a meal I'm helping my kids see snacks and meals as the same so that they can hopefully eat and enjoy both the same.
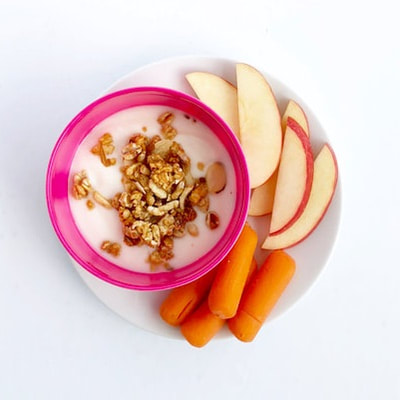
Yogurt & Granola
Served with sliced apples and baby carrots.
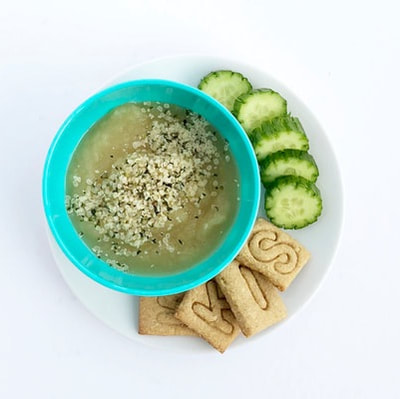
Applesauce and Hemp Hearts
Served with sliced cucumbers and alphabet cookies.
Served with sliced cucumbers and alphabet cookies.
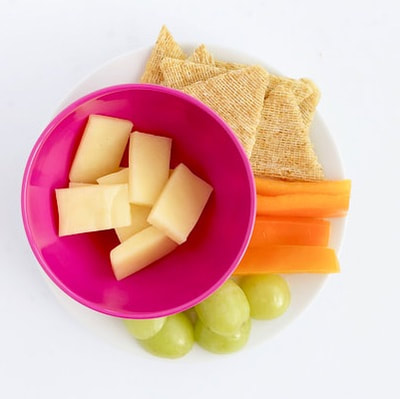
Cheese & Crackers
Served with bell peppers and grapes (sliced lengthwise to prevent choking).
Served with bell peppers and grapes (sliced lengthwise to prevent choking).
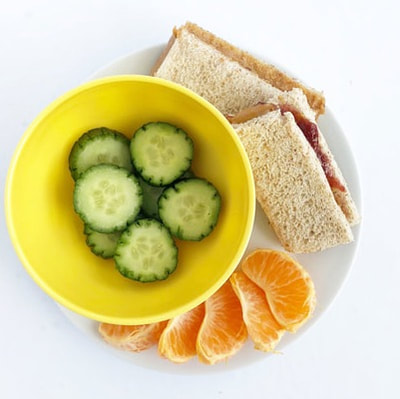
PB&J Sandwich
Served with orange slices and sliced cucumbers.
Served with orange slices and sliced cucumbers.
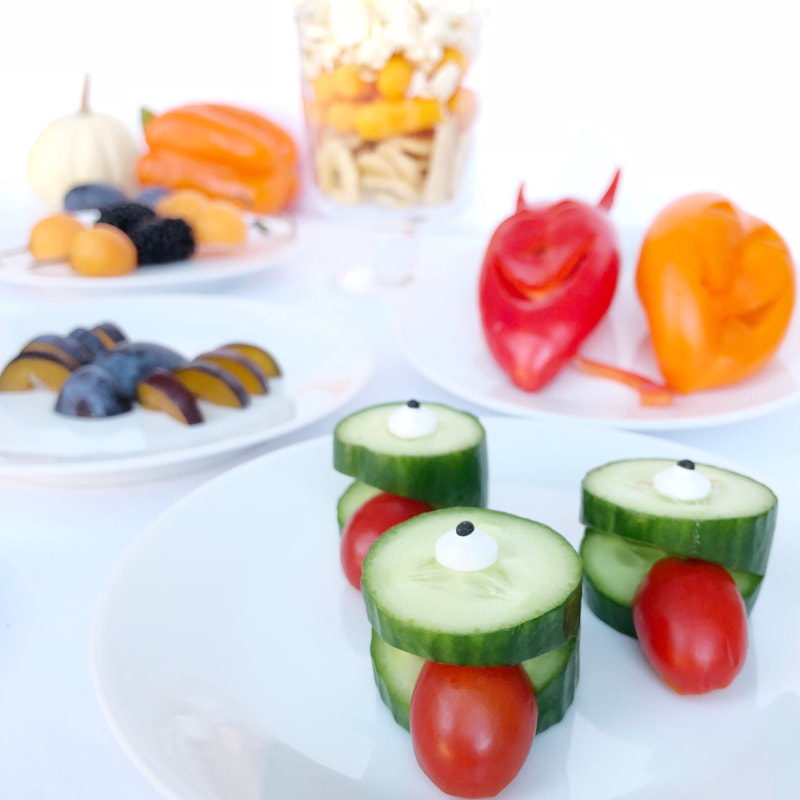
While it's difficult to encourage healthy eating on Halloween, it's not impossible, especially when better-for-you foods have a fun twist. Try these fun, spooky, and downright tasty treats to get your kids excited about eating healthy this Halloween.
FRUIT SPIDER
This creepy crawler is a fun and healthy snack activity for kids this Halloween. Made from small plums or large red grapes, these crawlies are naturally sweet and taste delicious.
Instructions
Wash and dry two plums *small oval plums work best
Cut both plums in half lengthwise *watch for the seed
For the body, use one half plum
For the head, cut one-half plum in half again *It will now be 1/4 of the plum
For the legs, cut the remaining pieces of plum into 8 equal strips
DEVIL-LICIOUS VEGGIES
Transform your baby bell peppers into Devils & Jack-O’-Lanterns this Halloween. They’re easy to make and a great way to get your kids excited about eating healthy on Halloween.
Instructions:
Wash and dry mini bell peppers
Using a small and very sharp paring knife, make small cuts into peppers like you would a pumpkin
Use the pieces you've removed to shape ears, horns and/or tails.
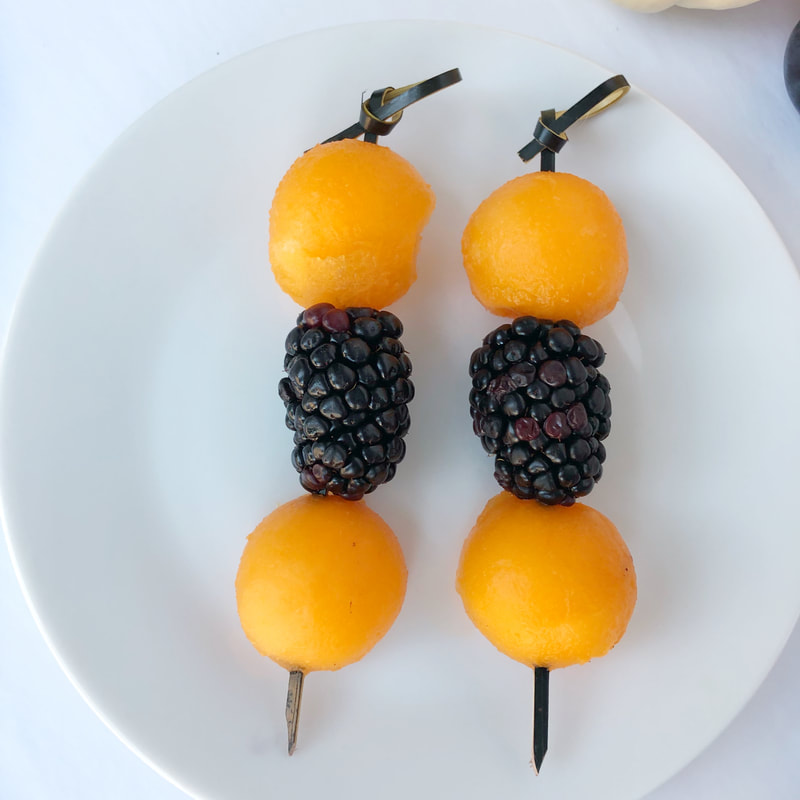
BLACK & ORANGE SKEWERS
Kids love anything on a skewer and this is an easy snack they can get involved with making.
Instructions:
Wash blackberries and cut cantaloupe into bite-size pieces or use a melon baller
Using bamboo or plastic skewers have your kids place the fruit on the skewer in a pattern of their choice.
*Note: these can be made with ANY orange or black(ish) fruits OR veggies ie. blueberries, oranges, carrots, cheddar cheese, seaweed.
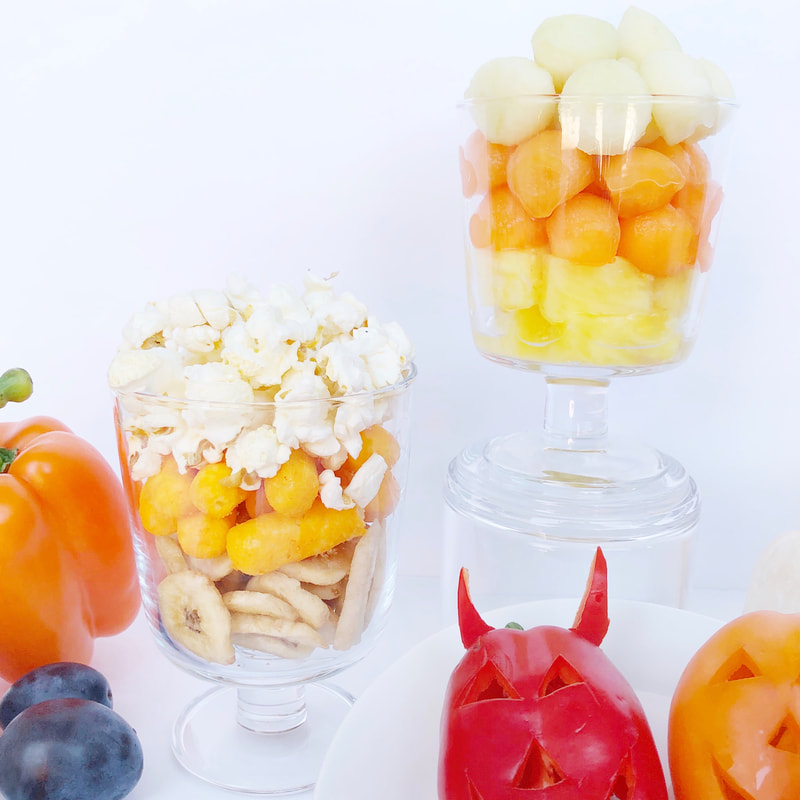
CANDY CORN PARFAIT
This fresh & sweet or sweet & salty treat is sure to be a huge hit! It's also a much healthier version than the classic sugary treat.
Instructions:
Fruit Parfait: Fill a parfait glass starting with pineapple, cantaloupe, and apples *make sure to squeeze lemon on top of apples to prevent browning.
Snack Parfait: Fill a parfait glass starting with banana chips, cheese puffs and popcorn (opt for lightly salted)
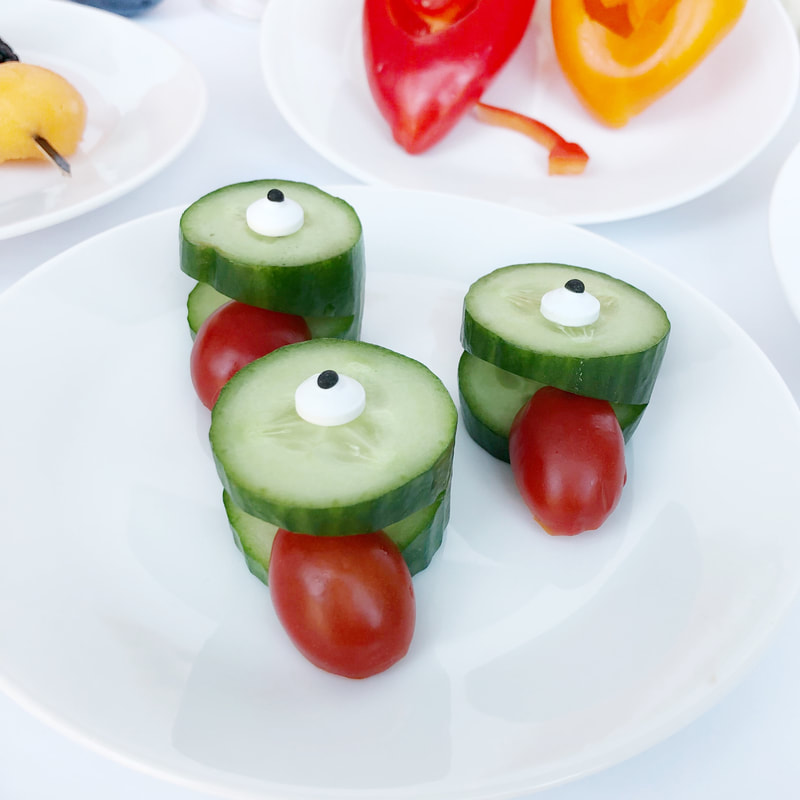
CUCUMBER MONSTERS
These monsters are more silly than spooky and are a great way to expose your kids to veggies!
Instructions:
For the body, cut a 2inch slice off of a cucumber
For the mouth, slice a v-shape chunk out of the side of the cumber *making sure not to cut all the way through.
For the tongue, slice a cherry tomato in half and place inside the v-shape opening
Add a candy eye to the top. *You can sub with a cheerio and chocolate chip as well!
If your child loves a hot lunch - this bento box is for you!
The OmieBox is the first insulated bento lunch box for kids that stores BOTH hot and cold food together. The bento compartments are double walled, air insulated and leak-proof, so it keeps fruits and vegetables cool and fresh. Hot items go inside the thermos (which is wide a low for little fingers) but what’s cool is you can remove the thermos compartment and pack a sandwich if you wish instead!
It also has a handle so it’s the only container you need to store and transport food to school. Oh and its available in 5 super beautiful colours. I have the green one Yay!
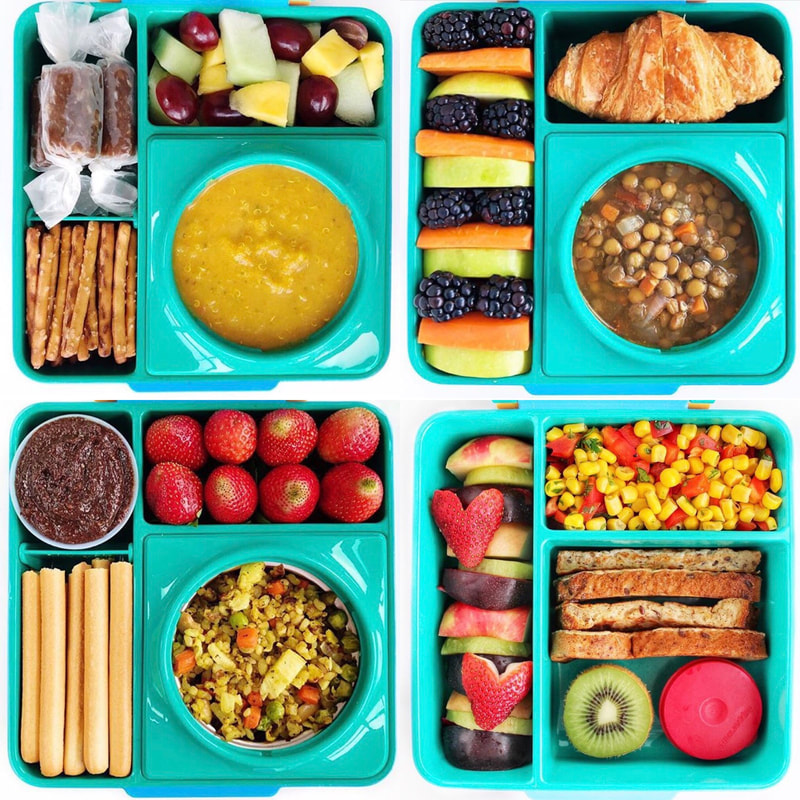
Here are my top 5 lunches packed in the OmieBox
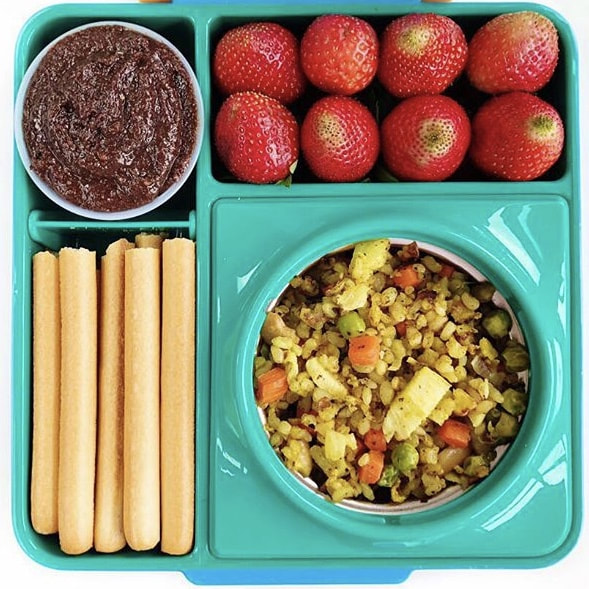
PINEAPPLE FRIED RICE & 3-INGREDIENT *SCHOOL SAFE CHOCOLATE SPREAD
CHOCOLATE SPREAD
?? Recipe from my good friend Hee Jee at whiteblankspace.com
INGREDIENTS
Mix all ingredients until it forms a smooth paste.
PINEAPPLE FRIED RICE
?? Recipe from Lisa Lin at healthynibblesandbits.com
INGREDIENTS
?? Recipe from my good friend Hee Jee at whiteblankspace.com
INGREDIENTS
- 1/4 cup tahini at room temperature
- 2 tbsp cacao powder
- 3 tbsp maple syrup
- pinch of salt
Mix all ingredients until it forms a smooth paste.
PINEAPPLE FRIED RICE
?? Recipe from Lisa Lin at healthynibblesandbits.com
INGREDIENTS
- 3 tablespoons safflower oil, divided (any high-heat oil works, too)
- 3 large eggs, whisked
- 1 cup diced yellow onions (about 1/2 large onion)
- pinch of salt
- 1/2 large red pepper, diced
- 1 large carrot, peeled and diced
- 1/2 cup (70g) frozen peas
- 1 teaspoon turmeric
- 1 1/2 teaspoons ground coriander
- 6 cups cooked jasmine rice
- 2 1/2 tablespoons soy sauce or tamari
- 1 1/2 tablespoons brown sugar
- 1/2 teaspoon ground white pepper (optional)
- 1 1/4 cups diced pineapple
- 2 scallions, sliced
- 3 tablespoons chopped basil
- Heat 1/2 tablespoon of oil in a wok or large sauté pan over medium-high heat. When the pan is hot, add the whisked egg and scramble it with a spatula. Continue scrambling until eggs are cooked, about 30 seconds to 1 minute. Transfer eggs to a plate and set aside. If the wok or pan is dirty, wipe it down with paper towels.
- Heat remaining 2 1/2 tablespoons of oil over medium-high heat. Add the onions and a pinch of salt and cook until the onions start to soften, about 2 minutes. Mix in the red pepper, carrots and peas and cook for another 2 minutes. Add the turmeric and coriander and stir until the vegetables are coated with the spices. Add the rice and mix well with the vegetables. Continue cooking and stirring the rice for about 1 to 2 minutes.
- In a small bowl, quickly mix the soy sauce (or tamari) with the brown sugar and pour that sauce over the rice. Add the white pepper, if using, and stir until well incorporated.
- Add the eggs, pineapple and sliced scallions to the rice and stir to distribute. Turn off the heat and mix in the chopped basil. Serve immediately.
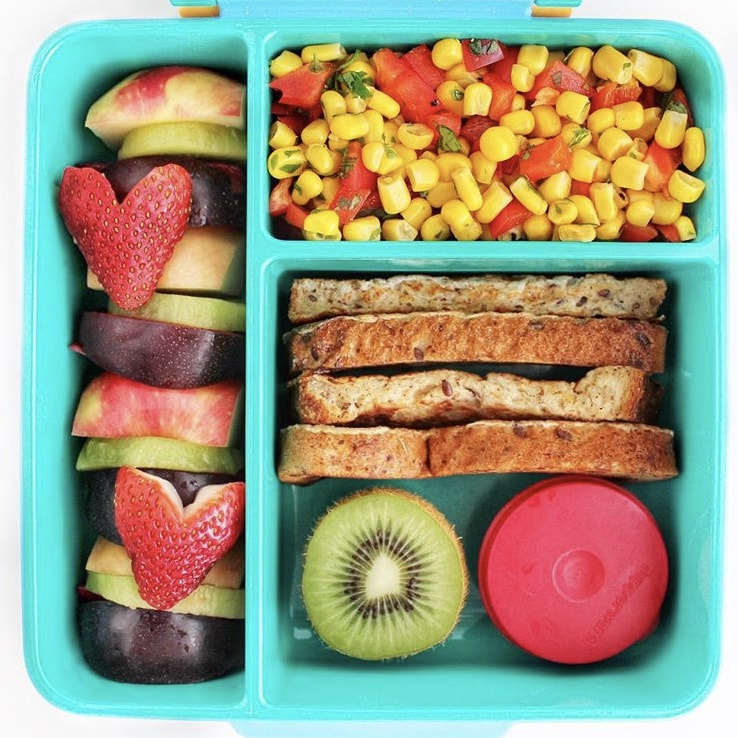
CORN SALAD WITH FRENCH TOAST
CORN SALAD
?? Recipe adapted from The Disney Princess Cookbook *Yes you read this right. It’s the BEST!
INGREDIENTS
SWEET POTATO & HEMP HEART FRENCH TOAST SOLDIERS
?? Recipe from my good friends Nic & Nat at sneakymommies.com
INGREDIENTS
?? Recipe adapted from The Disney Princess Cookbook *Yes you read this right. It’s the BEST!
INGREDIENTS
- 1.5 tsp olive oil
- 1/2 cup diced red bell pepper
- 2 cups cooked corn (frozen or from a BPA free can if possible)
- 3 strips cooked bacon, crumbled (optional)
- 1 tsp dried basil
- Salt and Pepper to taste
- Heat 1 tsp olive oil in a medium-size frying pan over medium-low heat. Sauté the diced red pepper in the oil for 2 minutes.
- Add the corn, crumbled bacon, basil and remaining 1/2 tsp of olive oil. Stir the ingredients together, and cook them until they are hot and well mixed.
- Remove the pan from heat. Stir in salt and pepper to taste. Enjoy hot or cold!
SWEET POTATO & HEMP HEART FRENCH TOAST SOLDIERS
?? Recipe from my good friends Nic & Nat at sneakymommies.com
INGREDIENTS
- 2 tablespoons butter
- 4 slices bread
- ¼ cup sweet potato puree
- 2 eggs
- ¼ cup milk
- ¼ teaspoon cinnamon
- 2 tablespoons hemp hearts
- Maple syrup, fresh fruit for serving
- You'll first need to prepare your sweet potato puree. *You can also use canned puree. I love the brand Farmers Market This is a step I either do the night before (if I know I will be making them) or just have on hand. I always bake my sweet potatoes and so to do this...preheat your oven to 400 degrees F. Pierce the sweet potato (1 large one will do) with a fork all over and wrap it in aluminum foul. Place on a baking sheet and bake for 30-40 minutes until fork tender. Once cooled, mash it with a fork until it is the consistency of a puree (or you can blend it as well).
- Once your sweet potato puree is done, measure our ¼ cup and add it to a bowl. Whisk in the eggs, milk, cinnamon and hemp hearts until fully incorporated.
- Cut your bread into lengthwise sticks.
- Melt 1 tablespoon of butter in a medium-large frying pan over medium heat.
- Sink each stick into the sweet potato/egg mixture and flip it to coat both sides evenly. Place the bread sticks on the frying pan and cook for 2-3 minutes on one side, flip and then cook for another 2-3 minutes. Continue to do this until the edges are just slightly browned and it is cooked through.
- Continue to do this until all of the sticks of bread have been cooked through, adding in 1 tablespoon of butter each time you make a new batch of bread sticks.
- Serve warm with maple syrup, fresh fruit, almond butter or granola.
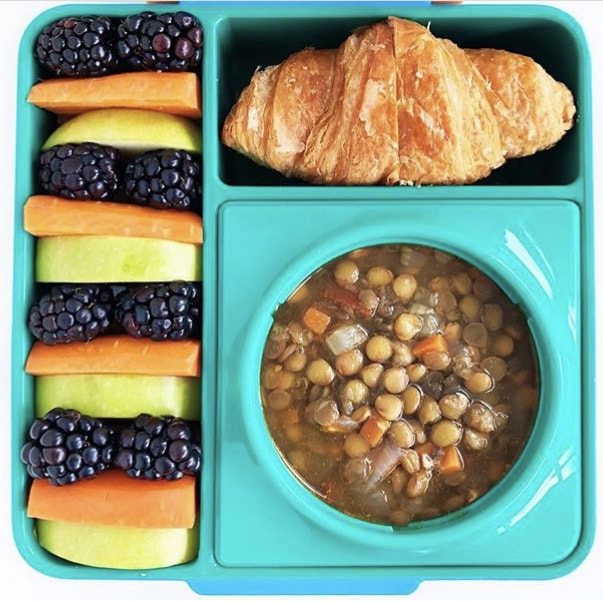
VEGETABLE LENTIL SOUP
VEGETABLE LENTIL SOUP
?? Recipe from my good friends Nic & Nat at sneakymommies.com
INGREDIENTS
?? Recipe from my good friends Nic & Nat at sneakymommies.com
INGREDIENTS
- 2 tablespoons olive oil
- 2 cups carrots, chopped
- 1½ cups celery, chopped
- 1 cup onion, chopped
- 4 garlic cloves, minced
- 7 cups vegetable stock
- 2 cups diced tomatoes, canned (use the juices too)
- 1 tablespoon brown sugar
- 1 teaspoon oregano, dried
- 1 teaspoon basil. dried
- 1 bunch kale, chopped (optional)
- 1 540 ml can of lentils (any colour), rinsed and drained
- salt and pepper to taste
- Optional: Parmesan cheese for serving
- In a large soup pot heat the oil over medium heat. Add the celery, carrot, and onion, and sauté about 5 minutes or until vegetables are beginning to soften. Add the garlic and continue sauté about 1 minute more.
- Now add the stock, diced tomatoes, brown sugar, oregano, and basil, stir, cover with a lid and bring to a boil.
- Remove lid, lower heat to medium low, keeping a simmer. Add the kale and lentils. Season with salt and pepper. Continue simmer for about 10-15 minutes or until kale has softened, as well as the vegetables. Serve with fresh grated parmesan if desired.
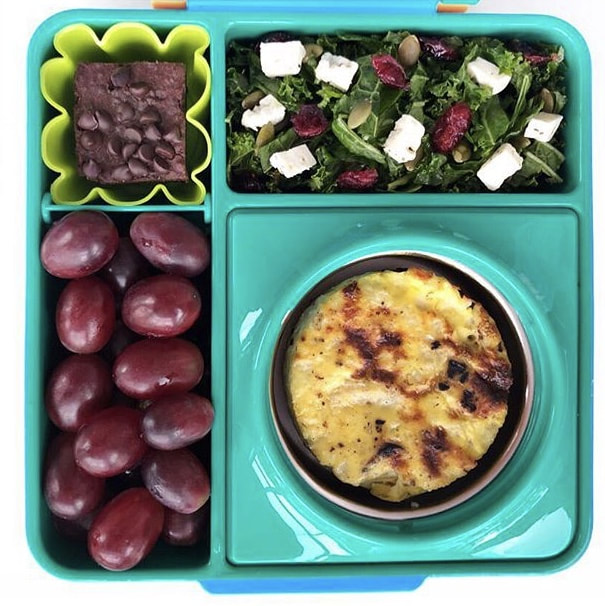
CAULIFLOWER FETA FRITTATA & BLACK BEAN BROWNIES
CAULIFLOWER FETA FRITTATA
?? Recipe from my good friend and Holistic Nutritionist Michelle Tirmandi from nourishandglow.ca
INGREDIENTS
BLACK BEAN BROWNIES
?? Recipe from my good friend and Holistic Nutritionist Michelle Tirmandi from nourishandglow.ca
INGREDIENTS
?? Recipe from my good friend and Holistic Nutritionist Michelle Tirmandi from nourishandglow.ca
INGREDIENTS
- 12 eggs
- 3 cups cauliflower, chopped
- 1/3 cup milk
- 1/3 cup feta cheese, crumbled
- 1 tablespoon dijon mustard
- 2 tablespoons olive oil
- sea salt and pepper to taste
- Preheat the oven to 375 ̊F.
- Partially cook the cauliflower in a pot of boiling salted water for 4-5 minutes until softened.
- Crack the eggs into a bowl and mix with milk, feta cheese, dijon mustard and sea salt and pepper.
- Heat a skillet over medium heat with olive oil and sauté the cauliflower for 5 minutes then pour the egg mixture over top.
- Bake for 10-15 minutes until the eggs have set.
BLACK BEAN BROWNIES
?? Recipe from my good friend and Holistic Nutritionist Michelle Tirmandi from nourishandglow.ca
INGREDIENTS
- 1 can black beans
- 2 eggs
- 1/3 cup raw cacao powder
- 1/3 cup coconut oil + extra for the pan 1/3 cup chocolate chips
- 2/3 cup unrefined cane sugar
- 2 teaspoons vanilla extract
- pinch of sea salt
- Preheat the oven to 350 ̊F.
- Grease muffin tray with coconut oil.
- Add all of the ingredients to a food processor and puree.
- Pour mixture in to muffin tins and bake for ~ 30-35 minutes or until a toothpick comes out clean.
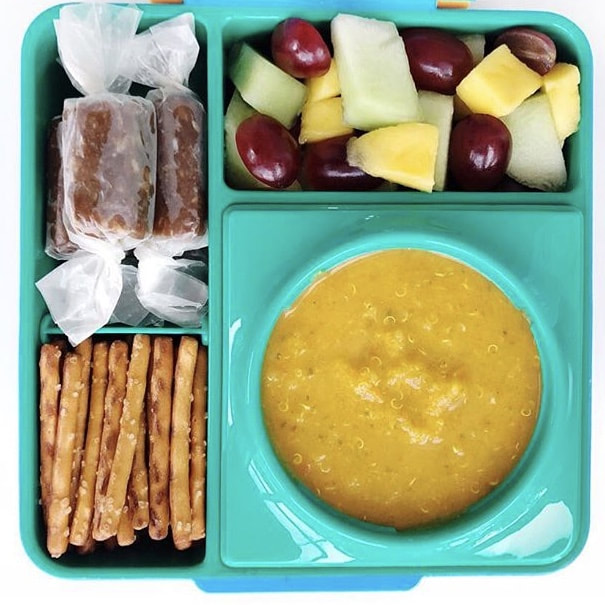
CHICKPEA QUINOA SOUP & GINGERBREAD BITES
CHICKPEA QUINOA SOUP
?? Recipe from my good friend and Holistic Nutritionist Michelle Tirmandi from nourishandglow.ca
INGREDIENTS
GINGERBREAD BITES
?? Recipe from my good friend and Holistic Nutritionist Michelle Tirmandi from nourishandglow.ca
INGREDIENTS
Keep chilled in freezer and serve cold.
?? Recipe from my good friend and Holistic Nutritionist Michelle Tirmandi from nourishandglow.ca
INGREDIENTS
- 2 tablespoons coconut oil
- 1 white onion, chopped
- 4 cloves garlic, minced
- 1 bell pepper, chopped
- 1 jalapeno pepper minced (optional)
- 3 tomatoes, chopped
- 2 zucchinis, chopped
- 1 L vegetable broth
- 2 teaspoons ground turmeric
- 1 teaspoon sea salt
- 1 tablespoon cumin powder
- 2 teaspoons chili powder (optional)
- 1/4 teaspoon cayenne pepper (optional)
- 1 can chickpeas
- 2 cups quinoa, cooked
- 1 avocado, chopped
- Heat the coconut oil to medium heat and add onions. Sauté until the onions are translucent (~8 mins) and stir in the garlic.
- Add remaining veggies to the mixture along with the broth and spices. Simmer on medium heat (uncovered, stirring regularly) for 20 minutes.
- Cook quinoa according to package directions.
- Remove the soup from heat and let cool for 10-15 minutes before hand blending to desired consistency.
- Add chickpeas and quinoa, cook for another 5-10 minutes and serve topped with avocado slices.
- Omit or use half the amount of chili and cayenne for a less spicy soup. Leftover soup can be frozen for several weeks. Add yogurt for extra nutrients and flavour.
GINGERBREAD BITES
?? Recipe from my good friend and Holistic Nutritionist Michelle Tirmandi from nourishandglow.ca
INGREDIENTS
- 1 cup medjool dates
- 1/2 cup nut butter (any type *use sesame seed or wow butter to make school safe)
- 1/3 cup full fat coconut cream (refrigerate a can of coconut milk for 30 minutes - see below)
- 4 tablespoons coconut flour
- 1/3 cup unsweetened coconut flakes (plus extra for topping)
- 2 tablespoons blackstrap molasses 3/4 teaspoons ginger powder
- 1 teaspoon cinnamon
- 1/8 teaspoon nutmeg
- 3/4 cup raw cacao (optional)
- 3/4 cup coconut oil (optional)
- maple syrup
- Place a can of coconut milk in the fridge 30 mins prior to baking.
- Add the dates and nut butter to a food processor and mix until a sticky dough is formed.
- Remove the coconut milk from the refrigerator, open and drain (and save) the liquid so only the thick cream remains. Add the cream, molasses, coconut flakes and the remaining spices to the food processor and mix well.
- Take the dough from the food processor and place in a bowl the freezer for 10 minutes.
- Remove the dough from the freezer and form into small balls. * I wrap mine in wax paper so that I can pop them into a lunch or snack box!
Keep chilled in freezer and serve cold.
My Favourite Toronto lunch Bag & backpack company SoYoung Collaborated with my favourite lunchbox company YumBox to design a special edition lunchbox. YAY!
The special edition YumBox collaboration lunchbox was born out of a need to offer a more generously sized lunchbox that could fit multiple Yumboxes (or other containers) as well as offer a flat carry option in addition to the standard vertical carry. Perfect for large appetites, full day outings, or numerous separated meal and snack requirements. A box fit for the WHOLE family!
I LOVE that this lunchbox is machine washable AND eco friendly because it's made from linen, a natural fiber that's grown without pesticides and a fiber that requires 90% less water than others fibers.
It also includes thoughtful details like easy-clean removable inserts (yes please), insulated interiors (cool dude), extra pockets and straps that allows you to wear your bag. It also comes with a super awesome name tag.
List of Features
- Linen/Cotton exterior fabric
- Fits a large (adult size) Yumbox with extra room for snacks and/or drinks
- Convertable strap for carrying upright or vertical
- Insulated Interior Machine washable (gentle cycle cold) - No dryers, please
- Removable insulated insert for easy daily cleaning
- Detachable long strap for wearing as messenger bag or backpack (47")
- PVC, Phthalate, Lead and BPA Free
- Extra back pocket for cutlery and love notes
- Dimensions: 10.375"W x 7.5"H x 4.5”D
Watch my video below to see how I #stackandpackyumboxlunchbox and click here to learn more about the special edition Yumbox Lunchbox by SoYoung Canada.
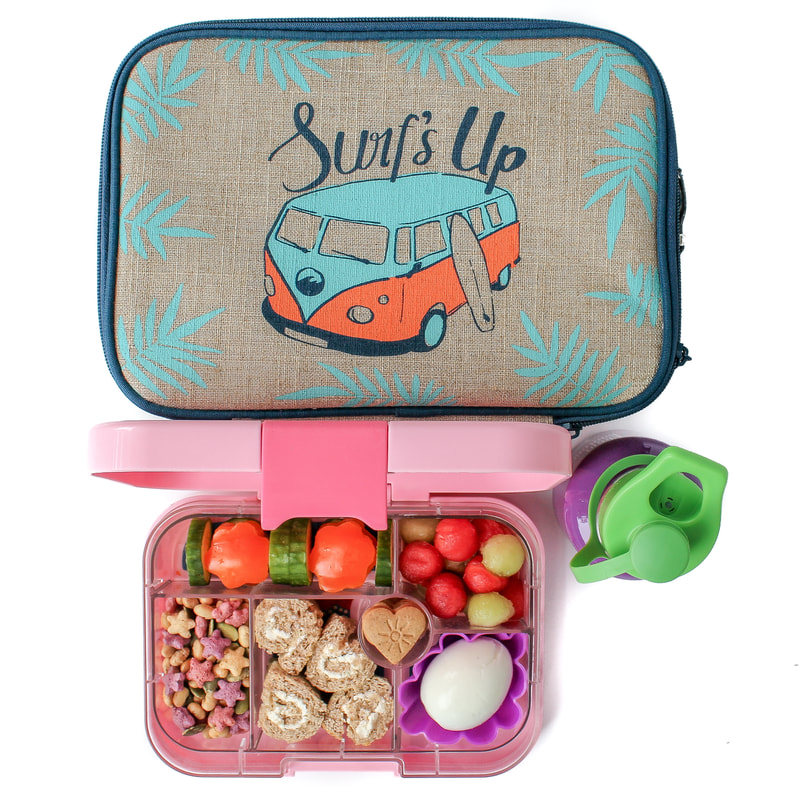
In this lunchbox
- Cream cheese sandwich rolls
- Cucumber slices & bell pepper flowers
- Protein snack mix: dry roasted soybeans, pumpkin seeds & Love Grown lentil star cereal
- Balled honeydew and watermelon
- Free range organic boiled egg
- Ginger Snap cookies from ShaSha
Music by Evren Oz ~ Video by Little Lunch Love
How amazing are fresh Ontario strawberries? The colour, freshness, and hmmmm smell of them? SO good!
I decided to use them in my latest food art Collab with Made with Local These delicious bars are made with love in Nova Scotia and I thought they would be the perfect pairing for my yummy local strawberries.
I decided to use them in my latest food art Collab with Made with Local These delicious bars are made with love in Nova Scotia and I thought they would be the perfect pairing for my yummy local strawberries.
Here are 3 awesome facts about Made with Local Bars:
- They're made from natural ingredients sourced from local Canadian farmers (YAY)
- Each bar contains 4 grams of Fibre and 7 grams of protein (Pair that with the essential vitamins and antioxidants from strawberries and you've got yourself one super nutritious snack)
- They're available in 5 Yummy flavours (Peanut Butter Blondie, Coconut in the Dark, Blueberry Grunt, Cranberry Choco Chunk)
They also sell a bar MIX that I use regularly to make my own granola bars at home. I love the mix because I can customize the ingredients to make them nut free and safe for school (YAY). Visit them online here to view their entire selection of products and to find out how you can get your hands on a yummy bar of your own.
Happy Summer Everyone!
Hugs
~ Jenny
Lunches looked a lot different when I went to school. My sandwiches were put in a ziplock bag and tossed into a brown paper bag along with a piece of fruit and a granola bar. When it was time to retrieve my lunch from my backpack, the sandwich was usually smushed, the banana was beaten up and oozing and the granola bar.. well, thank goodness for the granola bar!
Now, kids go to school with their lunches packed in all sorts of fancy boxes which I love not only because they’re great for the environment but because they make lunch FUN!
So which box do I use and like best? Well, I get asked this question all the time and to be honest - I like them all!
Here are the 5 boxes I use and a little information about each of them:

LITTLE LUNCH BOX co
Designed in Australia by a busy mother on the quest for the perfect lunch box, The Little Lunch Box Co lunch box comes in a variety of colours and patterns and is suitable for all ages. They offer two sizes with a couple of compartment options, Bento Two, Bento Three and Bento Five.
The Bento Five
I have The Bento Five that was designed specifically for children who prefer variety or who are fussy eaters. It allows me to pack endless combinations of foods such as fruit, veggies and dip, cheese and crackers and yogurt and granola which can all be packed side by side without the risk of spoiling.
This product is BPA Free, dishwasher safe, able to store wet foods * Please refer to their packing instructions for an explanation of wet foods, easy for little hands to open, lightweight medium in size at 17.5cm x 17.5cm x 5.6cm. Little Lunch Box Co. recommends using an insulated bag with an ice pack to keep contents cool.
Yumbox
Designed in France by mama-duo Maia and Daniela who wanted:
- a lunch box housing a bento-like tray with one lid that sealed all compartments
- designated food groups to encourage and assist parents in packing a balanced meal
- built-in portion control
- a cool design and illustrations to make this little box more of an adventure in good nutrition than just plain old lunch
I own two of these babies (the Yumbox Panino and the Yumbox Original) because they’re light, compact and super easy for my kids to open and close.

The Yumbox Panino
The Yumbox Panino has a 4-compartment food tray and is the box for you if your little loves a sandwich or salad style lunch. It has one large sandwich size section (2 cups) with two smaller 1/2 cup sides plus a 1 oz dip/treat well.
The Yumbox Panino has a 4-compartment food tray and is the box for you if your little loves a sandwich or salad style lunch. It has one large sandwich size section (2 cups) with two smaller 1/2 cup sides plus a 1 oz dip/treat well.
The Yumbox Original
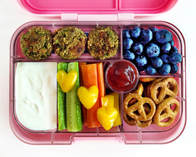
The Yumbox Original 6-compartment food tray, is perfect for toddlers through age 8 who like variety. It accommodates five 1/2 cup portions plus one dip/treat well. The illustrated trays are a helpful guide if your child wants to pack their own lunch (ya right lol) They are also a helpful guide for me when I’m feeling a bit stumped on what I should pack.
This product is BPA-Free, Phthalates-free and are CPSIA and FDA compliant. It is dishwasher safe, able to store wet foods * Please refer to their FAQ page to learn how to pack wet foods, easy for little hands to open, lightweight (1 lbs 1.5 oz.) and compact in size at 8.5 (l) x 6.5 (w) x 1.8 (h) inches. YumBox recommends using an insulated bag with an ice pack to keep contents cool.
LunchBots
The company was started by Jacqueline Linder, a mom who was concerned about chemicals in plastic leaching into her food. So, she started LunchBots and they now offer an extensive collection of stainless steel containers (super strong and super non-toxic) including bento containers with a variety of compartments, leak Proof containers and insulated containers.
Bento Cinco
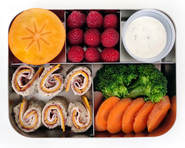
I own the Bento Cinco container because it’s perfect for both children and adults who have a healthy appetite. The two larger compartments are perfect for a sandwich/salad, chicken/rice combos and the three smaller compartments fit fruits, veg, trail mix, baked goods etc. So basically, it can fit enough food in it to satisfy anyone for the entire day.
I also love that it's slim enough to fit in almost every lunch bag and that it's lightweight & extremely durable.
This product is made from durable food-grade 18/8 stainless steel with no linings, no toxins, no BPA and no phthalates. The Large Bento Container is NOT able to store wet foods, however they have other options available that can accommodate wet foods. It is dishwasher safe, weighs 17 oz and compact in size at 8" x 6" x 1.75" | Large sections: 4" x 3.5" | Small sections: 2.7" x 2.5" *LunchBots recommends using an insulated bag with an ice pack to keep contents cool.
OmieBox
Created with love by two parents on opposite sides of the world, Nancy Yen (Founder & CEO) and Robin Big (Creative Director) set out to create a new kind of lunch system that would help kids eat better.
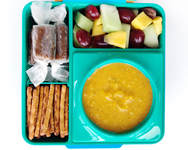
OmieBox is the first insulated bento lunch box for kids that stores hot and cold food together. The bento compartments are double walled, air insulated and leak-proof, so it keeps fruits and vegetables cool and fresh. Hot items go inside the thermos (which is wide a low for little fingers) but what’s cool is you can remove the thermos compartment and pack a sandwich if you wish instead!
It also has a handle so it’s the only container you need to store and transport food to school. Oh and its available in 5 super beautiful colours. I have the green one Yay!
OmieBox is made of ABS, PP, silicon, and 18/8 food grade stainless steel. It is is BPA‐free, Phthalates‐free. It is also CPSIA and FDA compliant. It is dishwasher safe leak‐proof *Please refer to their FAQ page to learn how to pack wet foods* but it weighs a touch heavy at 1.9 lbs with the vacuum insulated container, and 1.2 lbs without. It’s a small price to pay for an insulated hot/cold lunchbox and so worth it!
Which lunchbox do you use?
Life is busy {cray cray busy} and while I TRY to make the kids lunches the night before, I usually end up making them in the morning in-between breakfast and “get your shoes on, we’re going to be late!” To survive the morning I've learned to make a lunch or two pretty fast.
Here are 5 fast tips on how to speed up the lunch making process:
Watch my video below to see how I create a lunchbox in 5 minutes
Here are 5 fast tips on how to speed up the lunch making process:
- Store a variety of bread in the freezer {ie. english muffin, croissant} to keep fresh & assemble your sandwich while the bread is still frozen. It will defrost during the day and help keep the rest of the lunchbox cool.
- Fry 1/2 dozen eggs individually ahead of time and store in the fridge for 2-3 days for fast sandwiches or even breakfast! I like to use a small frying pan or an egg cup will work in any size pan.
- Pre-wash & pre-cut fruits and veggies * This simple step will help you save time with every meal and snack you make
- Keep an assortment of healthy snacks on-hand ie. raisins, pretzels, cereals, crackers and combine together to create your own snack-mix
- Leftovers count as lunch! Simply re-heat and serve in a thermos along with some fresh fruit and/or veggies and a snack.
Watch my video below to see how I create a lunchbox in 5 minutes
Want to see more 5 minute lunchbox examples? Let me know in the comments below.
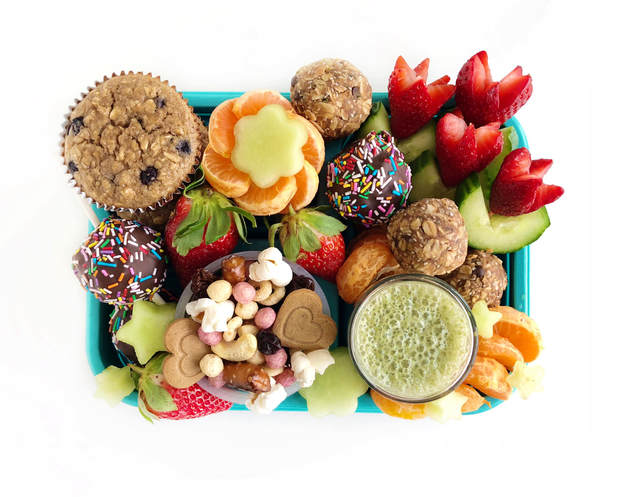
It’s March break and your kids are home and hungry. What do you do? What do you feed them? Well, I teamed up with Holistic Nutritionist Michelle Tirmandi from Toronto Yoga Mamas to come up with 5 easy & healthy snacks your kids will LOVE!
You can also watch us discuss these snacks in a Facebook Live video on the Toronto Yoga Mamas Blog here.
You can also watch us discuss these snacks in a Facebook Live video on the Toronto Yoga Mamas Blog here.
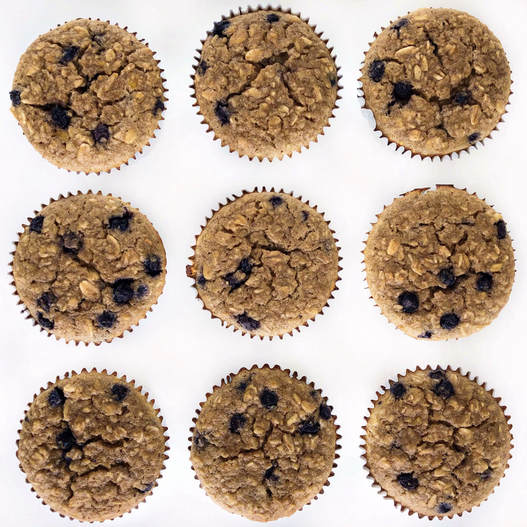
Blueberry Oatmeal Blender Muffins
These muffins make a super easy breakfast or snack for the kids! They are filled with healthy ingredients and can also be slathered with nut butter (sunflower seed butter for those with nut allergies) to increase their energy. They are also made in one bowl ~ Hurray!
Get your kids involved with this easy recipe. Have them place the ingredients into the blender and have them place the blueberries into the muffins after you’ve added the batter to the muffin tin. They can practice their counting by placing 6-7 berries in each muffin or just have fun and create a face with the blueberries.
2 cups regular rolled oats
2 ripe bananas
2 eggs
1 cup full fat (3.5-4%) plain yogurt
1/4 cup maple syrup
11/2 teaspoons baking powder
1/2 teaspoon baking soda
1 teaspoon cinnamon
11/2 teaspoons vanilla extract
11/2 cups blueberries (defrosted if using frozen)
Defrost berries in advance if using frozen.
Preheat oven to 375 ̊F and line a muffin tray with muffin cups or grease with coconut oil.
Mash the bananas with a fork. Add all of the ingredients except the berries to a high powered blender or food processor. Blend all of the ingredients together until everything is mixed well then stir in the berries and pour in to muffin cups.
Bake for 20-22 minutes (depending on your oven).
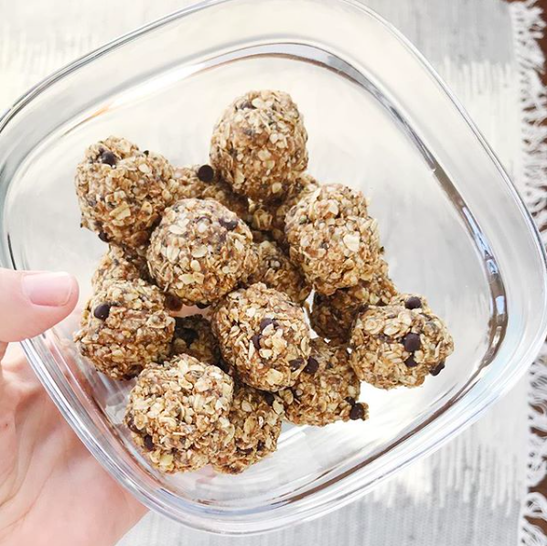
Energy Balls
Energy balls are a great option for busy families on the go! They are an energizing snack with protein, fat and fibre included. The chocolate chips add extra sugar for a sweet treat but can easily be omitted if trying to make a healthier snack. The chia seeds are great for digestion and essential fatty acids in the chia seeds are great for adults and kids!
If you want to get a little crazy, turn your energy balls into energy cake pop’s! Place a cake pop or popsicle stick into the energy ball and dip in chocolate and roll in sprinkles! Your kids will love you and you’ll feel better knowing they are secretly eating something nutritious.
1 ½ cups regular rolled oats
2 tablespoons chia seeds
½ cup almond butter (or sunflower seed butter for nut free option)
3 tablespoons maple syrup
3 tablespoons water (add ½ teaspoon, as needed) |
1 teaspoon cinnamon
1 scoop protein powder or 3 tablespoons hemp hearts
Pinch sea salt
3 tablespoons chocolate chips or raisins
Add all of the ingredients together in a large bowl except for the water, nut butter and stir. Next, mix in the remaining ingredients and combine well. Wet hands slightly and roll into balls. Store in the refrigerator. They can also be frozen.
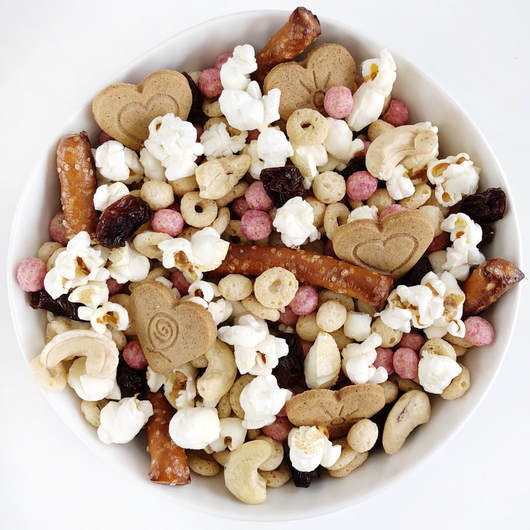
DIY Snack Mix
Getting kids involved with their food is a great way to encourage them to eat healthier and get more variety in their diets. Actually, I personally find my kids eat more if they had a hand in making the food! So, let your kids create their own snack mix using various snacks you have on hand ie. cereal, pretzels or popcorn, cookies, nuts, seeds and dried fruit!
Including nuts or seeds (be careful of choking hazards depending on the age of the kiddos) is a great way to add healthy fats and minerals into the diets of kiddos. And try to choose organic popcorn if possible as many popcorn brands are GMO.
7+ small bowls
1 cup ‘O’ type cereal (ie.cheerios)
1 cup lentil cereal (look for Love Grown)
1 cup small cookies (ie. ShaSha heart shaped ginger snaps or animal cookies)
1 cup pretzels
1 cup popcorn or mini rice cakes
1 cup raisins or craisins
1 cup Cashews (optional)
Place each ingredient in a separate bowl. Place the bowls with the ingredients in front of your child and give your child an empty bowl. Ask your child to create their own personal snack mix using the ingredients in front of them.
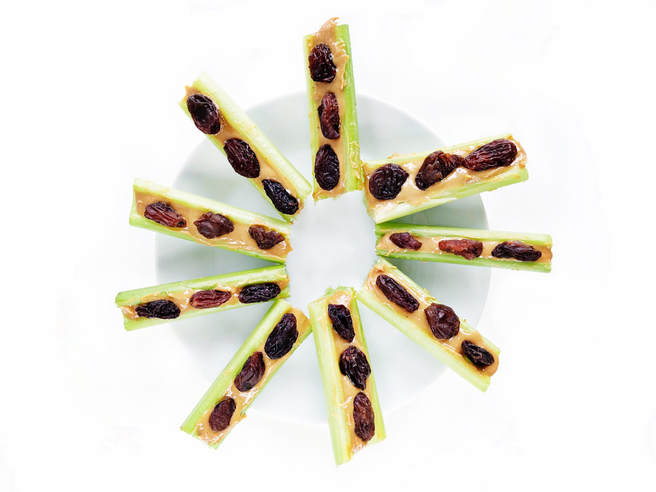
Ants on a Log
Who didn’t eat these as a child growing up? That’s why this classic snack made it into our top 5 snacks your littles will love!
Nut butter or alternatives such as tahini or sesame seed butter contain healthy fats and minerals that are important for kids! Goat cheese is another great option as it is easier to digest than cow's dairy and it's still spreadable!
3-4 stalks of celery
Nut butter (sesame seed butter or tahini as nut free option) or goat cheese
Raisins
Wash and cut celery stalks into 3 inch pieces. Now, let your kids fill the celery (logs) with goat cheese or nut butter (using plastic knives). Next, have them decorate the logs with raisins (the ants)!
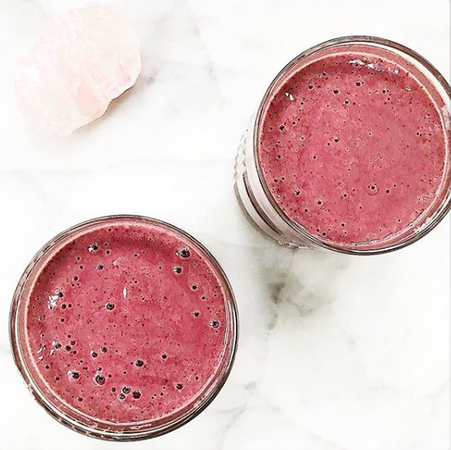
Smoothies
Soothies are a great way to sneak in tons of healthy ingredients. I love using blueberries because it makes the colour of the smoothie vibrant which kids love. Hemp hearts add protein and fat and chia seeds are amazing for digestion. They both also help to make the blood sugar more stable which is just as important for kids as it is for adults!
Any type of berries can be used in the smoothie, the key here is to try and balance the smoothie without using too much fruit. Sometimes it takes a while for kids to get used to adding green veggies, so play around with what works. Oh, and if the smoothie isn’t a hit pour it into a popsicle mold, freeze and see how that goes over with them!
3/4 cup berries (any type)
1/2 small banana
1/2 -1 cup spinach
2 tablespoons hemp hearts
1 tablespoon chia seeds
1 cup non-dairy milk
Place all ingredients into a blender and blend until smooth.
To learn more about these fabulous snacks ~ watch our Facebook live video recording on the Toronto Yoga Mama’s blog here.
I try my best to prepare fresh food when I can, but I always have a cabinet full of packaged snacks & food for when life gets busy and bellies grow hungry. Though convenient, one of the downsides is that kid’s food packaging creates a ton of waste.
So, in an effort to reduce this footprint, I’ve thought of ways to reuse everyday items in my kid’s lunchboxes. Here are three of my favourites!
Yogurt Drink Containers
So, in an effort to reduce this footprint, I’ve thought of ways to reuse everyday items in my kid’s lunchboxes. Here are three of my favourites!
Yogurt Drink Containers
My kids love yogurt drinks and usually request more than one at a time. They are expensive, take up a lot of room in the refrigerator {especially if you buy bulk} and are usually full of sugar. So I buy one flat and wash and refill used containers with my own yogurt mix of equal parts flavoured yogurt and milk. This creates less waste in the blue box and keeps the little ones happy.
Cereal Box Liners
We go through a lot of cereal in my house. So I’ve replaced my wax paper with the plastic liner bags found inside the cereal box. Just open your cereal bags at the seams and wash and dry them thoroughly; they make the perfect liners for homemade fruit rollups, dividers for freshly baked goods and sandwich wrapping.
Starbucks Splash Sticks
I’m sure Starbucks didn’t think their splash sticks would serve a dual purpose! Low and behold they are the perfect kid-friendly skewer to make kabobs. They are short enough to fit in most lunchboxes, have a rounded tip and even come with a cute monkey!
What can you reuse in your kids lunchboxes?
What can you reuse in your kids lunchboxes?
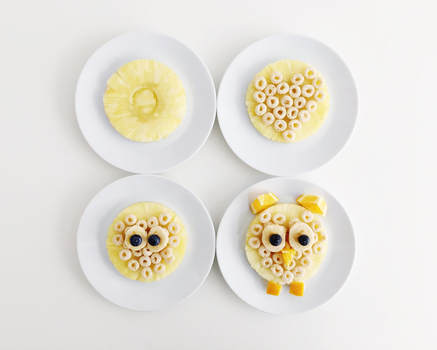
Breakfast is a great time for playful meals, and this little owl is a fun example. Made from fresh fruit and cereal, this food art project is a nutritious and delicious start to the day!
Step 1. Gather your ingredients
Step 1. Gather your ingredients
You will need:
1 banana
1 orange (large or small)
1 pineapple slice with core
2 blueberries
One handful of your favourite cereal (I like Love Grown Power Os because they are made from beans and full of fiber and protein)
Note: If you don’t have all the ingredients listed above find substitutions! Ex. Pineapple for melons
Step 2. Get started
Slice pineapple into one ½ inch ring (with core)
Create a heart design on the pineapple with the cereal
For the eyes, place 2 banana slices on the cereal and two blueberries on the banana slices
Slice orange into:
2 medium wedges for the ears
1 small wedge for the nose
2 small square shapes for the feet
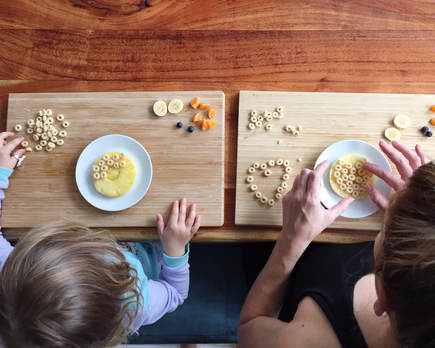
Step 3. Do it together
Create a heart design on the pineapple with the cereal
For the eyes, place 2 banana slices on the cereal and two blueberries on the banana slices
Slice orange into:
2 medium wedges for the ears
1 small wedge for the nose
2 small square shapes for the feet
Step 3. Do it together
Our children love spending time with us and it’s important that we eat too. So find a few minutes to sit down and get creative with them. It’s a wonderful way to start the day!
Step 4. Get creative
There are no rules. So get creative and have fun!
Step 4. Get creative
There are no rules. So get creative and have fun!

