|
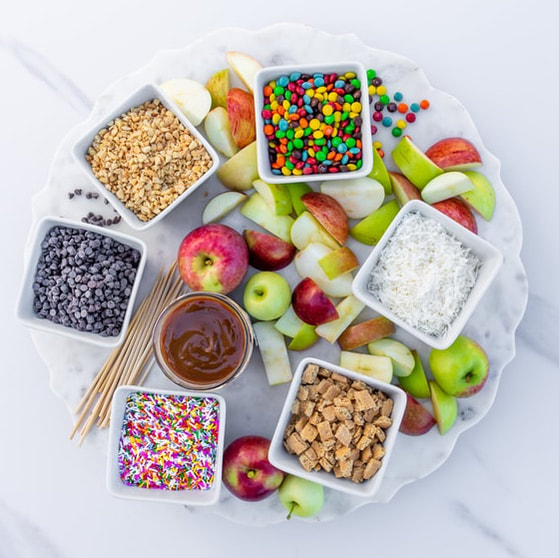
Make a fun and festive treat for your family and friends this fall. Everyone will love dipping apple slices into creamy caramel and their favourite toppings! Easy to make and it comes together in less than 30 minutes!
Watch me make it on Instagram here! Caramel Apple Board PREP TIME: 20 Minutes TOTAL TIME: 20 Minutes YIELD: 6-8 Servings INGREDIENTS: 6-8 Apples of your choice Lemon Water (for soaking apples) ¾ cup (160g) Rainbow Sprinkles ¾ cup (180g) Chocolate Chips, semi-sweet ¾ cup (130g) Chopped Peanuts, dry roasted ¾ cup (160g) Graham Crackers, crushed ¾ cup (70g) Unsweetened Coconut ¾ cup (205g) Mini M&M’s 1 cup (340g) Caramel Sauce DIRECTIONS: Get out a large board or platter. Put the toppings in small bowls. Place on the board. Cut the apples into wedges. Soak them in lemon water for 10 minutes to prevent them from browning. Drain them just before using them and pat dry. Place the apple slices on the board with the toppings and set out the wooden skewers. Carefully poke a skewer through an apple slice, dip the apple in caramel, and then roll in desired toppings.
1 Comment
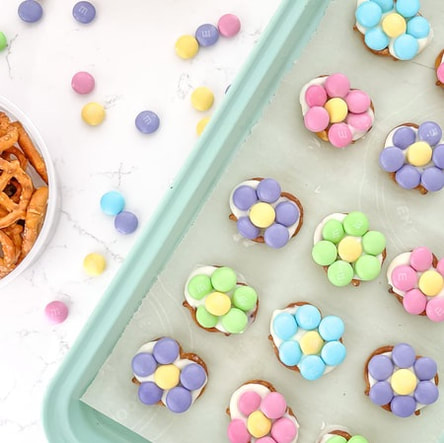
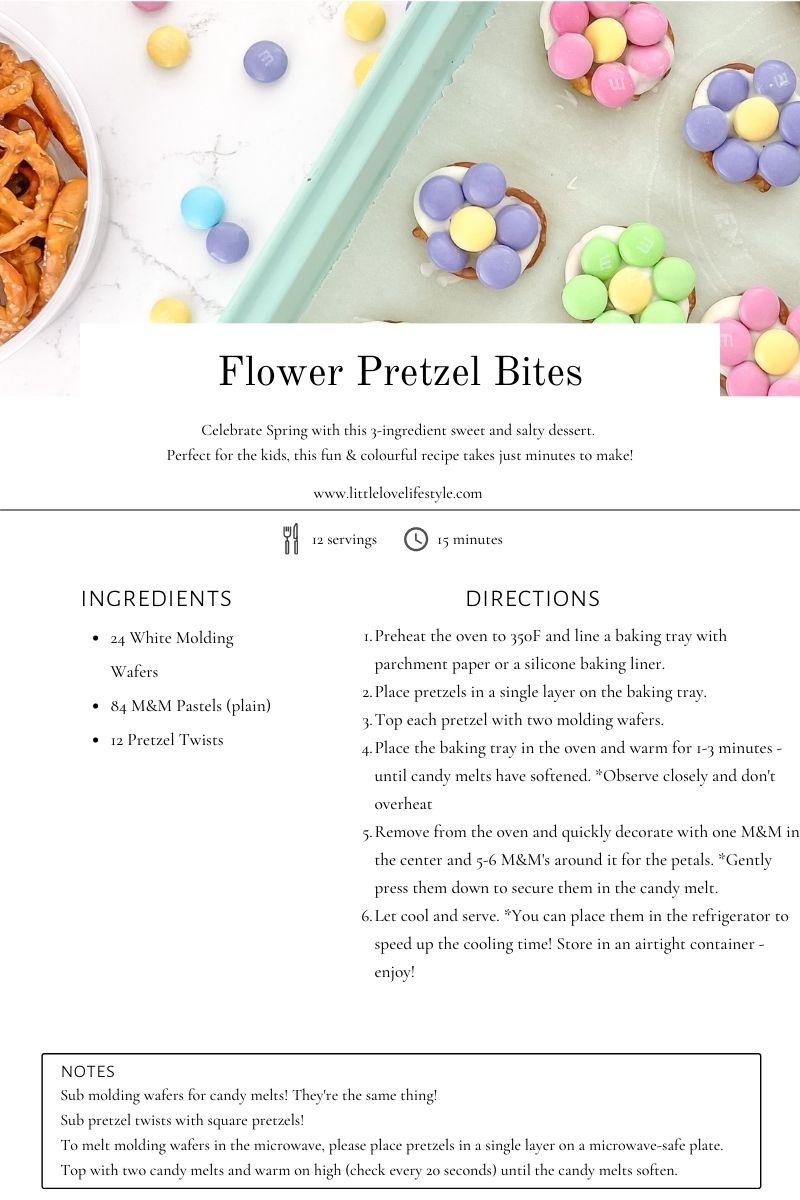
Celebrate Spring with this 3-ingredient sweet and salty dessert. Perfect for the kids, this fun & colourful recipe takes just minutes to make and will quickly disappear!
Watch me make these on Instagram @littlelovelifestyle
Ingredients
White Molding Wafers M&M Pastels (plain) Pretzel Twists (salted) Instructions Microwave instructions at the end. Preheat the oven to 350F. Line a baking tray with parchment paper or a silicone baking liner. Place pretzels in a single layer on the baking tray. Top each pretzel with two candy melts. Place the baking tray in the oven and warm for 1-3 minutes - until candy melts have softened. *Observe closely and don't overheat Remove from the oven and quickly decorate with one M&M in the center and 5-6 M&M's around it for the petals. *Gently press them down to secure them in the candy melt. Let cool and serve. Please place them in the refrigerator to speed up the cooling time! Store in an airtight container - enjoy! Microwave Instructions Place pretzels in a single layer on a microwave-safe plate. Top with two candy melts and warm on high (check every 20 seconds) until the candy melts soften. Decorate & enjoy! I'm excited to feature one of my favourite fashion bloggers, Rajbinder K Grewel. Rajbinder shares the best style tips on her Instagram @thismamaneedsavacay, including how to rock the classics, wear new trends, elevate your style and rework existing pieces from your wardrobe. Watch this interview on Instagram here.Tell me about yourself and why you started @thismamaneedsavacay My name is Rajbinder Grewal and I like to joke that I started This Mama Needs a Vacay to ruin social media for my kids. But as a stay-at-home mom for almost 17 years, I wanted a creative outlet for myself. So I started a blog to share about family travel, parenting, fashion & beauty. Where do you get your fashion inspiration? Do you have a style icon? I think my very first style icon is my Mom. I remember her dressing up when I was a kid and just looking at her in awe. I'm just overall inspired by women who dress for themselves and rock whatever it is they want to wear What is one 2022 trend you think EVERY woman can rock? Just one? Personally, I think EVERY trend is for EVERY woman to rock! Such a non-answer I know! But really, if it's a trend you like - then wear it! Click here to see how! What's the one fashion item you can't live without? My jeans!!! I love jeans! They are so versatile! Next would be my sweats but those are more about function than style. Click here for Rajbinder's '5 Tips to Look for When Buying Jeans' Any advice for women struggling to find their style? Don't overthink it. Instead, go with how you feel when you wear something. If you feel your best in a wrap dress - do that. If you feel like a million bucks in jeans and a t-shirt - then rock that. Personal style is meant to be personal - it's about you and wearing what you want and why you want to. It should be dictated by your own happiness and what brings you joy. And don't compare because that's when we start to feel the pressure of not having our personal style be what we think it should be. Do you have any fashion don'ts? Ie. Please don't wear a crop top with low-rise pants or super short shorts (I tell my daughter this all the time!) I used to have so many of these! But call it age or whatever, but now I really don't believe in ANY fashion don'ts. Having 3 daughters, I am really learning to not police their bodies or tell them how to dress. I don't want anyone telling me either, and the world tries to tell women who are over 40 what they can and can't wear. So this is my rebellion. Telling everyone that there are no rules or don'ts! If you could only wear one outfit for the rest of your life, what outfit would that be and why? Slim blue jeans and a white t-shirt. I can dress it up or down easily, natural fibres are always best, and it's just what I feel most confident in. Visit Rajbinder on Instagram @thismamaneedsavacay for more amazing style Inspo and online www.thismamaneedsavacay.com
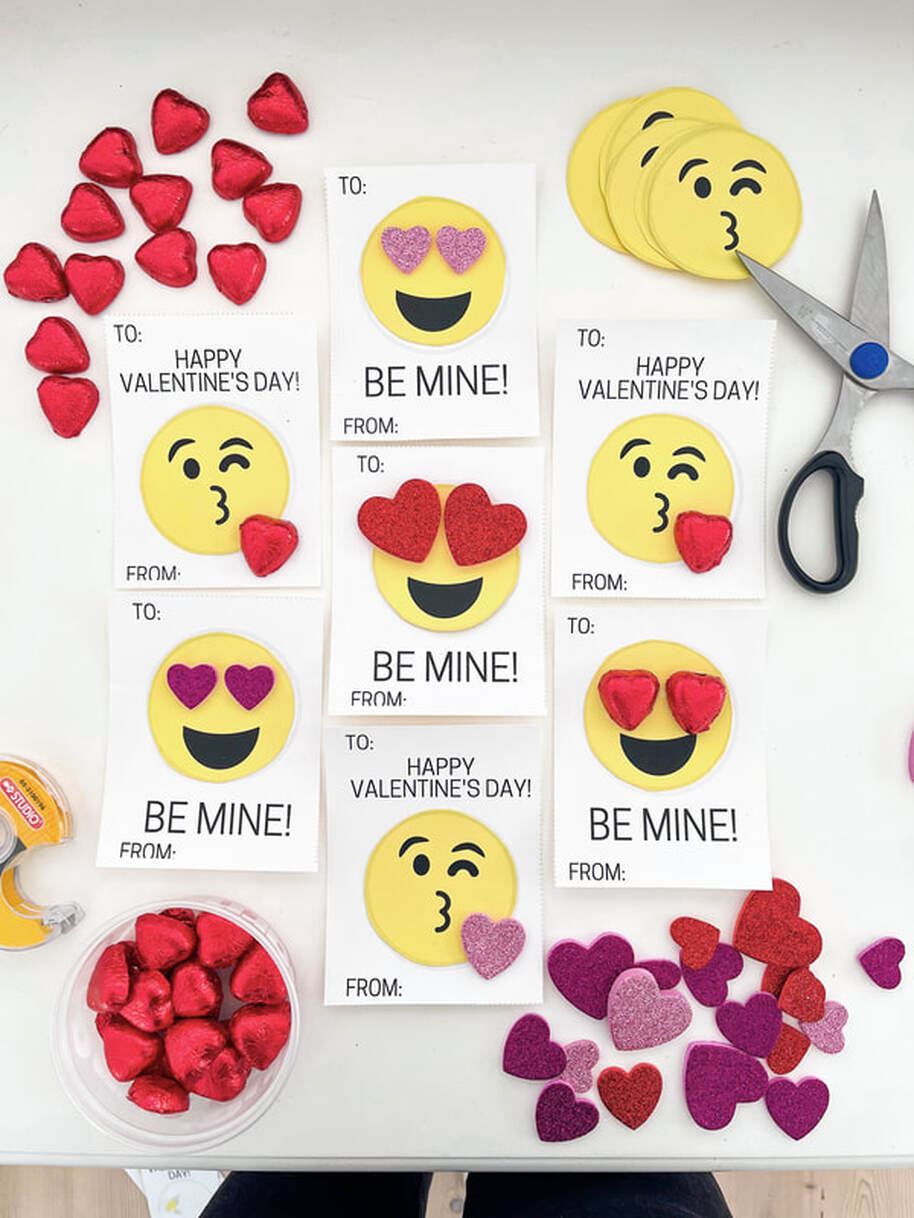
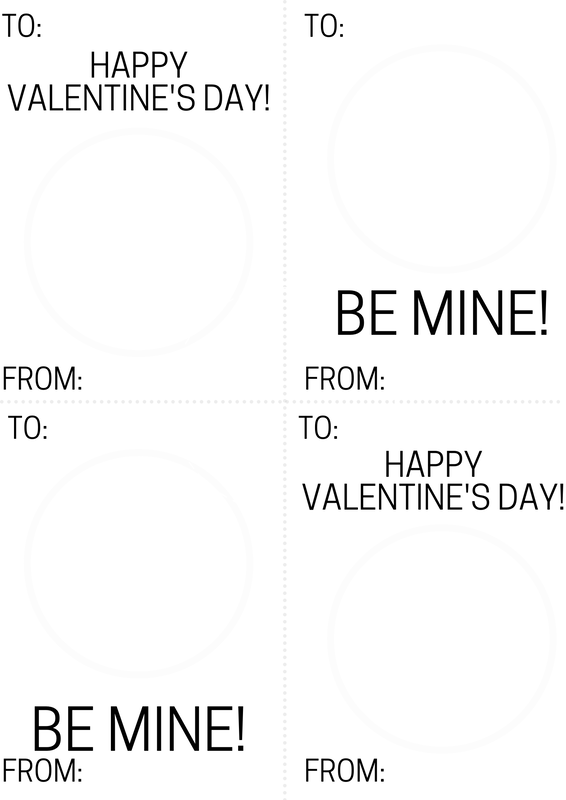
You kids will LOVE these free printable emoji cards! They're easy to make and fun to bring to school for classmates. Print them out for free below and watch me make them on Instagram @littlelovelifestyle
What you need
Print out the emoji Valentine cards
There are four cards on one 8.5 x 11 page and six emojis on one 8.5 x 11 page. I printed my cards on heavyweight paper in white and the emoji faces on heavyweight paper in yellow. *If you don't have yellow paper, kids can colour the emoji faces in yellow with crayons, paint, or markers. Calculate how many pages you need to print each, and make sure you have the correct amount of paper in the printer before hitting the print button. Quick tips about printing these Valentines Before you print the PDF file, do a quick print preview to ensure the emoji valentines fit correctly. All printers are different, and some may cut off some of the edges around the cards. If you see that happening, select the “Scale to fit” option for Macs or the “fit to page” choice for PCs. Once it fits correctly, go ahead and print! Instructions: Print out emoji cards and faces Cut cards along the dotted line, so you have a total of four cards Cut out emoji faces Tape emoji faces onto cards using double-sided tape Stick heart-shaped stickers on emoji eyes and kiss Stick heart-shaped chocolate on emoji eyes and kiss using VERY STRONG double-sided tape or a glue gun. Watch me assemble these cards on Instagram @littlelovelifestyle Click below to download your free emoji Valentine Printable
This year I'm interviewing the talented bloggers I've met over the years. First up, my good friend Nicole Cook from Nikkibtricky.com. Nicole is one of my favourite recipe developers and humans. I've made many of her recipes - all of which my family has loved! Watch this interview on Instagram hereTell me about the name Nikkibtricky - how did you come up with the name and is there a connection with the recipes you share? The name came from a nick name as a teen from my friends. They’d always call me Tricky. So, when I first created an account years ago on Instagram, I came up with the name Nikkibtricky, but it didn’t have much behind it, and wasn’t meant to be for blogging. I’ve always carried that same name and people in my city that I meet will even call me by my handle, which is hilarious. It’s always been a catchy name that stuck. When I started blogging, I just played on the name and used it to show case what I love to share, Tricks in the kitchen, and Tricks to staying trendy on a budget. It just worked. What’s your favourite dinner recipe (that you make for your family) and why? I would say it’s my chicken pot pie - Click here for the recipe - Click here to watch Nikki make it on Instagram. It’s such a comforting meal and it’s always a crowd pleaser. It’s something my whole family loves and even guests. It’s an easy recipe to modify too, so if I’m missing an ingredient or want to use another vegetable that I don’t want to go to waste, I can easily do that. If I ever have left over chicken or turkey I want to use up, this is a great recipe to help do so. Do you always serve up gorgeous Instagram worthy food at your house? Because when I think of mealtime at your house - it’s always colourful and beautifully plated! I really love to cook and I often do my best to cook a nice meal for my family. However, there are certainly days when I want a break or I’m simply not in the mood and those days are for take out, or chicken fingers and French fries (or whatever we can throw together). Dinner does not always look like an Instagram worthy meal, because that is just not real life. Even when I’m making nice meals I’m not focusing on plating (unless I am taking a picture). I’m focusing on enjoying the taste and the company of my family at the table. What is the funniest thing that has happened to you in the kitchen recently? Probably that one time that I thought baking soda would replace baking powder (because I ran out) in my biscuit recipe. They looked the same once baked, but once we sat at the dinner table and took a bite, they tasted toxic haha. Note to self, there is a difference between baking soda and powder. They both help with rising baked goods but beyond that don’t assume they can replace each other. That was a fail. Your in-laws have just surprised you for dinner and unfortunately you are low on groceries. What do you cook them for dinner? I would cook either a Shepherd’s pie or a curry dish. Both recipes use simple ingredients and pantry staples that I would likely have the ingredients for. They’re also quick and easy to make. If that doesn’t work, then I’d order take out and support one of our local restaurants. If you were a food, what food would you be and why? I guess I’d have to be pasta lol. The reason for that is because pasta is my favourite food, so why would I want to be anything else? Plus, I’d like to consider myself a comforting and warming person just like pasta (at least I’ll tell myself that haha). - Click here for some of Nikki's pasta recipes! Is there anything you refuse to cook for your family? That’s a hard question for me because quite honestly, I love trying new recipes and I’m always open to trying new things. Though, if there’s one thing I don’t really cook and it’s mostly because my family and I don’t like it, it’s any boney fish, or recipes with raw fish. When it comes to fish I stick to shellfish, or white fish that I can buy boneless. Do you ever get tired of cooking and ask your husband to do it - or simply order in? There are definitely days when I get tired of cooking and want a break. On those days I love to enjoy some take out, or else my husband does sometimes put something together. He’s not much of a cook so if he’s preparing dinner it’s either something frozen, or really simple like a grilled cheese. Though to give him some credit, he is always very helpful in the kitchen. He often helps with any prep I need, like cutting vegetables etc, and he almost always helps with clean up, which I always appreciate. Visit nikkibtricky.com for more amazing recipes and
|
||||||||||||||||||
Jenny's Packed Lunch Survival GuideListen to the 3 part podcast hosted by Billy Buttery on Food is Culture | A Podcast now (Click Here) |
more about lunch containers
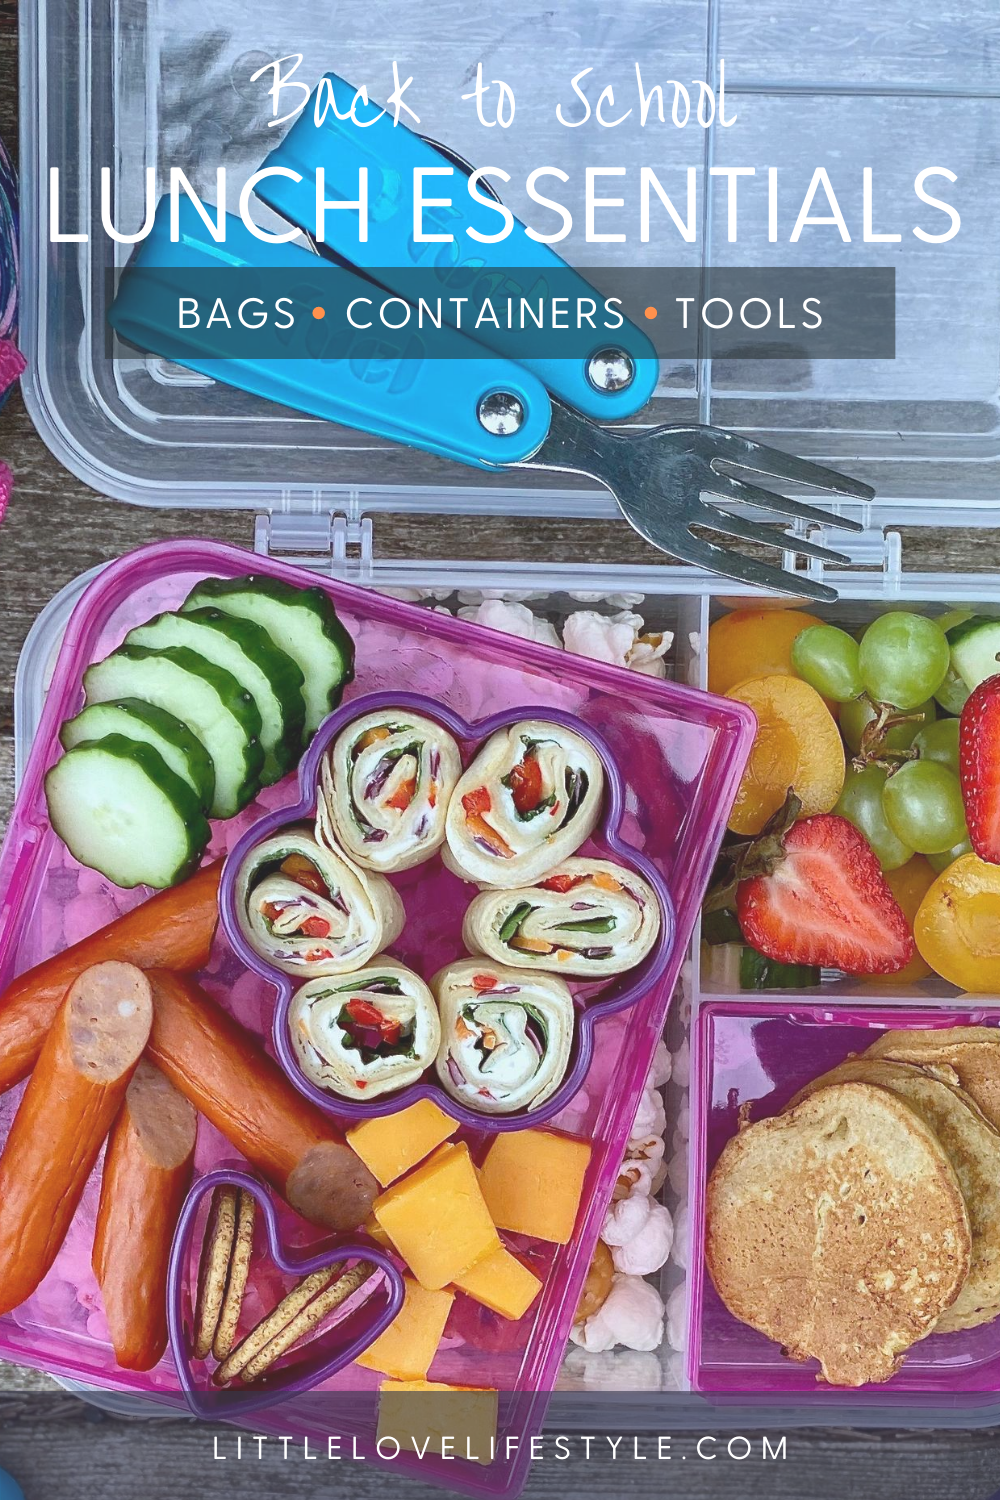
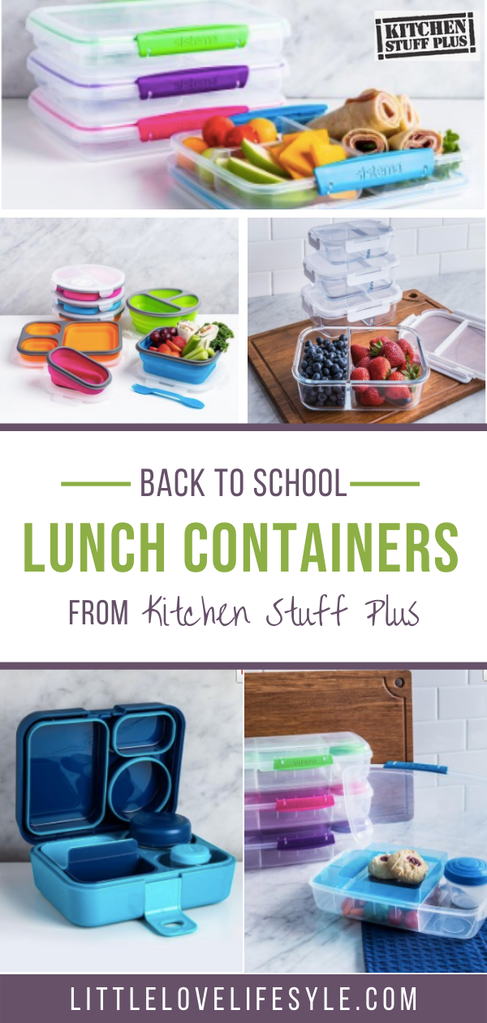
If your child is starting school for the first time - look for easy to use lunch containers like Sistema KlipIt containers (available in a variety of fun colours ), Bentgo Kids or Bentgo Chill a modular bento which lets you pack a variety of snacks, neatly separated so you don't have to worry of contents mixing
TIP: Have your little practice eating out of the lunchbox before they start school and show them the right way to open & close containers (ie. not upside down).
If your child has a generous appetite, look for larger lunch containers like the Lunchbots Large Trio Stainless Steel Bento, Sistema KlipIt containers, Ziplock Lunch containers or Divided Glass Storage Containers - a great option for bigger kids. These containers are available in a variety of sizes and clean-up is a breeze because the glass bottoms are dishwasher safe (killing all the lunchtime germs)
For smaller kids, I recommend the Bentgo Kids or Bentgo Chill. These light-weight plastic containers are BPA-free, dishwasher safe, and available in a variety of sizes and fun colours.
TIP: Easily create fancy bento compartments using silicone muffin liners.
more about water bottles
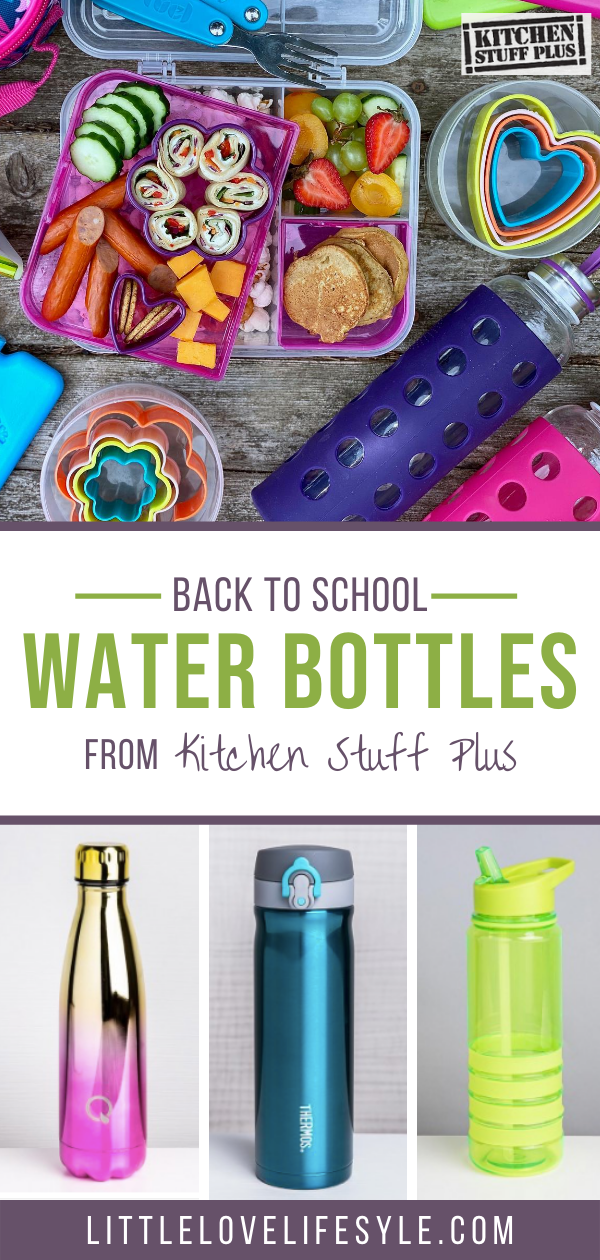
I always buy two water bottles because my kids either loose one or break some part of it during the school year. For little hands I recommend the Thermos Funtainer or something similar because it opens with the click of a button. For bigger kids (or thirsty kids) look for bigger bottles. I love this one from MiliFox. It holds 32oz/1L of water and has motivational quotes to inspire them throughout the day.
TIP: To properly clean bottles that can't be placed in the dishwasher, wash the bottle in warm water and detergent every day. Use a cloth or brush on the inside to remove any slimy build-up that may have formed. Rinse well and be sure to dry completely — either by air-drying overnight or hand-drying with a clean cloth. If you would like to sanitize the bottles (maybe on a Friday after the school-week) fill the bottle with straight white distilled vinegar; let it stand for about 10 minutes. Rinse and air dry.
TIP: To properly clean bottles that can't be placed in the dishwasher, wash the bottle in warm water and detergent every day. Use a cloth or brush on the inside to remove any slimy build-up that may have formed. Rinse well and be sure to dry completely — either by air-drying overnight or hand-drying with a clean cloth. If you would like to sanitize the bottles (maybe on a Friday after the school-week) fill the bottle with straight white distilled vinegar; let it stand for about 10 minutes. Rinse and air dry.
more about lunch bags
Keep lunches cool with an insulated lunch bag like the Dual Compartment Lunch Bag, by Thermos. Available in a variety of colours and prints, this well-designed lunch bag is fitted with antimicrobial treated interiors, 100% free PVC with PEVA linings, and has two separate compartments.
Another amazing choice is the Vaschy Neoprene Lunch Bag, which is also available in a variety of colours and fun prints. This soft and flexible lunchbag fits most lunchboxes, and easily fits into school-age back packs leaving room for books and school supplies.
Tip: To kill viruses and germs on bags that can not be laundered, first wipe clean with a damp soapy cloth, then lightly wipe or spray lunch bags with rubbing alcohol. Be sure to dry completely overnight.
more about thermal food jars
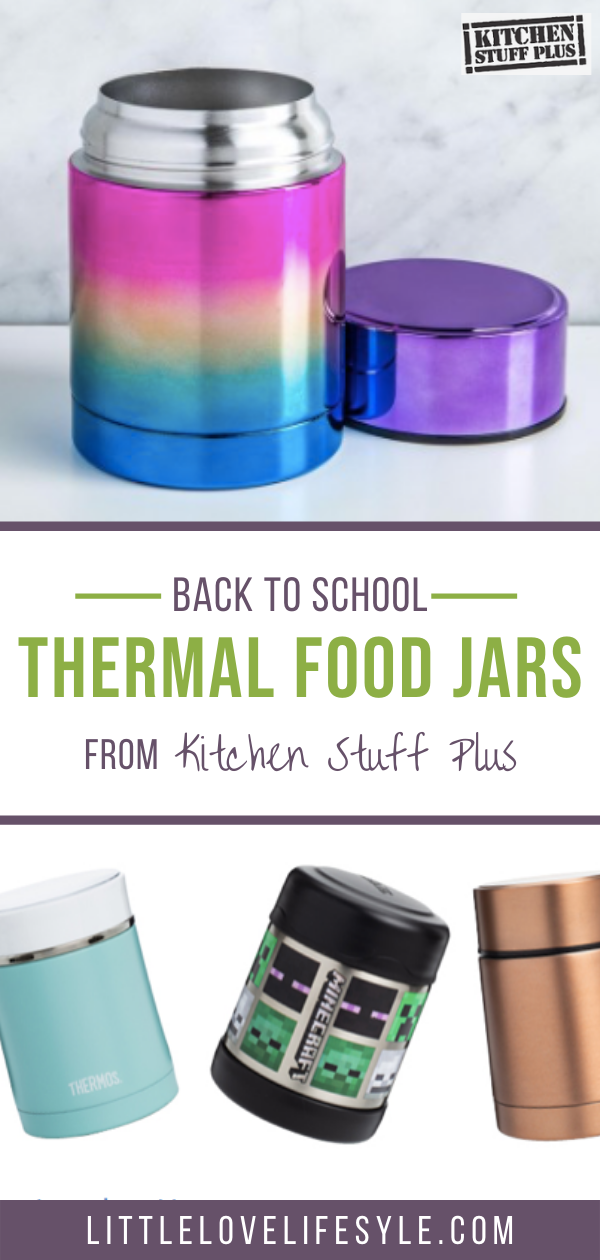
A great thermal food jar (thermos) will keep foods hot and at safe temperatures for hours. I personally love the Lunchbots Brand Thermal containers. They're available in 3 sizes and can hold up to 2 cups of food! If you choose a fun printed container, like these fun kids prints from Thermos they will make boring leftovers exciting at lunchtime!
Thermos Brand thermal containers and Lunchbots Thermal containers will not only keep food hot, they are leak-proof, durable, and easy to clean.
TIP: Keep food hot until lunchtime and always preheat your thermos! Fill it with boiling water for 5 minutes, empty and fill with piping hot food.
Thermos Brand thermal containers and Lunchbots Thermal containers will not only keep food hot, they are leak-proof, durable, and easy to clean.
TIP: Keep food hot until lunchtime and always preheat your thermos! Fill it with boiling water for 5 minutes, empty and fill with piping hot food.
more about lunch tools
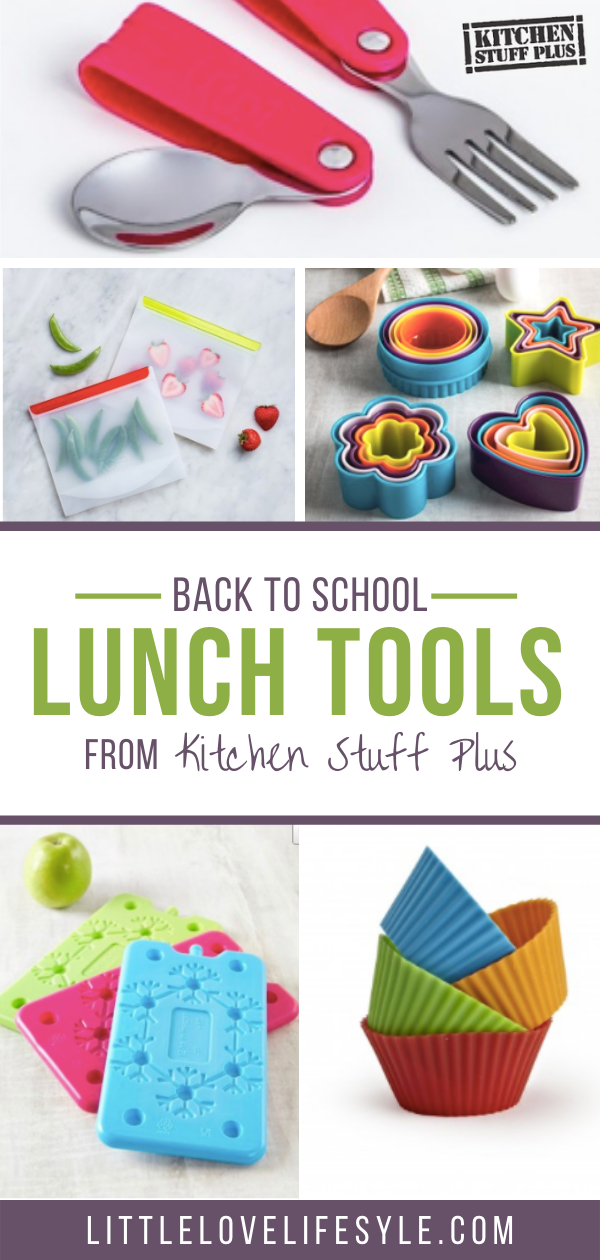
One sure way to make lunchtime exciting, is to incorporate fun and colourful lunch tools like silicone muffin liners, which allow you to easily create fancy bento compartments and keep food separate in any lunch container. These handy containers are dishwasher safe making them a breeze to clean!
Ice packs like the colourful Luciano Slim Ice Packs are essential for keeping lunch cool. And the slim design makes them easy to fit in every lunch bag!
Fuel Primary Foldable Fatware Cutlery is available in 3 bright colours, dishwasher safe, and the foldable design helps keep them clean until they're ready to be used.
Easily cut sandwiches and other soft foods into creative shapes with cookie cutters. You can also use them as bento compartments in a lunchbox. Because they're not leak proof, I suggest filling them with dry foods like cereal or fruit like blueberries and grapes.
Look for reusable silicone bags that are dishwasher-safe and perfect for litter-less lunch programs. The Joie Clip & Seal Silicone bag is available in two sizes, snack and sandwich size. I also love the compostable paper lunch bags from Lunchskins.
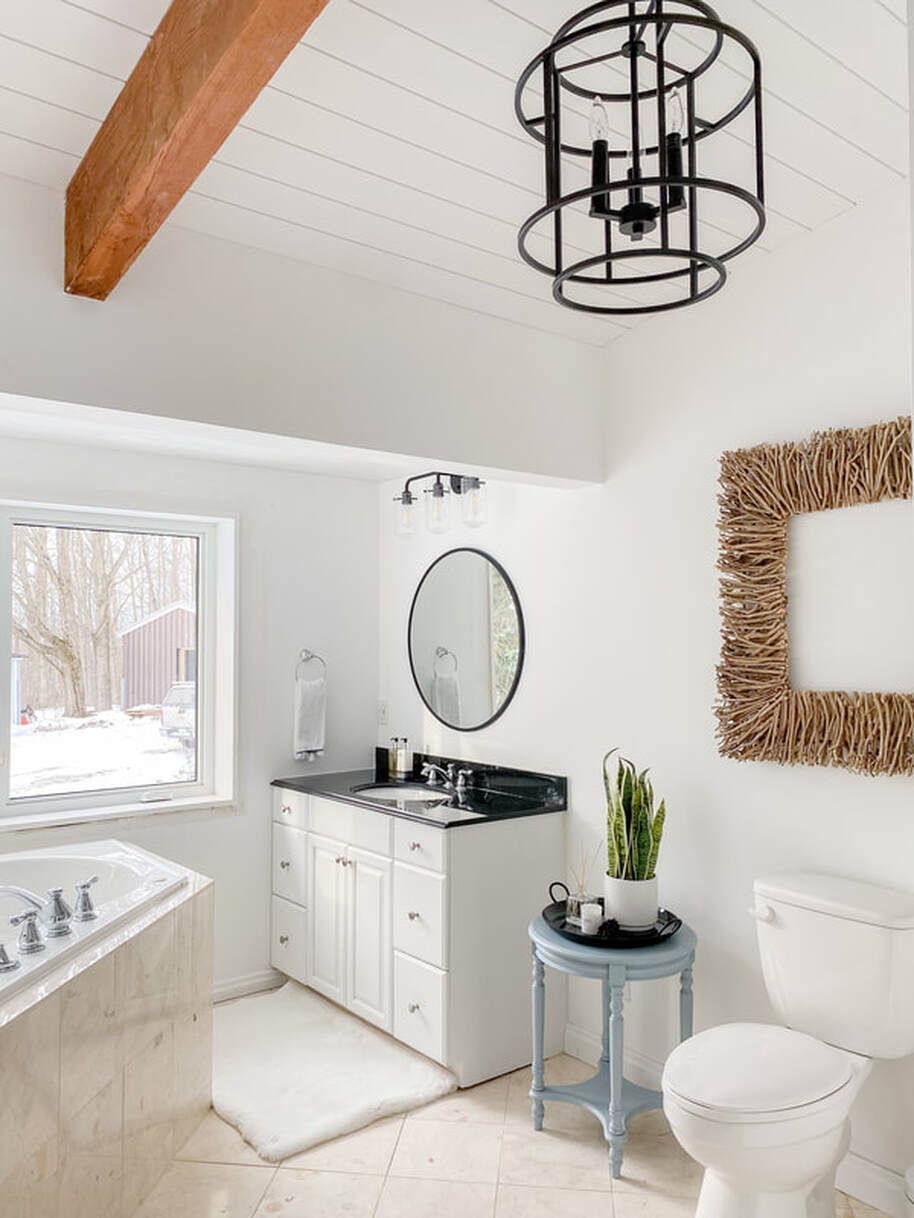
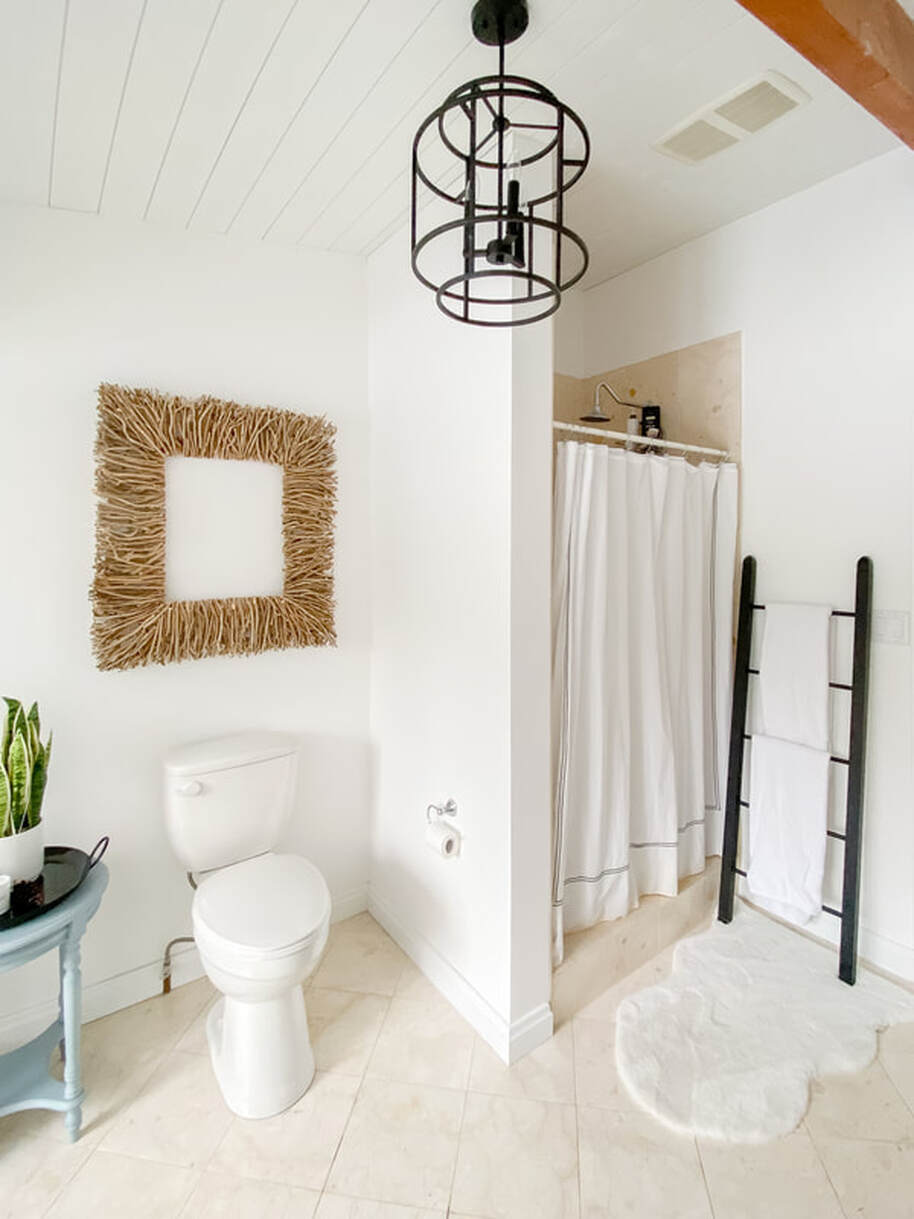
We bought a cottage last July and we've been slowly renovating it room-by-room into the Country House of our dreams. One room I had to tackle ASAP was our upstairs washroom. It was stuck in the 70's and in desperate need of a facelift. So, I bought a few cans of paint (Benjamin Moore Chantilly Lace) and got to work painting the walls, vanity, baseboards and window trim (which has since been replaced along with the windows).
My style inspiration for the house is 'Modern Farmhouse' and if you search the term every image you see includes shiplap! So we bought pre-painted MDF, wood composite from Lowes and installed it up on the ceiling. Wow, it completely transformed the space and highlighted the beautiful wood beams on the ceiling! It also highlighted the terrible lighting fixtures so that was the next to go!
Click here for the link to the vanity light and click here for the link to the chandelier. Both are from Design Electrical in Owen Sound.
Click here for the link to the vanity light and click here for the link to the chandelier. Both are from Design Electrical in Owen Sound.
Before
After
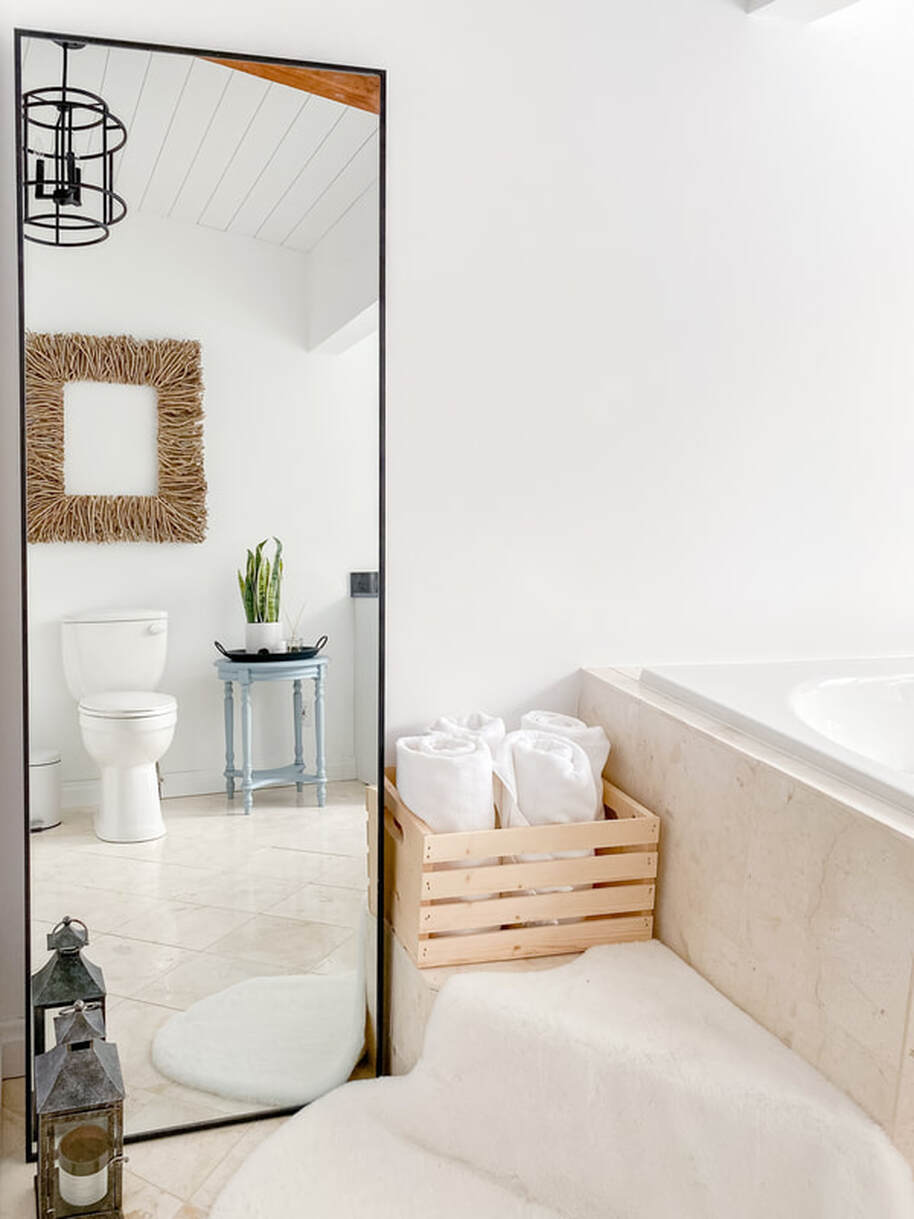
I cozied up the space with some great finds from Homesense including the mirrors and faux fur carpets that wear and wash beautifully! Just hang to dry and shake to fluff them back up!
The large wood frame is from Barebirch (best shop ever) in Owen Sound and the small blue antique table is from Styled By Monique in Collingwood.
The large wood frame is from Barebirch (best shop ever) in Owen Sound and the small blue antique table is from Styled By Monique in Collingwood.
I fancied up the enormous 70's jet tub with simple wood crates from The Home Depot, simple greenery from outside and another cozy faux fur rug. We will eventually replace the tub and vanity and install a glass door on the shower.... but for now I think it looks great! And my kids are little enough (5 & 7) to think the tub is super cool too... lol.
The holidays are my favourite time of year. I love baking festive cookies, sipping on hot chocolate, indulging in hours of Hallmark movies, and curating small thoughtful gifts.
I enjoy gifting simple items that I love and use every day. Being an avid baker, these gifts tend to be from my kitchen...festive cookie stamps, cookie scoops, cozy mugs, festive oven mitts, and perhaps even a pretty apron.
My go-to kitchen store is Kitchen Stuff Plus of course and below is my curated list of kitchen gifts I love for under $20.

Concerned about in-store shopping this holiday season? Kitchen Stuff Plus has a click & collect option. Shop online and then fetch your kitchen goodies curb side. Super easy! learn more at https://www.kitchenstuffplus.com/pick-up
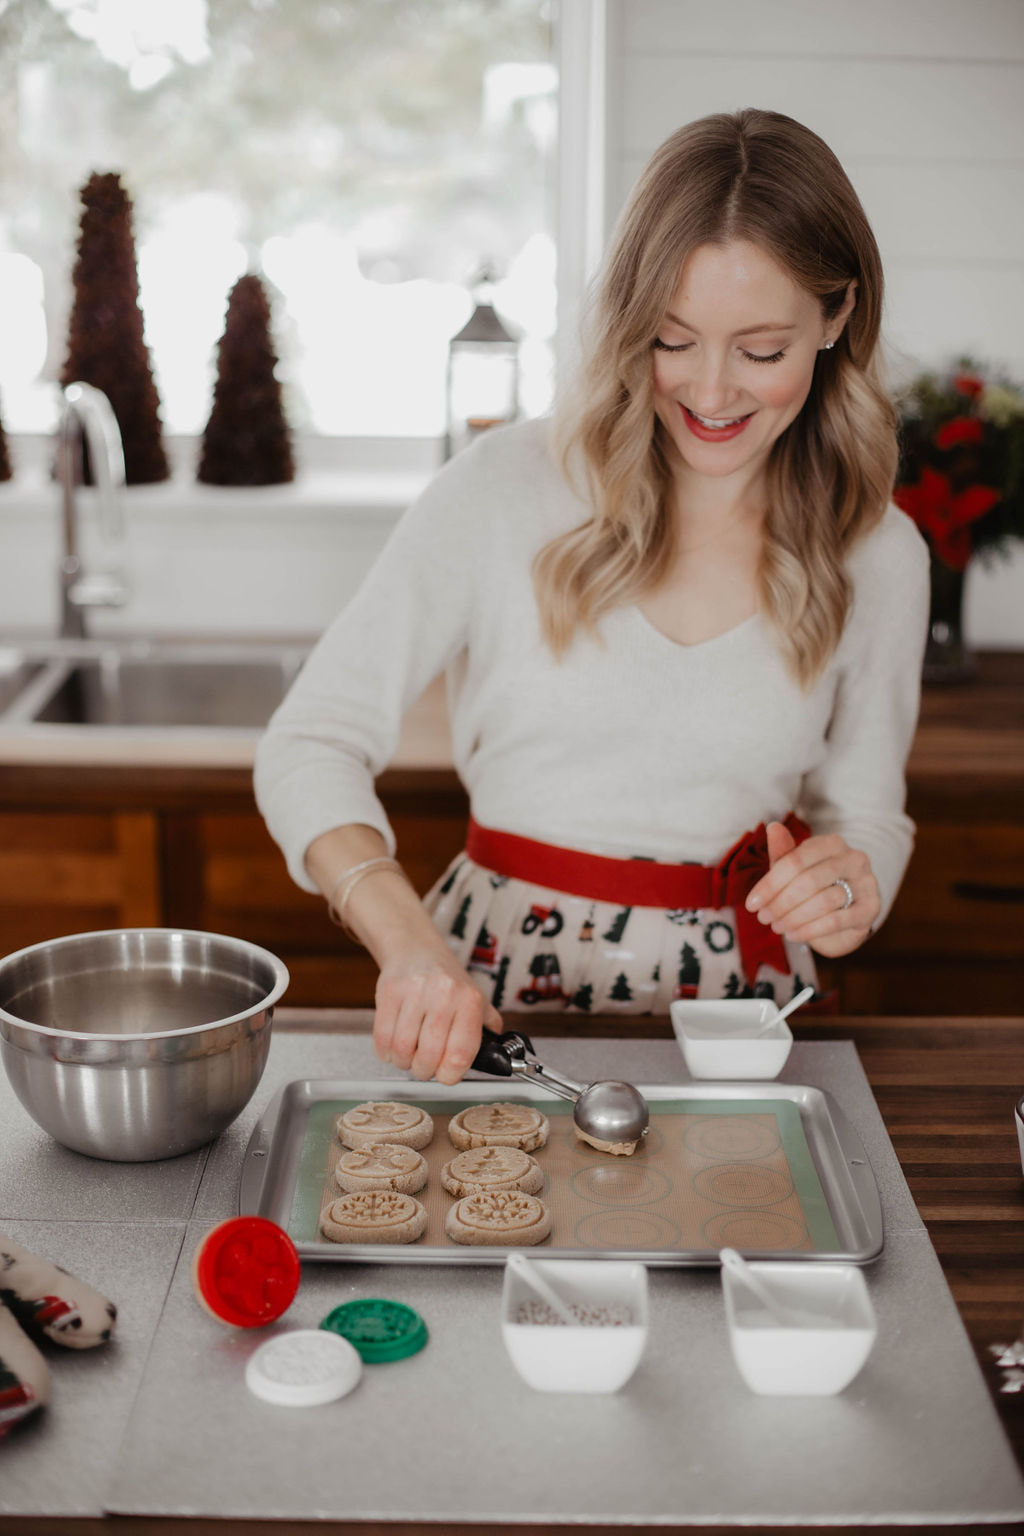
Whether you bake dozens of cookies for swaps or gifts or bake a simple batch with your family to enjoy at home, the key to Christmas cookie success is having the right tools. A cookie scoop keeps everything the same size and portion and will help cookies bake evenly.
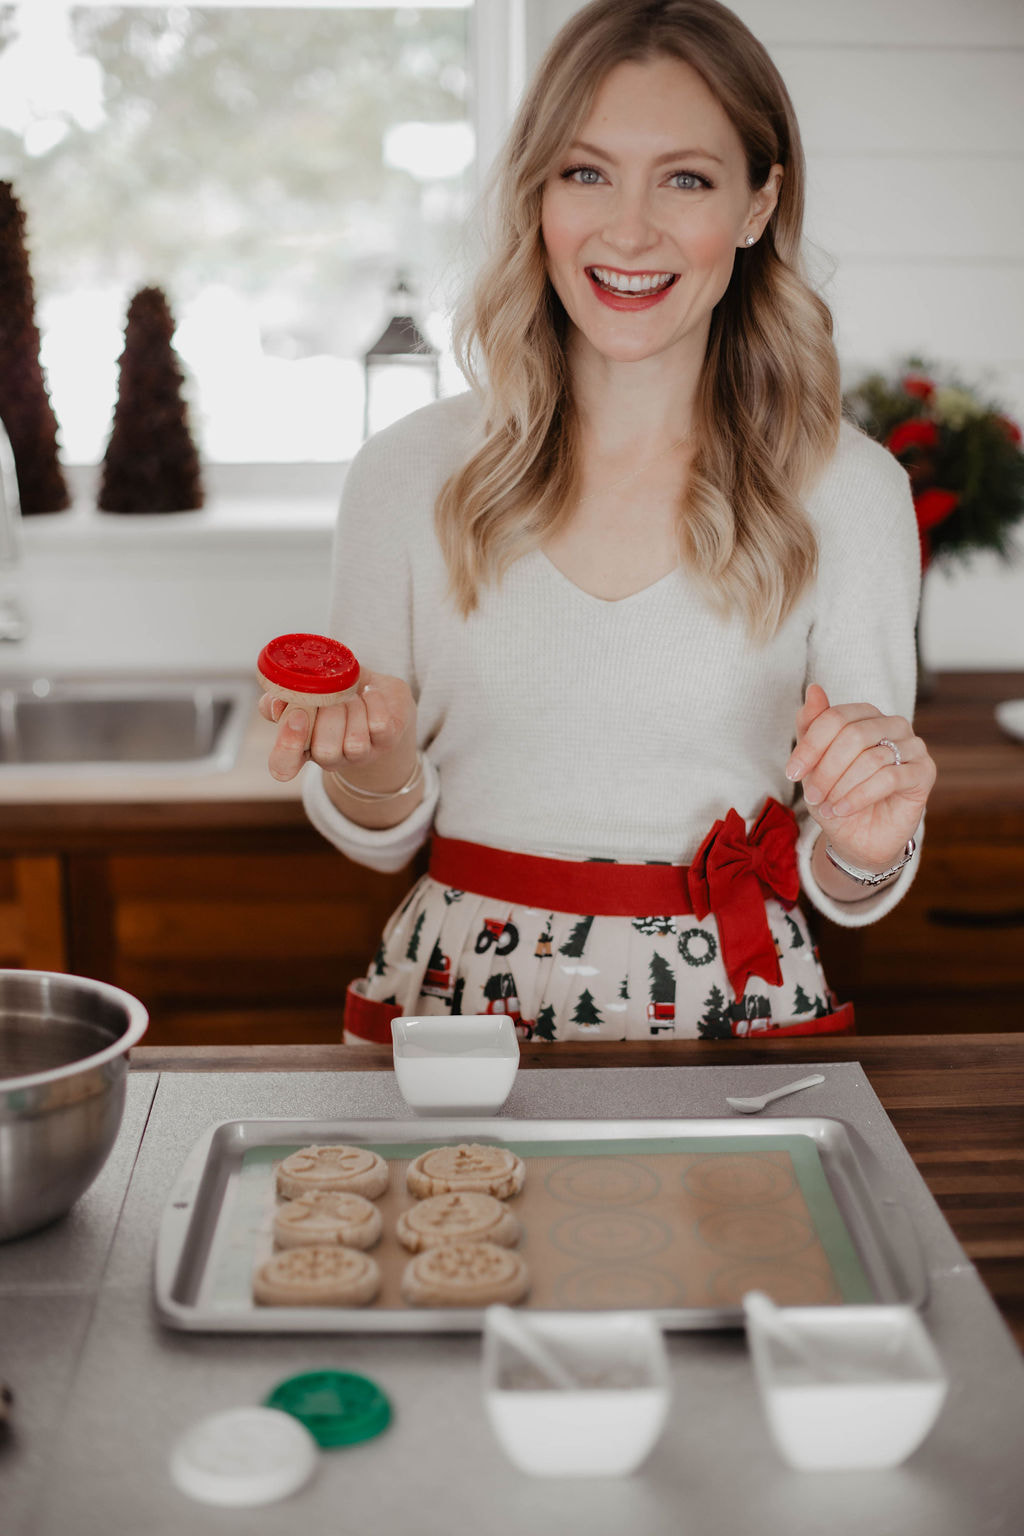
The KSP Christmas Cook 'Assorted' Silicone Cookie Stamp makes holiday baking easy and fun. The stamp comes with 3 festive silicone stamps: a gingerbread man, a snowflake, and a Christmas tree. Simply stamp balls of dough with your cookie stamp and you can even place the stamps in the dishwasher after for a quick and easy clean-up!
A silicone baking mat helps create a more even baking surface on even the worst baking sheets, resulting in cookies with more evenly browned bottoms and fewer burnt cookies.
A silicone baking mat helps create a more even baking surface on even the worst baking sheets, resulting in cookies with more evenly browned bottoms and fewer burnt cookies.
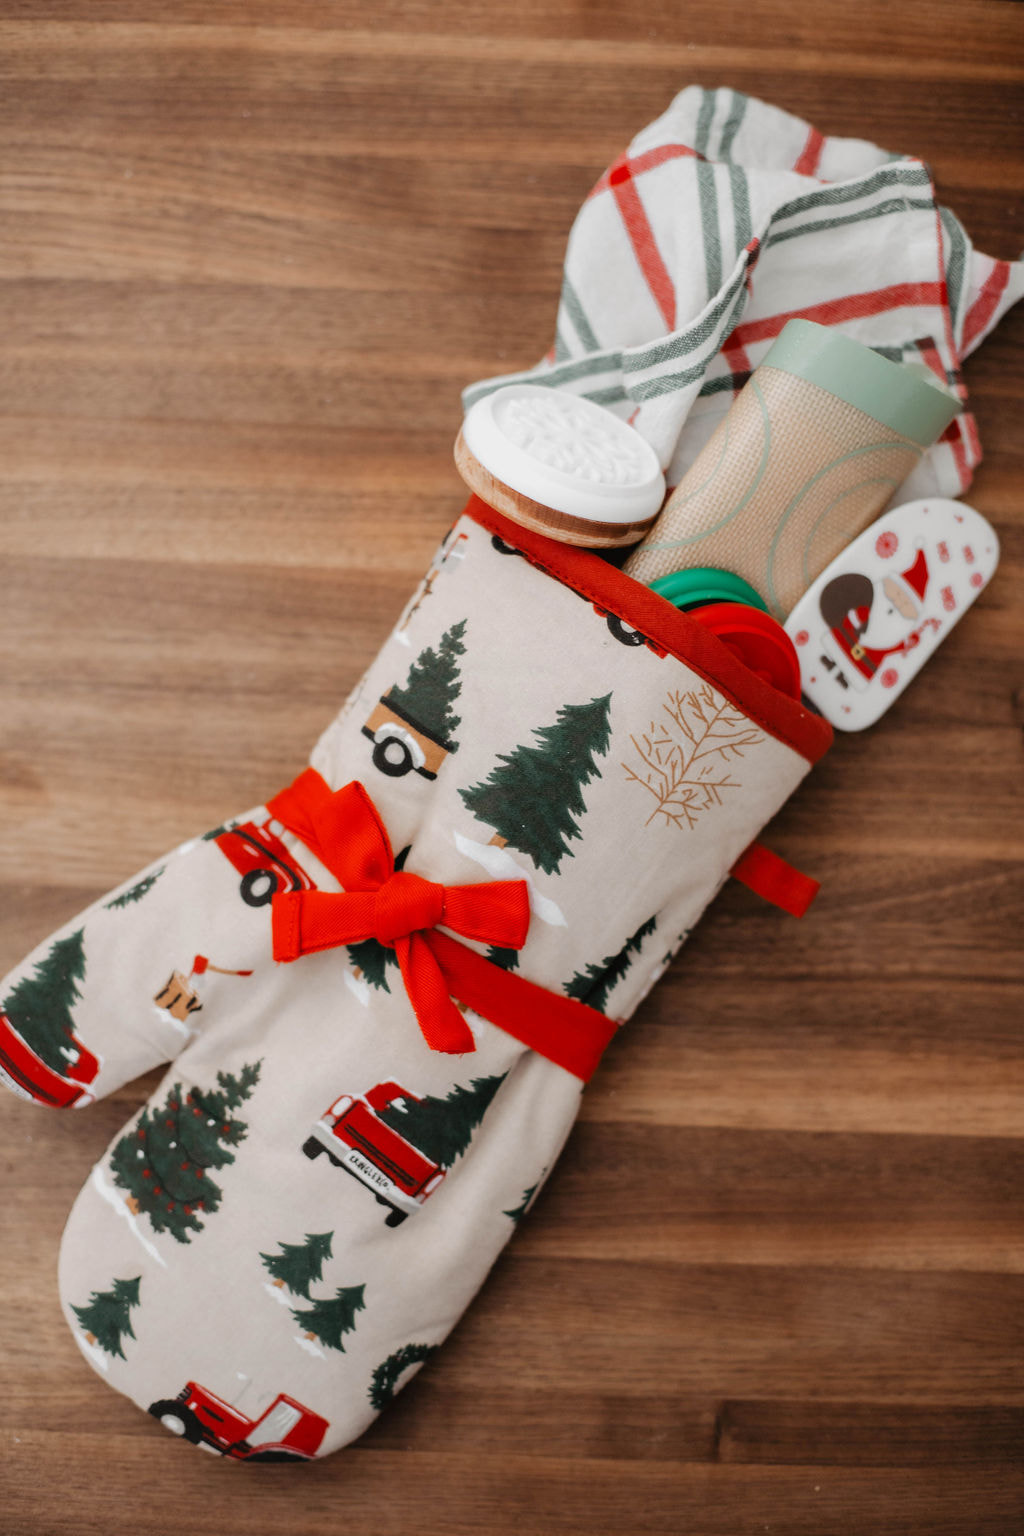
Add some holiday style to your kitchen this Christmas season with these festive Oven Mitts. Available in a variety of patterns, these oven mitts are perfect for holiday baking and they make the cutest gift wrap. Just fill them with some of my kitchen faves and tie them with a bow!
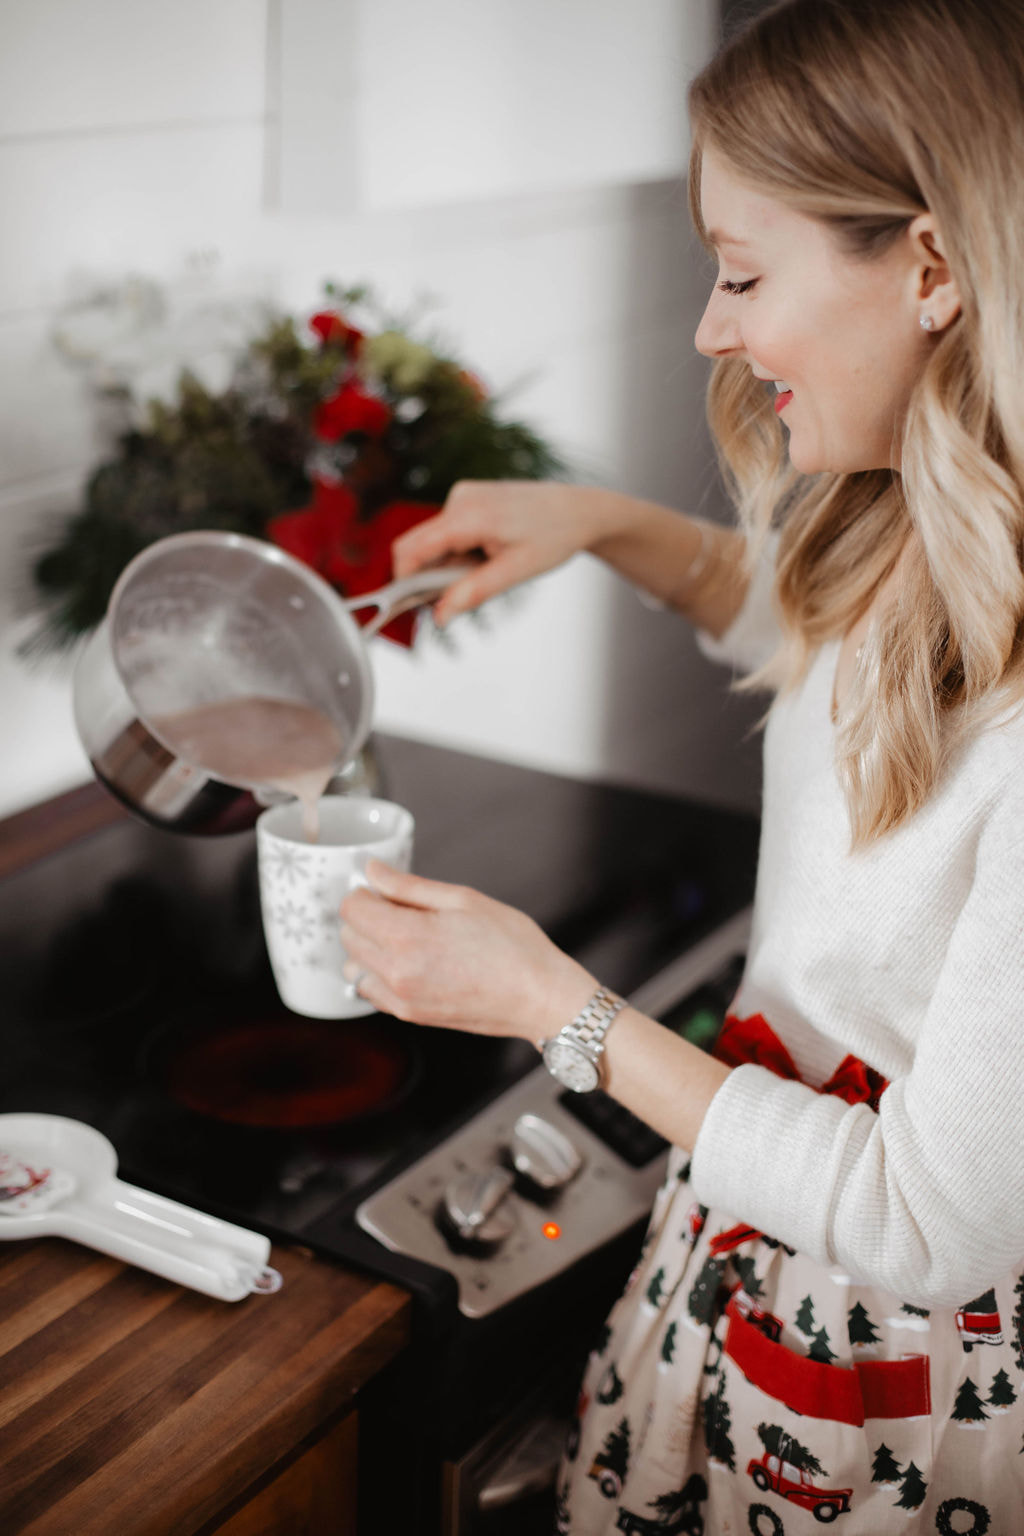
Who doesn’t love homemade hot chocolate, especially when you have a beautiful warmer and server to make it in like this one from Kitchen Stuff Plus.
To make my favourite hot chocolate, add milk to a small saucepan or warmer (measure 1 cup of milk per person) and place it on the stovetop over medium heat. When the milk gets hot (small bubbles form on the sides of your saucepan) add chunks of milk chocolate and stir until the chocolate melts and combines with the milk. Add as much chocolate or as little as you like and feel free to substitute milk chocolate with dark or white chocolate.
To make my favourite hot chocolate, add milk to a small saucepan or warmer (measure 1 cup of milk per person) and place it on the stovetop over medium heat. When the milk gets hot (small bubbles form on the sides of your saucepan) add chunks of milk chocolate and stir until the chocolate melts and combines with the milk. Add as much chocolate or as little as you like and feel free to substitute milk chocolate with dark or white chocolate.
Sip your homemade hot chocolate in these beautiful and festive KSP Christmas Decal 'Snowfall' Porcelain Mugs. Available in a variety of prints, these festive mugs come as a set of 4 and are perfect for a hot drink on a cold winter day.
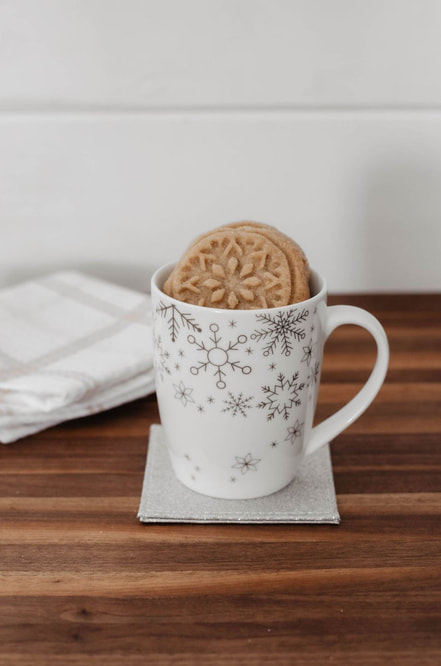
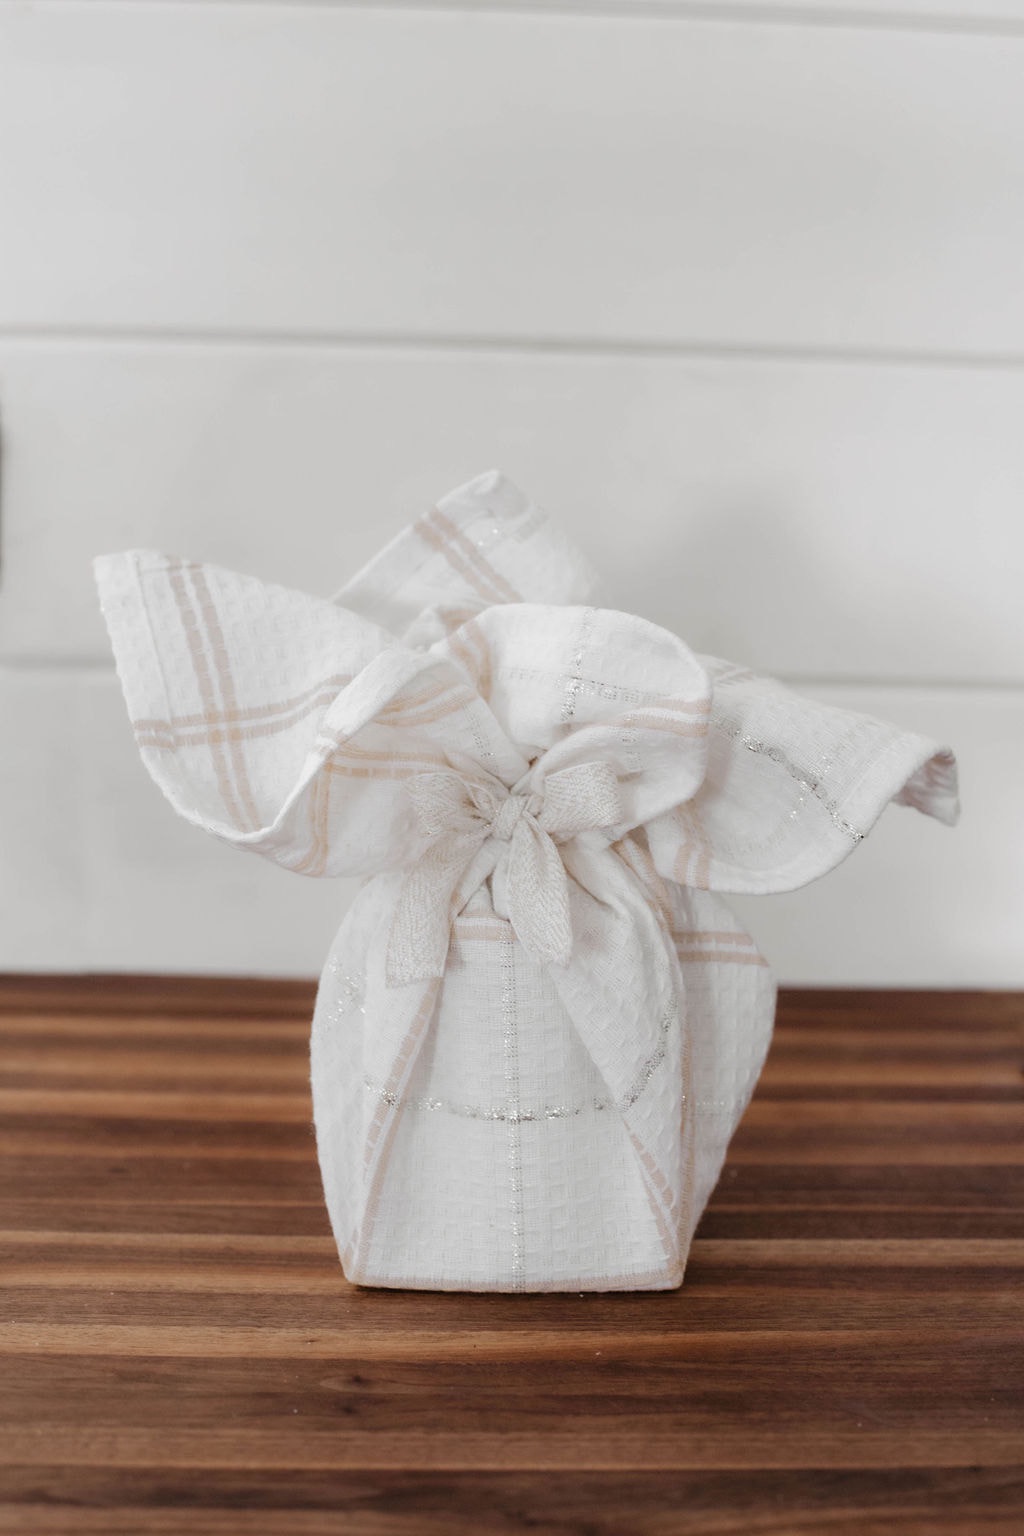
One of my favourite gifts to make and give during the holidays (especially for teachers) is a KSP Christmas Decal Porcelain Mug filled with homemade holiday cookies. I place it on a KSP Christmas Hardboard 'Glitter' Coaster and wrap it in a festive tea towel like this one from Kitchen Stuff Plus. The total cost of the gift is approximately $10 and every item can be used and enjoyed.
* Note: each item comes in a set of 3 to 4 so you can make a total of 3 to 4 gifts for a total of $40.
* Note: each item comes in a set of 3 to 4 so you can make a total of 3 to 4 gifts for a total of $40.
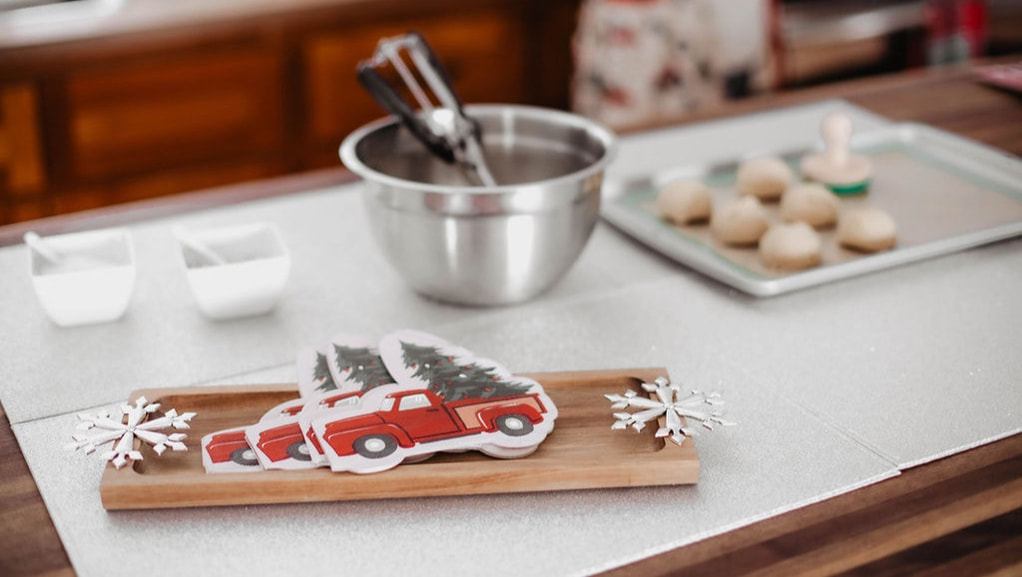
Visit KitchenStuffPlus.com for more great Holiday Gift Ideas like these adorable Christmas Truck Napkins, 'Glitter' placemats, and KSP Christmas Icon 'Snowflake' Xmas Acacia Tray.
Photography by Brooke Green Photography
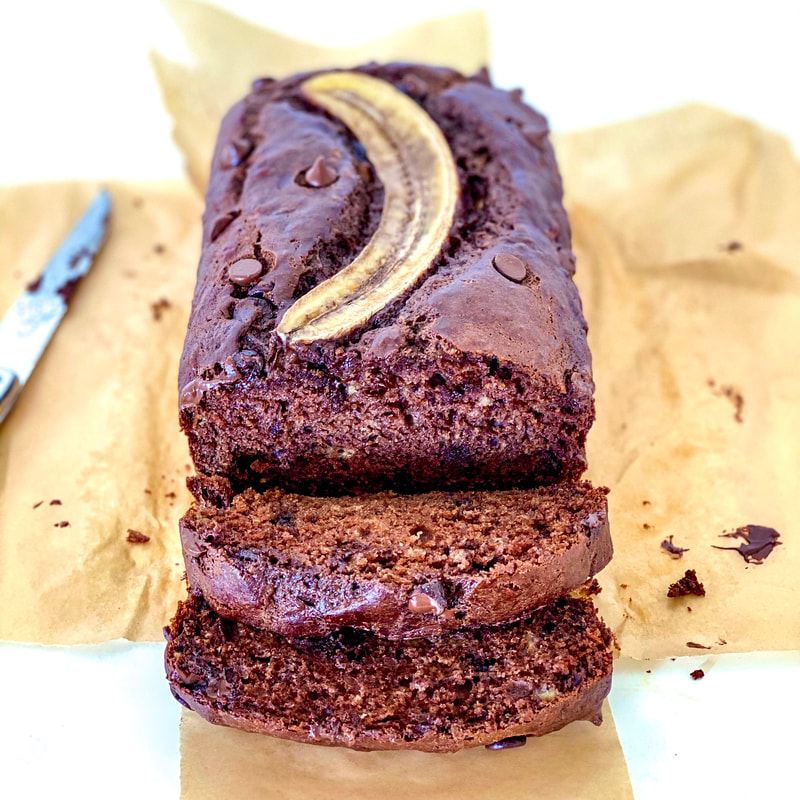
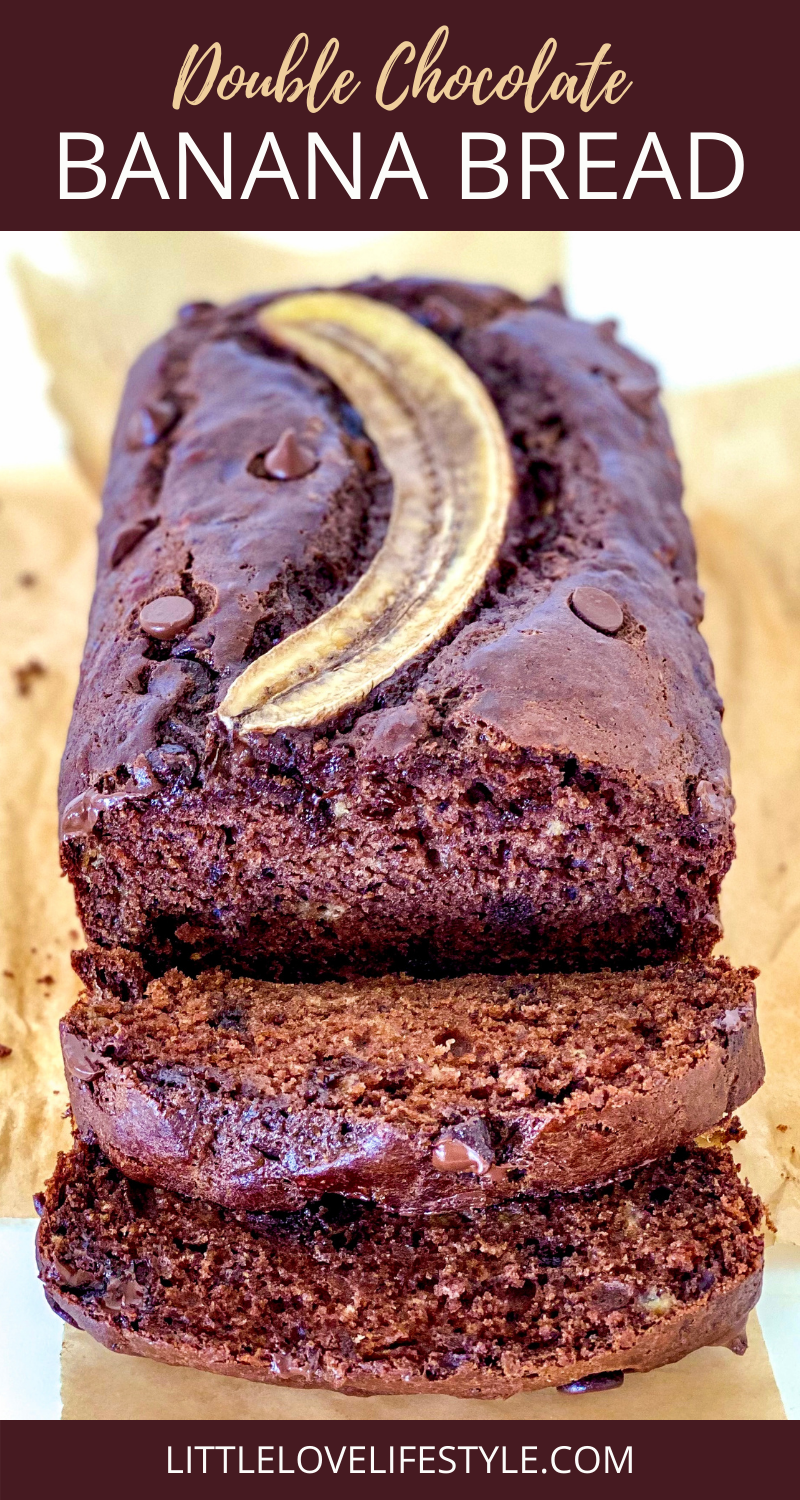
A twist on my classic Banana Bread Recipe, this Double Chocolate Banana bread is for the chocolate lover in your family! Naturally sweetened with maple syrup, this decadent loaf is a healthier alternative to a sinful slice of chocolate cake, yet just as delicious!
Ingredients:
1 cup mashed bananas (about 2 medium)
3/4 cup maple syrup
1/3 cup light tasting olive oil
2 eggs
1/2 teaspoon vanilla
1 1/2 cups all-purpose flour
1/4 cup cocoa
2 teaspoon baking soda
1 pinch salt
1/2 cup chocolate chips + 2 tablespoons to sprinkle on top
* Optional 1/2 banana sliced lengthwise to decorate the top + 1 tsp sugar
Instructions:
1. Preheat oven to 350F. Line a loaf pan with Parchment Paper.
2. In a large mixing bowl, whisk together maple syrup and olive oil until well combined. Whisk in eggs, one-at-a-time, until well combined. Stir in mashed banana and vanilla.
3. Sprinkle in baking soda, cocoa, flour, and salt and stir until just combined. Fold in 1/2 cup chocolate chips.
4. Pour mixture into prepared loaf pan and sprinkle with chocolate chips.
5. *Optional add 1/2 banana sliced lengthwise on top of the loaf and sprinkle with sugar.
6. Bake for 45 minutes or until a toothpick inserted in the middle of the loaf comes out clean.
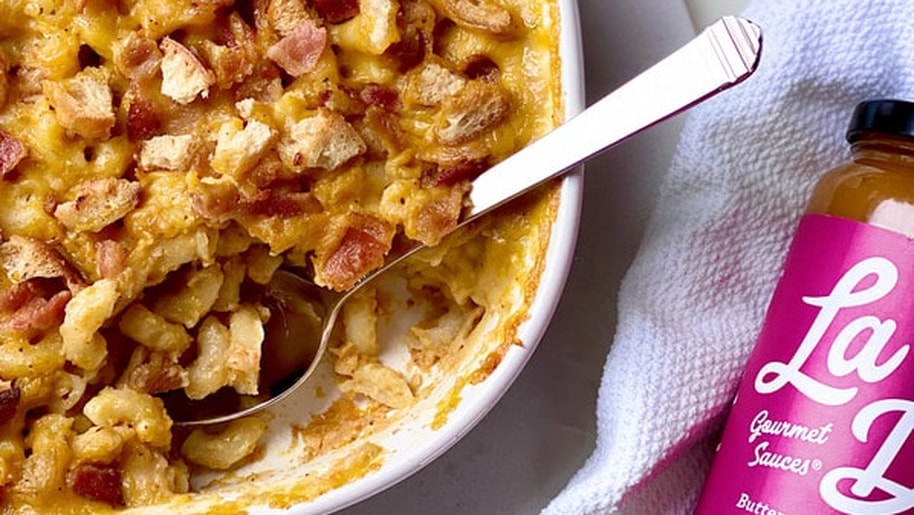
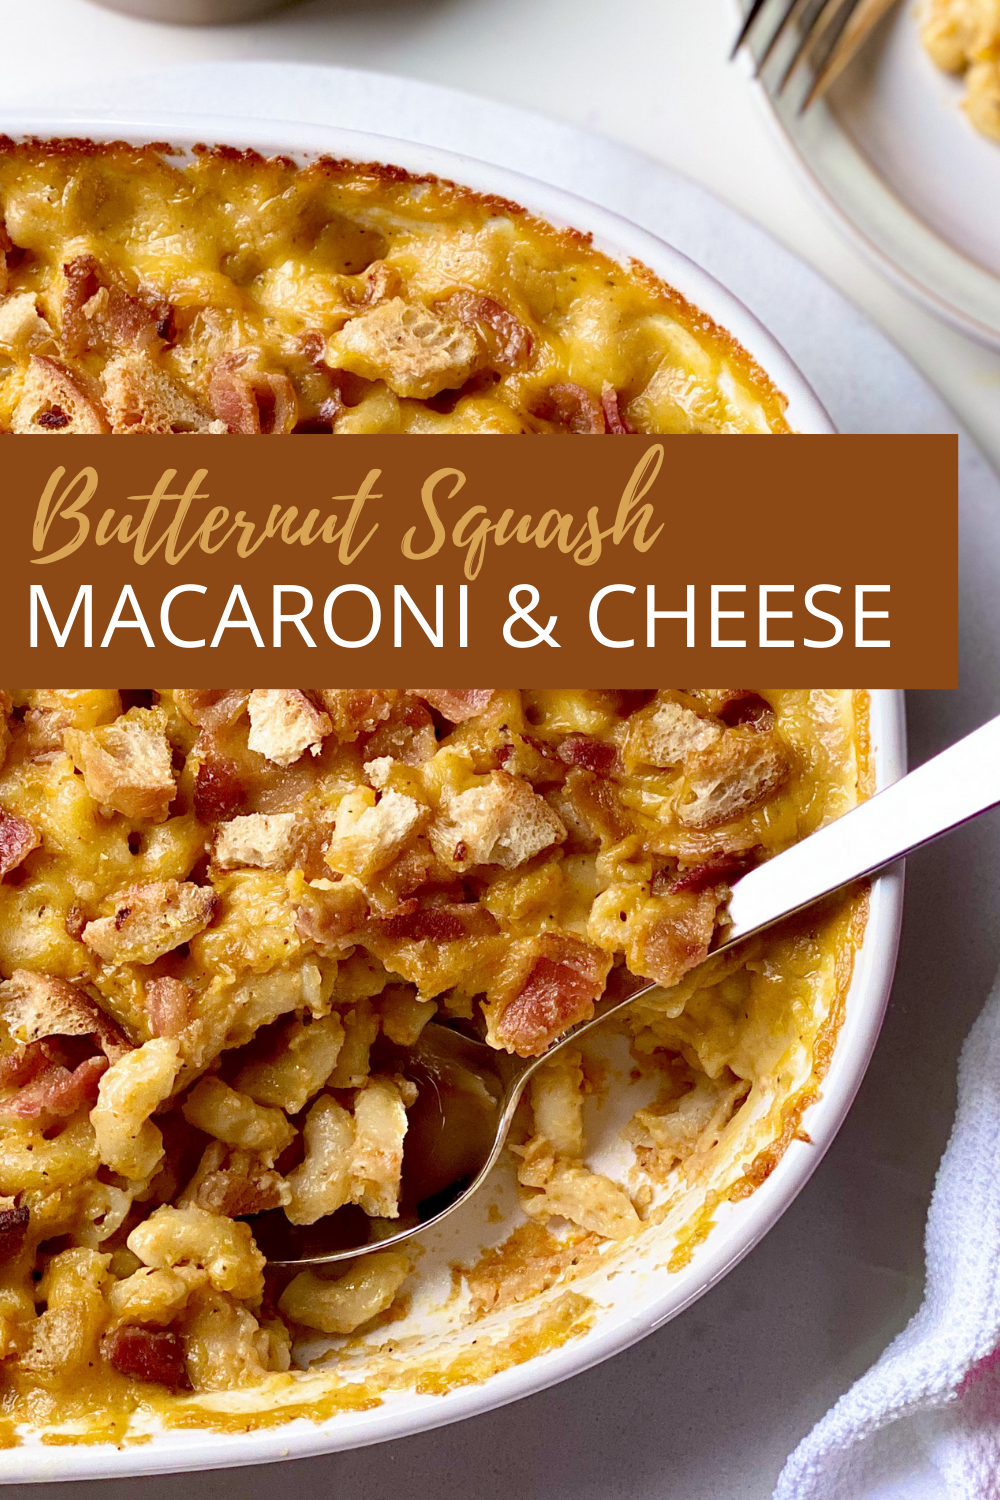
Butternut squash macaroni and cheese, a more healthy version of the classic macaroni and cheese, but with the same great creamy cozy flavour!
Ingredients:
2 cups macaroni noodles, cooked Al Dente
2 cups butternut squash sauce or soup - I love La De Da's Butternut Squash and Beet Sauce
2 cup milk
1 1/2 cup shredded Italian style cheese
1/2 cup all-purpose flour
1/2 cup crushed mini-baguette crisps or all-natural croutons
4 tablespoons butter
4 pieces bacon, chopped finely
Instructions:
1. Preheat oven to 350F. Butter a 2-litre (8-cup) ovenproof dish.
2. Cook pasta in a large saucepan of boiling water for 2 minutes less than the package recommends. Drain and set aside
3. Cook bacon in the same pan until crispy. Drain on a paper towel and set aside.
4. Melt butter in the same pan. Add flour and cook for 1 minute while stirring continuously.
5. Gradually add in the milk and butternut squash sauce, and cook, stirring occasionally until sauce boils and thickens.
6. Stir in cheese until melted. Pour into an ovenproof dish and top with breadcrumbs and bacon. Bake for 30 minutes or until golden.
Substitutes;
If you're gluten-free, use gluten-free macaroni and replace the bread crumbs with corn flakes.
If you're dairy-free, sub the milk with almond milk and cheese with 1 cup vegan cheese + 1/2 cup nutritional yeast flakes.
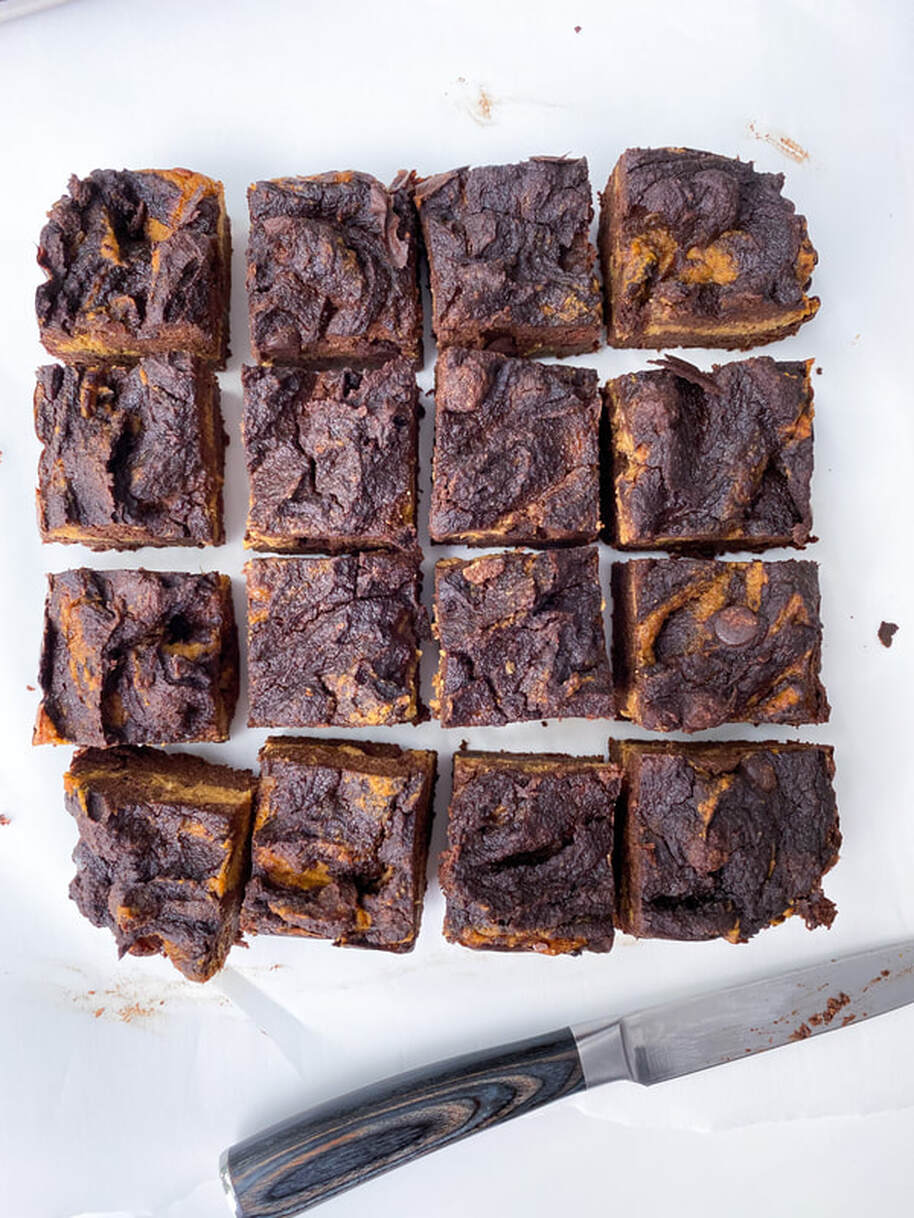
Pumpkin and chocolate is a delicious fall combo I simply can't get enough of! Last year, I combined the two to create Double chocolate Pumpkin Cookies and this year I combined them to create chocolate pumpkin brownies! These healthier brownies are rich, creamy and delicious. You'll love them!
Inspired by Donna Hay's Choc-Banana Brownies, these 'almost good for you' brownies are made with almond flour and are naturally sweetened with dates and maple syrup. A few chocolate chips too... because I couldn't resist!
Ingredients:
10 soft fresh dates, pitted
1 3/4 cup pure pumpkin puree (not pumpkin pie)
1/4 cup oil of choice (something light in flavour ~ I use sunflower oil)
1/4 cup maple syrup
2 eggs
2 tsp vanilla extract
1 1/2 cups almond flour
2/3 cup cocoa powder
2 tsp baking powder
1/2 tsp cinnamon
1/4 tsp nutmeg
1/4 tsp salt
1/2 cup mini semi-sweet chocolate chips (optional)
Instructions:
1. Preheat oven to 350F. Line a square cake tin with parchment Paper.
2. Place everything, except for the cocoa powder and chocolate chips, in a food processor and process just until smooth.
3. Remove 1 cup pumpkin mixture from food processor and set aside.
4. Add cocoa powder to food processor and process just until combined. Don't over mix. Remove the lid of the food processor, and using a spatula, fold in chocolate chips.
5. Pour 1/2 of the chocolate mixture into the prepared tin and smooth with a spatula. Top with the 1 cup pumpkin mixture you set aside. Smooth with a spatula. Pour the remaining chocolate mixture on top and using a butterknife, gently swirl the batter around. Don't over mix or the swirls will become messy.
6. Bake for 30 minutes. Remove from oven and let brownies cool in tin for 10 minutes before moving to a wire rack to cool completely. Cut, serve and enjoy! Keep the brownies in an airtight container in the refrigerator for 7 days.
SUBSTITUTES:
The almond flour can be substituted with all-purpose flour, but the brownies will have a lighter and fluffier texture - like cake.
The Cocoa powder can be substituted with Toasted Carob powder ~ a healthy alternative to cocoa that is low in calories, contains no fat and is caffeine free.
It’s that time of year again...or is it? Who knows when the kids are going back to school or for how long - but what we DO know is our little munchkins need to eat, and there are new health and safety considerations now.
So I've teamed up with my friends at Kitchen Stuff Plus to put together a list of Lunch Packing Essentials For The New Normal. Because lunchtime is a time when most kids need help opening their snacks and lunch containers, we share easy to use lunch containers so that kids are confident and independent at lunchtime and don't need to ask friends and teachers for help.
And because we all want to keep our home safe and free of germs, we share easy to wash lunch items like water bottles, cutlery, and lunch containers that can be placed in the dishwasher or items that can be easily sterilized with some easy DIY cleaning tips.
The list of amazing items are endless, but we've narrowed it down to a few of our favourites to make it simple to shop. Here they are:
1. lunch containers
|
If your child is starting school for the first time - look for easy to use lunch containers like Sistema KlipIt containers (available in a variety of fun colours ) or the Thermos Funtainer Bento-Style Lunchbox, a modular bento which lets you pack a variety of snacks, neatly separated so you don't have to worry of contents mixing
TIP: Have your little practice eating out of the lunchbox before they start school and show them the right way to open & close containers (ie. not upside down).
If your child has a generous appetite, look for larger lunch containers like the KSP Divided Glass Storage Containers - a great option for bigger kids. These containers are available in a variety of sizes and clean-up is a breeze because the glass bottoms are dishwasher safe (killing all the lunchtime germs)
For smaller kids, I recommend the Locksy Click N' Go Containers. These light-weight plastic containers are BPA-free, dishwasher safe, and available in a variety of sizes and fun colours. TIP: Easily create fancy bento compartments using silicone baking cups like these KSP Colour Splash Silicone Cupcake Liners. |
2. water bottles
|
Kitchen Stuff Plus has a HUGE selection of water bottles for kids. One of my favourites is the KSP Grip Glass Water Bottle because they come in a variety of fun colours, hold a generous amount of water, and the glass bottle is dishwasher safe!
Another great option, is the KSP Quench Double-Wall Water Bottle. The stainless steel bottle is eco-friendly, durable, and the double wall insulation keeps water cold for hours. It's also super stylish because it's available in fashionable colours like Unicorn, Ombre, and mermaid. For thirsty kids, check out the KSP Sport Tritan Water Bottle. It holds 750ml of water and features a durable hanging loop - so it can be easily attached to the outside of school bag. TIP: To properly clean bottles that can't be placed in the dishwasher, wash the bottle in warm water and detergent every day. Use a cloth or brush on the inside to remove any slimy build-up that may have formed. Rinse well and be sure to dry completely — either by air-drying overnight or hand-drying with a clean cloth. If you would like to sanitize the bottles (maybe on a Friday after the school-week) fill the bottle with straight white distilled vinegar; let it stand for about 10 minutes. Rinse and air dry. |
3. lunch bags
|
Keep lunches cool with an insulated lunch bag like the Dual Compartment Lunch Bog, by Thermos. Available in a variety of colours and prints, this well-designed lunch bag is fitted with antimicrobial treated interiors, 100% free PVC with PEVA linings, and has two separate compartments.
Another amazing choice is theKSP Bella Insulated lunch bag, which is also available in a variety of colours and fun prints. This soft and flexible lunchbag fits most lunchboxes, and easily fits into school-age back packs leaving room for books and school supplies. Both the Dual Compartment Lunch Bog, by Thermos and the KSP Bella Insulated lunch bag wipe clean with a damp soapy cloth. Tip: To kill viruses and germs, first wipe clean with a damp soapy cloth, then lightly wipe or spray lunch boxes with rubbing alcohol. Be sure to dry completely overnight. |
4. Thermal food jars
|
A great thermal food jar (thermos) will keep foods hot and at safe temperatures for hours. And if you choose a fun printed container, like these fun kids prints from Thermos, or the KSP Togo 'Unicorn' Thermal Food Storage Jar (my favourite) they will make boring leftovers exciting at lunchtime!
Thermos Brand thermal containers and KSP Togo thermal containers will not only keep food hot, they are leak-proof, durable, and easy to clean. The smaller size will be easier for kids to use, and for bigger kids, check out the classic colours, likecharcol, violet, white, or pretty pastels like pink and tourquoise. TIP: Keep food hot until lunchtime and always preheat your thermos! Fill it with boiling water for 5 minutes, empty and fill with piping hot food. |
5. Lunch Tools
|
One sure way to make lunchtime exciting, is to incorporate fun and colourful lunch tools like the KSP Colour Splash Silicone Cupcake Liners, which allow you to easily create fancy bento compartments and keep food separate in any lunch container. These handy containers are dishwasher safe making them a breeze to clean!
Ice packs like the colourful Luciano Slim Ice Packs are essential for keeping lunch cool. And the slim design makes them easy to fit in every lunch bag! Fuel Primary Foldable Fatware Cutlery is available in 3 bright colours, dishwasher safe, and the foldable design helps keep them clean until they're ready to be used. Easily cut sandwiches and other soft foods into creative shapes with the KSP Bakers 'Assorted' Cookie cutter Set of 5. You can also use them as bento compartments in a lunchbox. Because they're not leak proof, I suggest filling them with dry foods like cereal or fruit like blueberries and grapes. Kitchen Stuff Plus offers a wide range of reusable silicone bags that are dishwasher-safe and perfect for litter-less lunch programs. The Joie Clip & Seal Silicone bag is available in two sizes, snack and sandwich size. |
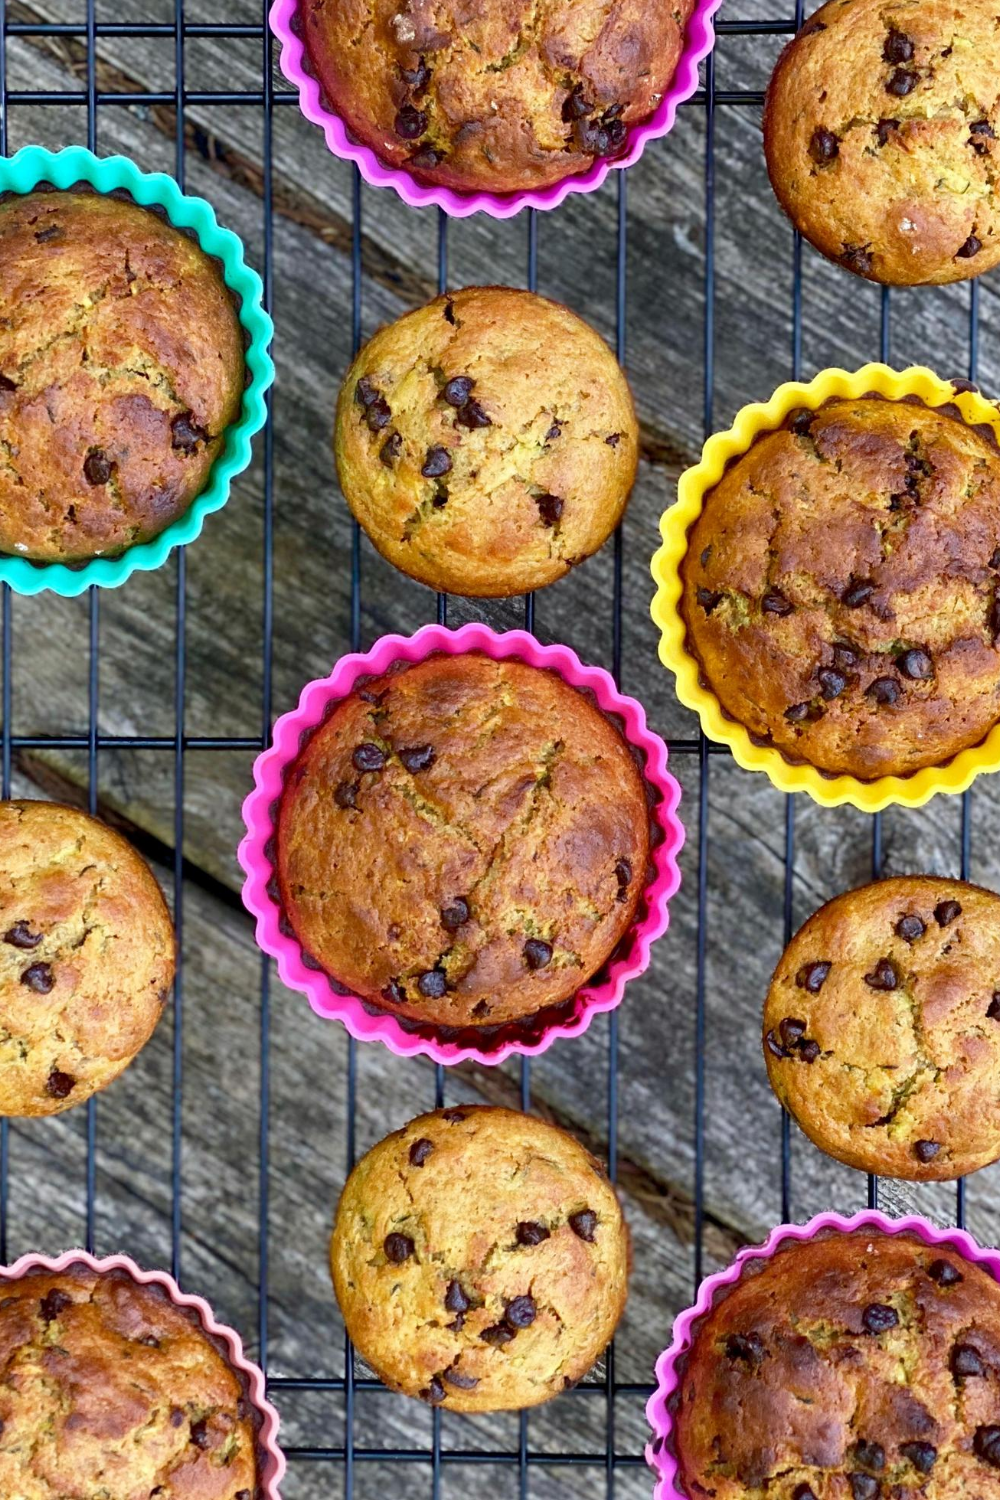
Zucchini is my favourite veggie to bake with because it adds moisture to baked goods and a boost of nutrition to special treats like these super yummy chocolate chip zucchini muffins! They make the perfect afternoon snack and won't last long so I suggest that you make a double batch!
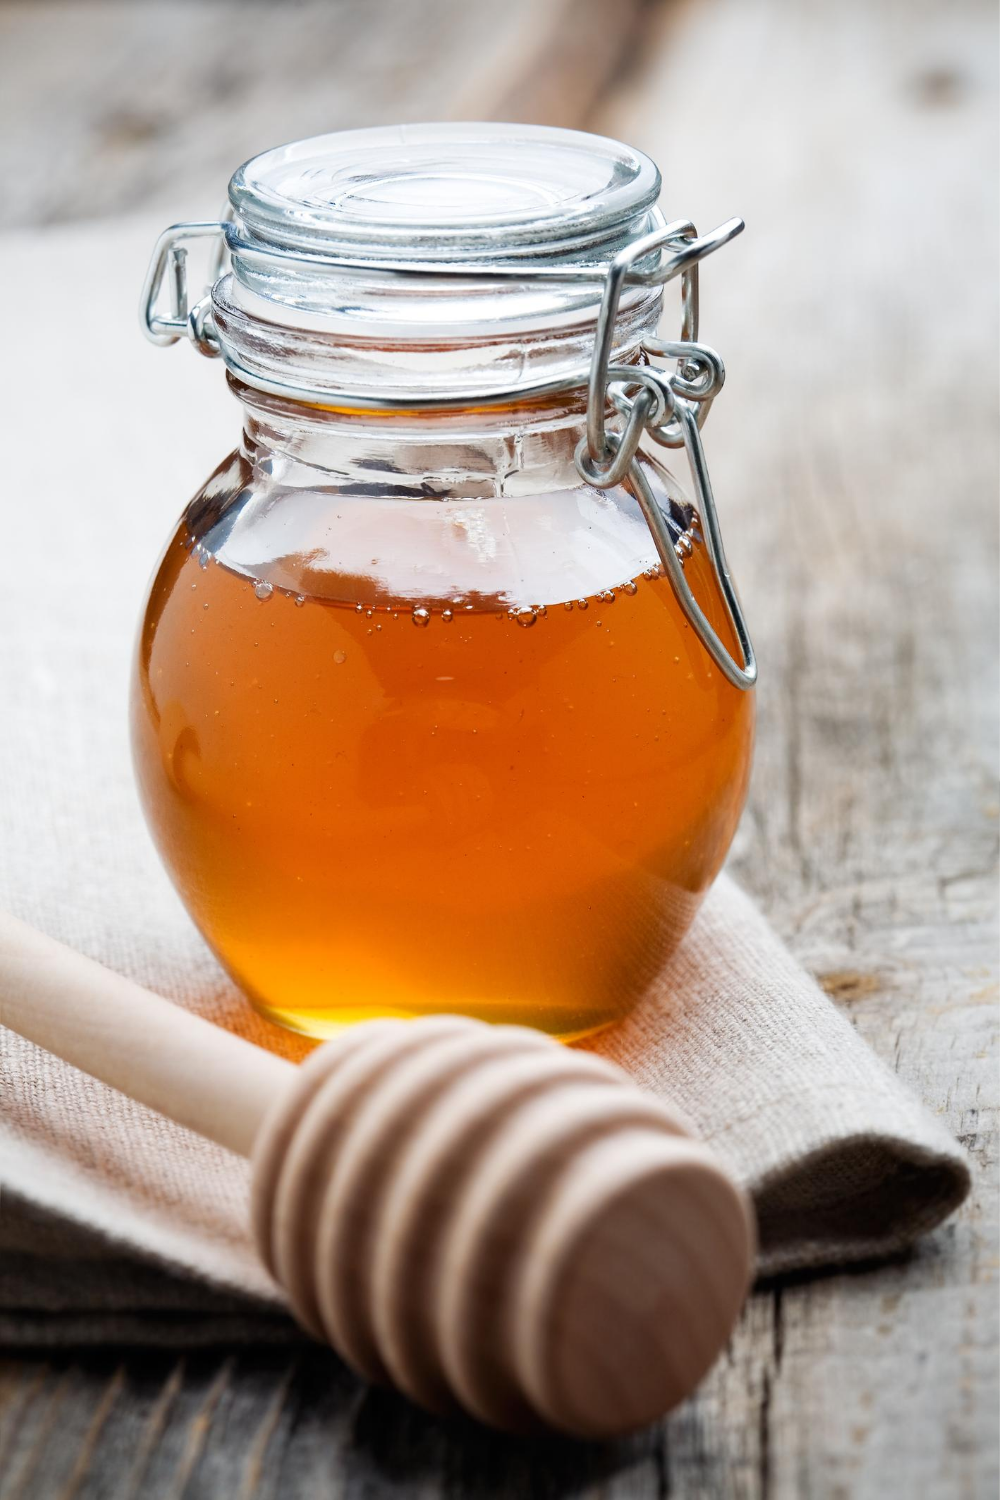
These zucchini muffins are healthier than most because they're naturally sweetened with honey. Make them even healthier and swap out the chocolate chips for nuts. Add extra fibre and swap half of the all-purpose flour for whole wheat.
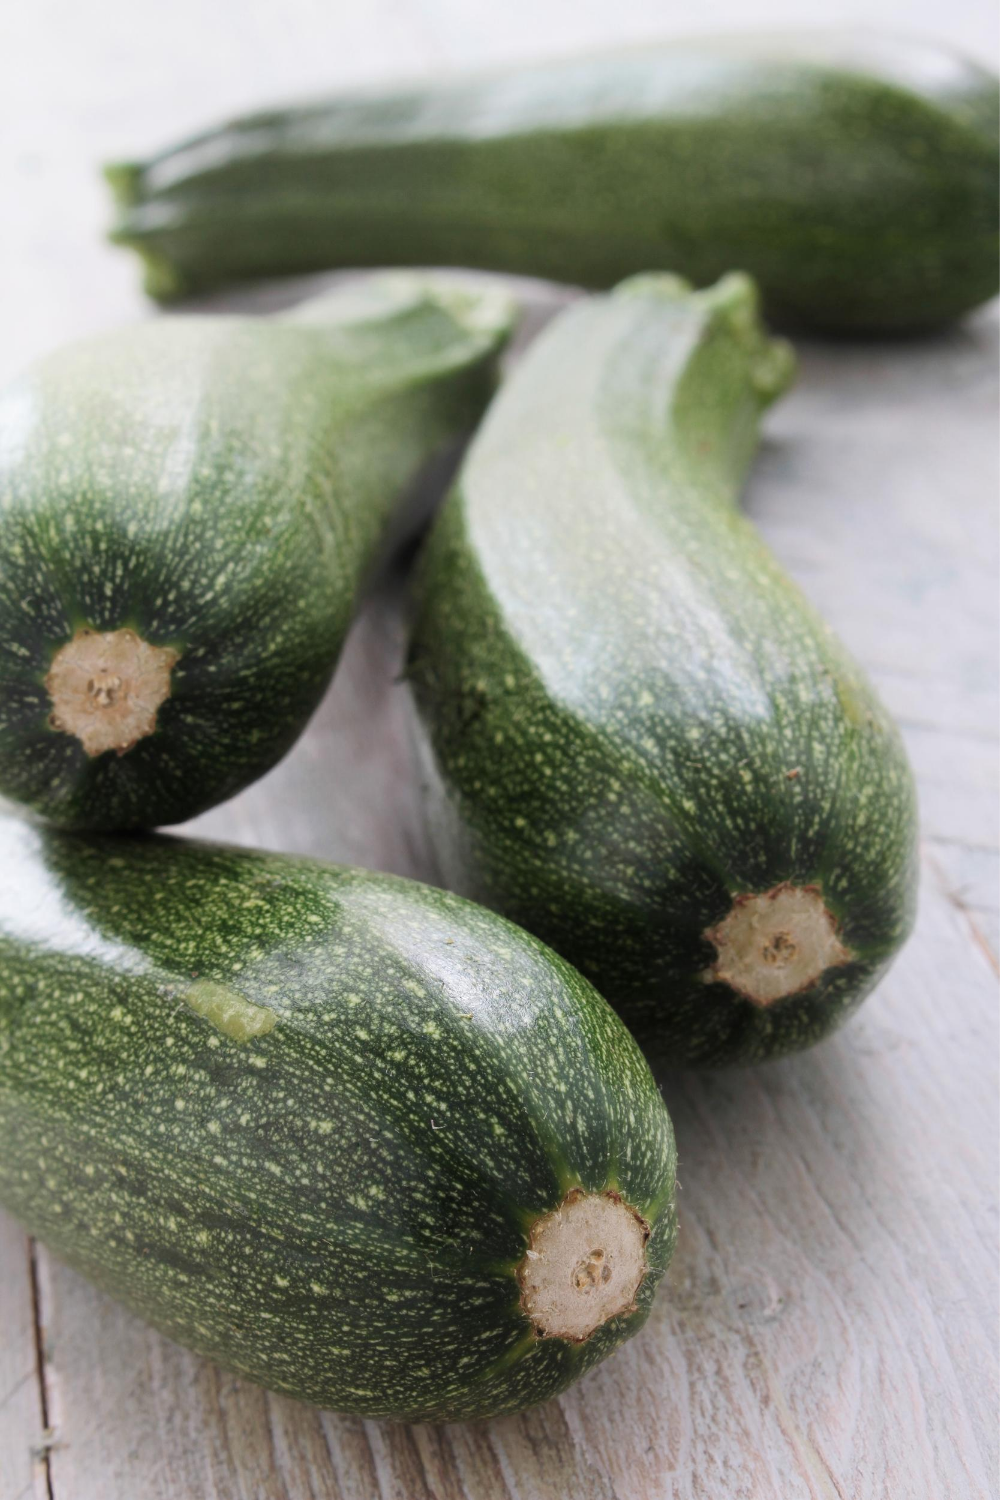
Because zucchini has a mild flavour, it can be used in pretty much any baking recipe that calls for applesauce or mashed bananas. Just substitute it at a 1:1 ratio and make sure you drain it well before baking with it.
And if anyone in the family is picky about veggies in their baked treats, simply peel off the dark skin before shredding it, and no one will ever know :)
ingredients
- ⅓ cup extra-virgin olive oil
- ½ cup honey
- 2 eggs
- 2/3 cup buttermilk
- 2 teaspoons vanilla extract
- 1 teaspoon baking powder
- ½ teaspoon baking soda
- 1 teaspoon ground cinnamon
- ½ teaspoon fine-grain sea salt
- ¼ teaspoon ground nutmeg
- 1 ½ cups grated zucchini (drain before using by wrapping in paper towels and squeezing over the sink)
- 1 ¾ cups all-purpose flour
- 1/2 cup chocolate chips (optional)
instructions
- Preheat the oven to 400°F. Grease muffin tin or line with muffin cups.
- In a large mixing bowl, combine the oil and honey and whisk until combined. Add the eggs, buttermilk, and vanilla and beat well.
- Sprinkle in the baking soda, baking powder, cinnamon, nutmeg, and salt and mix again
- Using a large spoon, stir in the zucchini, then add the flour and mix until combined. Fold in the chocolate chips (if using).
- Divide the batter evenly between the muffin cups and bake muffins for 15 to 20 minutes, or until a toothpick inserted into a muffin comes out clean.
- Let muffins cool in pan for 5-10 minutes then transfer to a while rack to cool completely. Store muffins in an air-tight container lined with paper towels (top and bottom) at room temperature for 2 days. The paper towels absorb moisture and help prevent muffins from getting soggy. Freeze any leftover muffins for up to 3 months.
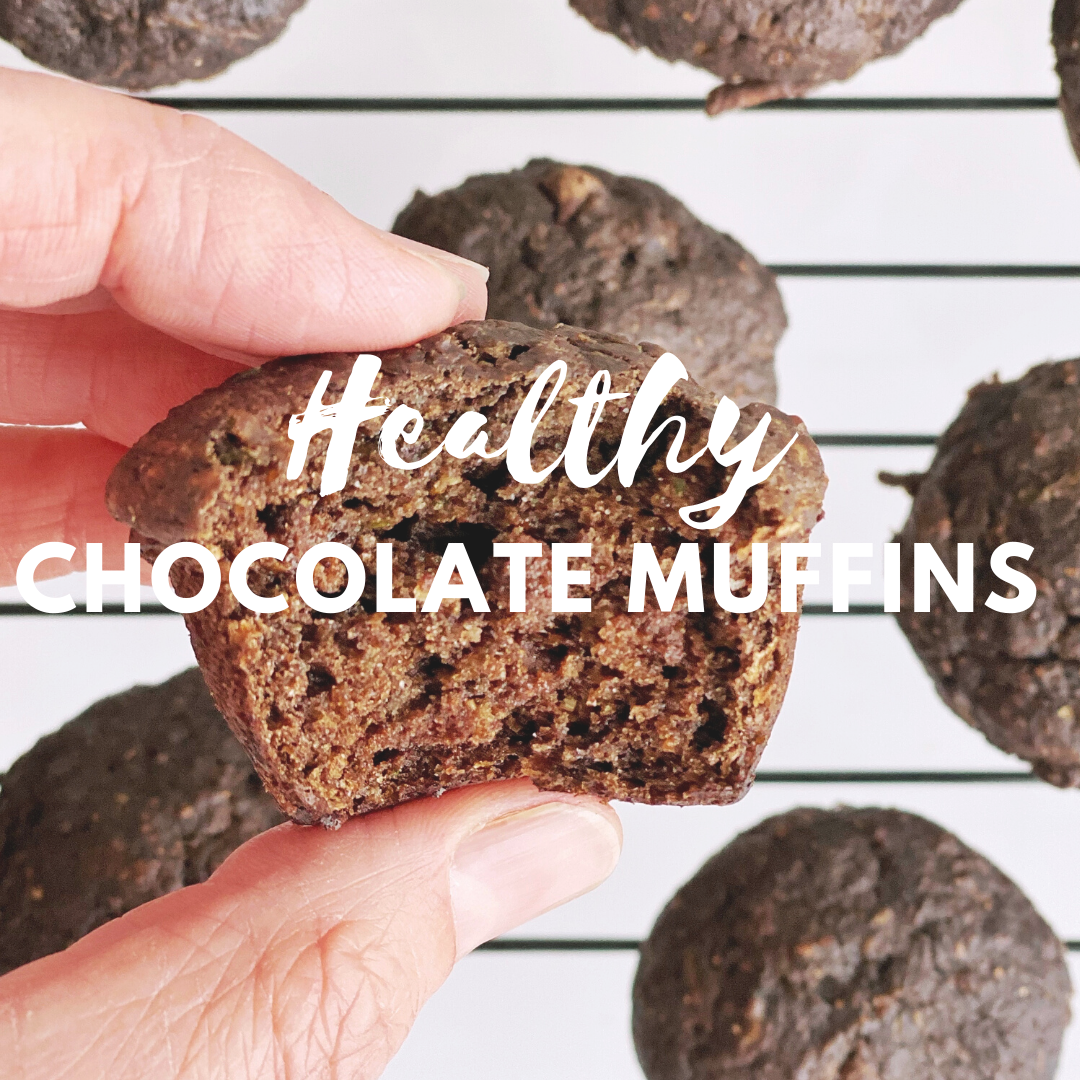
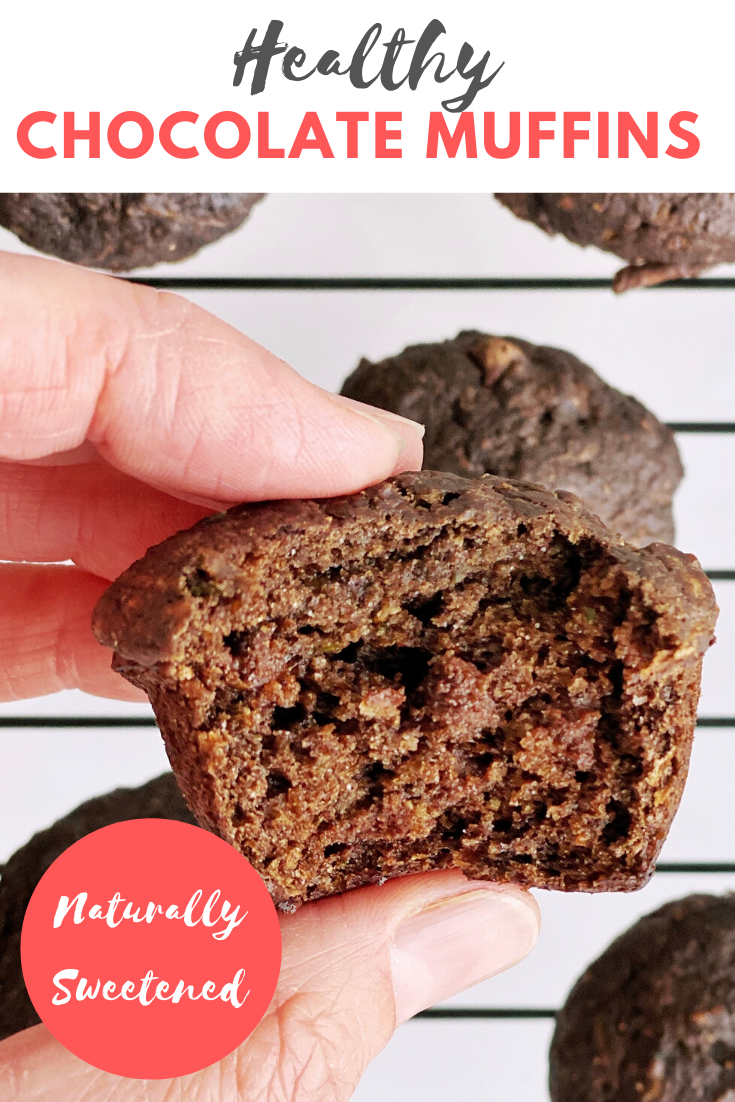
I'm so excited to share these fluffy and delicious healthy chocolate muffins with you. They're naturally sweetened with maple syrup, dairy free, nut free and egg free. I've subbed the cocoa with carob powder (a caffeine-free alternative to cocoa) and added in zucchini for extra nutrients and moisture.
I've made them into mini muffins (for my littles hands) but you can make them into regular size muffins or a l0af. Just adjust you cooking time to 20-30 minutes for regular muffins and 50-60 minutes for the loaf.
I hope you love them!
I've made them into mini muffins (for my littles hands) but you can make them into regular size muffins or a l0af. Just adjust you cooking time to 20-30 minutes for regular muffins and 50-60 minutes for the loaf.
I hope you love them!
INGREDIENTS
NOTES
Recipe adapted from my Chocolate Banana Mini Muffins, with reference to
Cookie & Kate.
- 1/3 cup melted coconut oil
- 1/2 cup maple syrup
- 2 flax eggs -(2 tbls flaxseed meal & 5 tbls water) ***Or sub with eggs ***
- 1/2 cup water
- 1 teaspoon baking soda
- 1 teaspoon ground cinnamon
- 2 teaspoons vanilla extract
- 1/2 teaspoon fine-grain sea salt
- 1 cup grated zucchini (squeeze out as much moisture as you can before using)
- 1 1/2 cups flour (I use 1/2 regular and 1/2 whole wheat flour)
- 1/4 cup carob powder (or cocoa powder)
- 1/2 cup semi sweet chocolate chips or carob chips
- Preheat the oven to 325°F (165°C) Grease mini muffin tin with coconut oil or line with muffin cups.
- Prepare your flax eggs: In a small bowl, mix 2 tbls flaxseed meal with 5 tbls water. Set aside and let rest 5 minutes.
- In a large bowl, mix the coconut oil and maple syrup together with a whisk. Add the flax eggs, water and vanilla and mix again.
- Sprinkle in the baking soda, cinnamon and salt and mix again
- Using a spoon, stir in the zucchini. Then add the flour and carob powder and carefully stir just until combined.
- Divide the batter evenly between the muffin cups and bake muffins for 12 to 15 minutes, or until a toothpick inserted into a muffin comes out clean.
- Let muffins cool in pan for 5-10 minutes then transfer to a while rack to cool completely. Store muffins in an air-tight container lined with paper towels (top and bottom) at room temperature for 2 days. The paper towels absorb moisture and help prevent muffins from getting soggy. Freeze any leftover muffins for up to 3 months.
NOTES
Recipe adapted from my Chocolate Banana Mini Muffins, with reference to
Cookie & Kate.
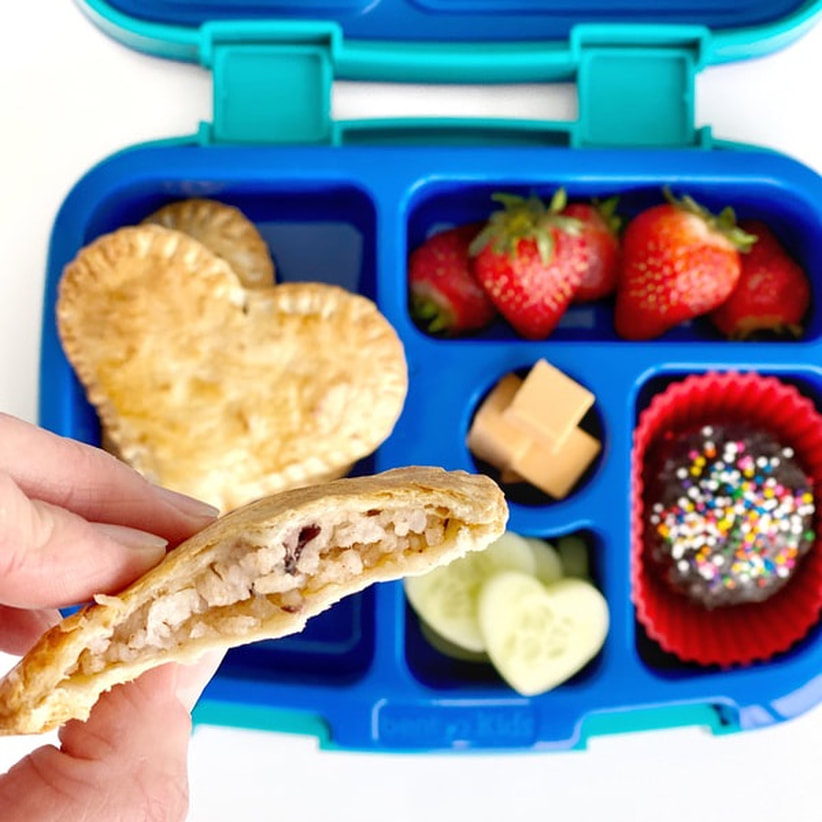
These hand pies are yummy to eat and super easy to make! They're also an amazing way to repurpose leftovers.
I made them using flour tortilla's (I used white but whole wheat works too) and I filled them with leftover rice and beans but they can be filled with anything Ie. leftover taco meat, roasted chicken & veggies, or make them sweet and fill them with apple pie or mixed berry filling.
I made them using flour tortilla's (I used white but whole wheat works too) and I filled them with leftover rice and beans but they can be filled with anything Ie. leftover taco meat, roasted chicken & veggies, or make them sweet and fill them with apple pie or mixed berry filling.
What you need:
Small flour tortilla's (whole wheat or white)
1 Egg Beaten
Pastry Brush
Large Heart Cookie Cutter
Baking Sheet lined with parchment paper
Filling of choice (nothing too runny)
Instructions:
1. Preheat oven to 350F and line a cookie sheet with parchment paper. You can use an Air Fryer to cook these too. Set the temp to 350F and use your broil rack.
2. Slice a few flour tortillas into hearts using a cookie cutter
3. Spoon filling on one heart tortilla, leaving a 1.5cm border. Using a. pastry brush, brush the border with a whisked egg and top with a second heart tortilla. Pinch the edges with a fork to seal.
4. Place the hand pie on a baking sheet and brush with whisked egg. Bake in the oven at 35oF for 5-10 minutes or until golden.
I love making easy healthy treats for my littles around Valentine's Day especially these easy, healthy, 3 ingredient Frozen Yogurt Banana Bites.
WHAT YOU NEED
This no bake recipe is a big hit with my kids and they love getting involved with making them too, especially when it comes time to drizzle the chocolate!
DIRECTIONS
Line a cookie with parchment paper
Slice bananas into rounds
Dip bananas slices into yogurt and place coated bites on a cookie sheet.
In a small microwave safe bowl melt chocolate chips
Drizzle chocolate over banana slices (or sprinkle with shredded coconut) and freeze until set.
Serve with fresh strawberries
*** Greek yogurt works too you will just have to dilute it with a bit of milk to make it runny enough to coat the bananas.
WHAT YOU NEED
- Ripe bananas
- Regular Vanilla yogurt * See note below
- Chocolate chips * or sub with shredded coconut
- Cookie sheet
- Parchment paper
This no bake recipe is a big hit with my kids and they love getting involved with making them too, especially when it comes time to drizzle the chocolate!
DIRECTIONS
Line a cookie with parchment paper
Slice bananas into rounds
Dip bananas slices into yogurt and place coated bites on a cookie sheet.
In a small microwave safe bowl melt chocolate chips
Drizzle chocolate over banana slices (or sprinkle with shredded coconut) and freeze until set.
Serve with fresh strawberries
*** Greek yogurt works too you will just have to dilute it with a bit of milk to make it runny enough to coat the bananas.
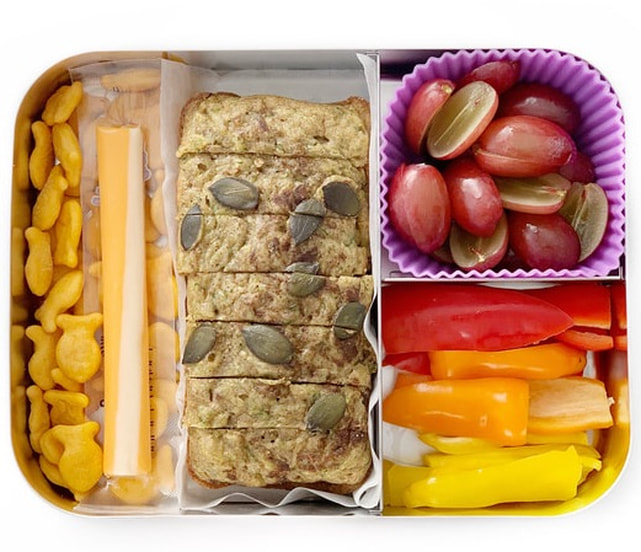
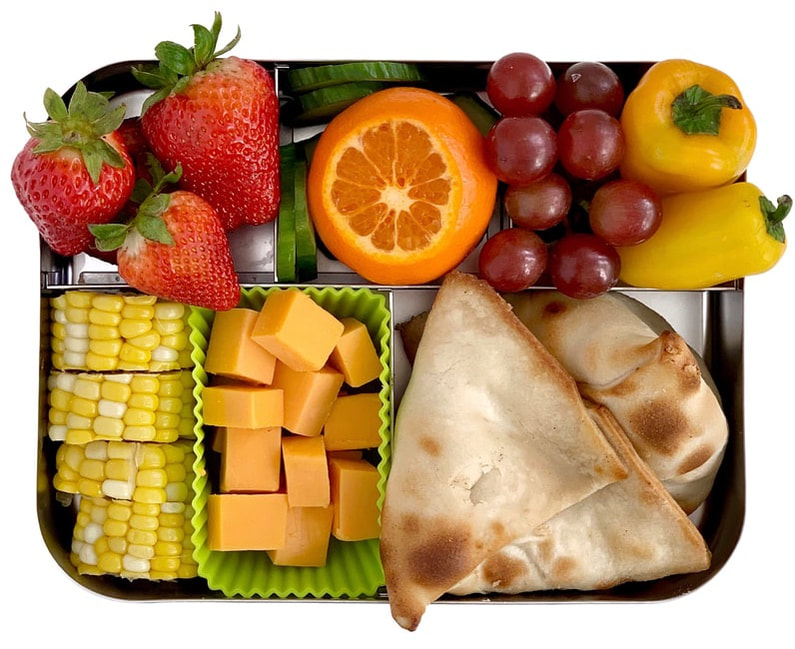
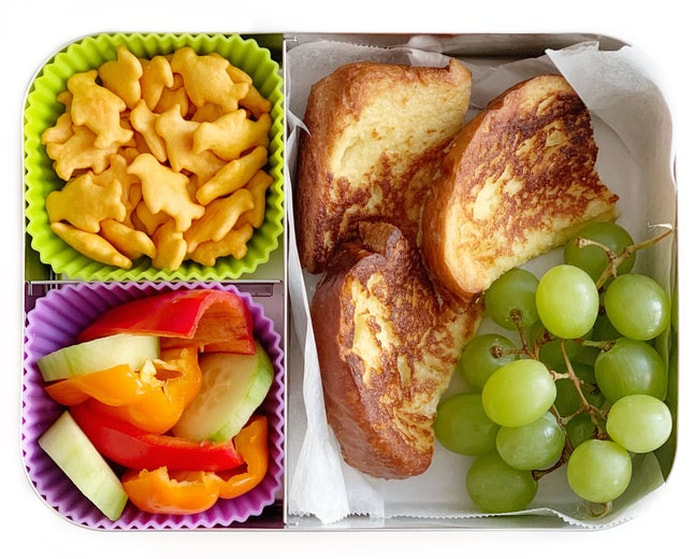
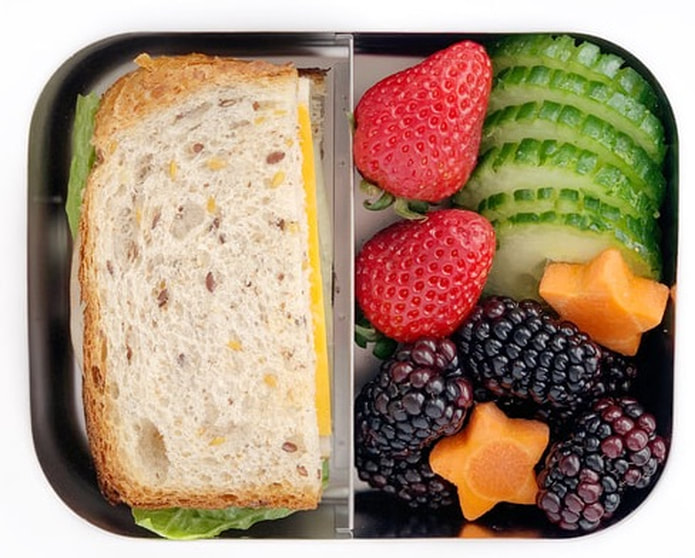
Here are 9 healthy and creative lunch ideas you can pack your kids for school. Each one is filled with fresh fruits and veggies that add a burst of colour in each box and make it fun and appealing for kids.
#1 Pasta Salad
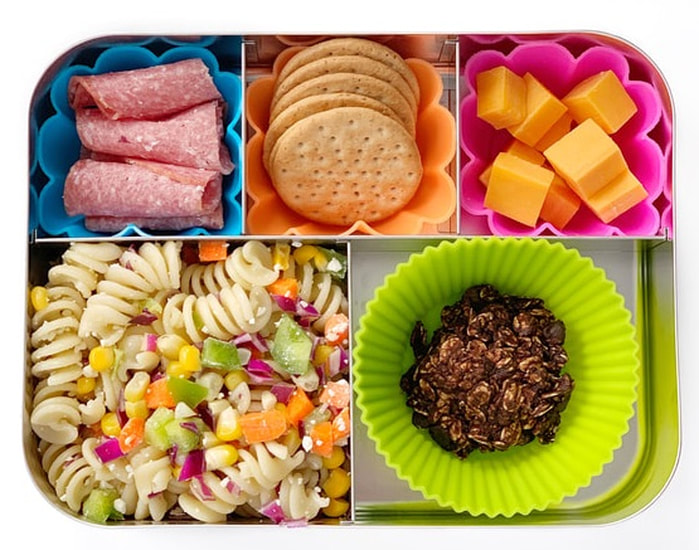
Cold pasta salad is quick and easy to make and super easy to customize. I've made this one with bell peppers, corn, purple cabbage and feta and dressed it with olive oil. I've served salami, crackers and cheese on the side and my yummy Double Chocolate Pumpkin Cookie.
#2 Zuccini Loaf
If you want your kids to DEVOUR their school lunch then include this yummy zucchini loaf. I've served it with a side of grapes and bell peppers and some kid favourites - goldfish and a cheese string. TIP: If you pack the loaf in the same compartment as the crackers make sure to wrap the loaf in parchment so that it doesn't make the crackers soft. The recipe for this yummy zucchini loaf can be found in my free lunch plan here.
#3 Samosas
Every time I'm at the grocery store I look for healthy prepared foods that I can easily toss in a lunchbox, like these yummy samosas. I've served them with a variety of fresh fruits and veggies and cubed cheese. Tip: cut corn into small rounds to make it easy for kids to eat.
#4 French toast
For those of you who have been following me for a while you know how much I love packing french toast. It's easy, delicious and I always have bread and eggs on hand so I pack it a lot! Here I've served it with grapes, cheese crackers, bell peppers and cucumbers. Feel free to include a small container of maple syrup with the French toast or just add a little syrup into the egg mixture before cooking it.
#5 Sandwich
Sandwich options are endless so talk with your kids and find out what toppings they like best. A few of my kids favourites are sunflower seed and jelly sandwiches, cream cheese and turkey and cheese. Here I've served it with fresh fruits and veggies. Tip: Slice carrots into star shapes using a mini cookie cutter and score cucumbers with a fork before slicing to make them fun.
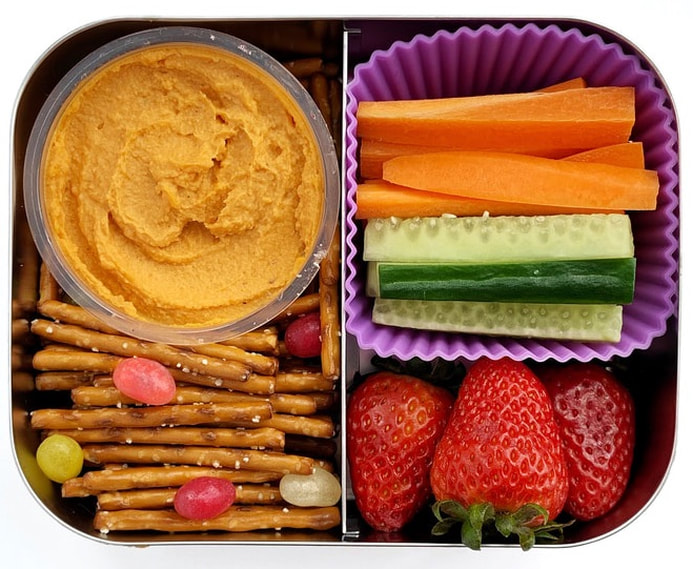
#6 Hummus
I am SO happy that my kids finally like hummus! It's a healthy spread that's packed with fibre and protein and you can buy it at any grocery store in convenient lunch size containers and an assortment of flavours. YAY!! I like to serve it with pretzels and veggies sticks and here I've also added a few fresh strawberries and Surf Sweets Jelly Beans.
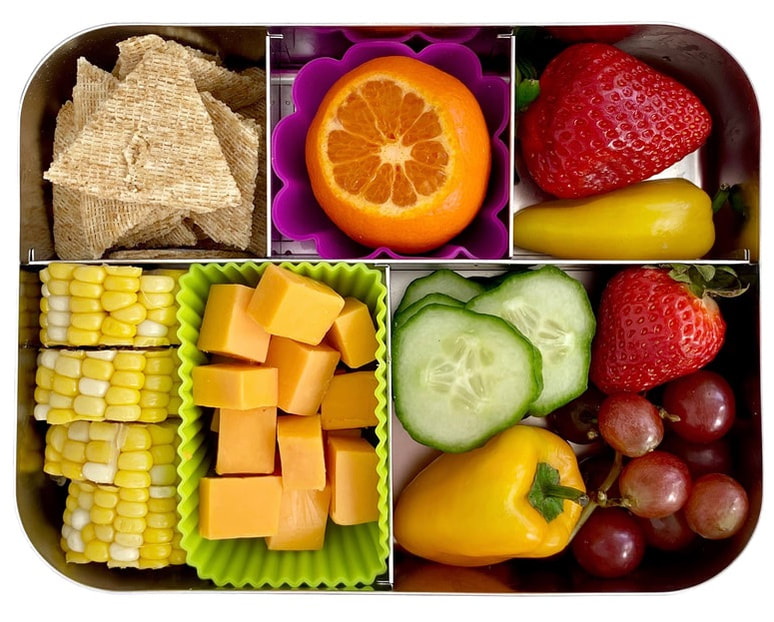
#7 The veggie Box
If you're kid is a veggisaurus like my Abi then this is the box for them! It's packed with loads of fresh colourful produce. I love mixing fruits and veggies together because it creates a rainbow of colour. You can skip the cheese and crackers or keep it in for some extra fibre and protein. TIP: Cut the top off of the orange to make it easy for kids to peel.
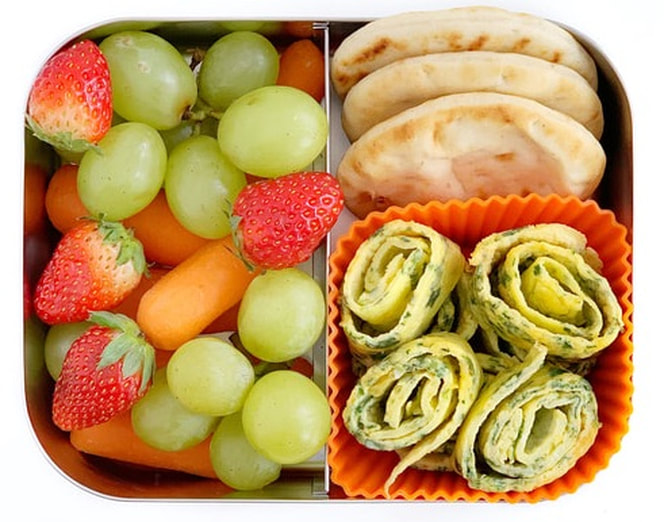
#8 Omelette rollups
If you're littles like eggs you'll have to try these yummy Spinach and Cheese Omelette Roll-Ups. They're easy peasy to make and customize. Click here for the recipe. I like to serve them with mini naan bread and as always, fresh fruits and veggies.
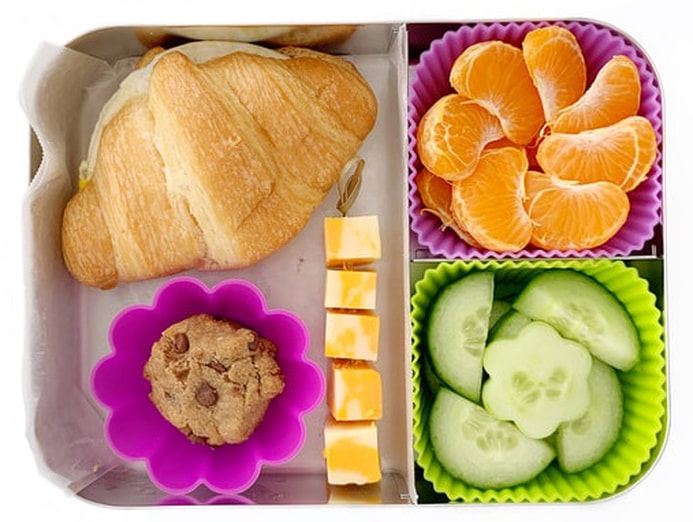
#9 BReakfast Croissant
My kids love croissants and their favourite way to eat them is with a fried egg. If you want to make them even more decadent and delicious try adding a slice of cheese and/or ham. Or simply serve a cheese kabob on the side like I've done above. Click here for my FAVOURITE chocolate chip cookie recipe.
I love pie and my FAVOURITE kind is banana cream. It’s rich, creamy and SO quick and easy to make which means I can make it anytime my family gets a serious craving for dessert!
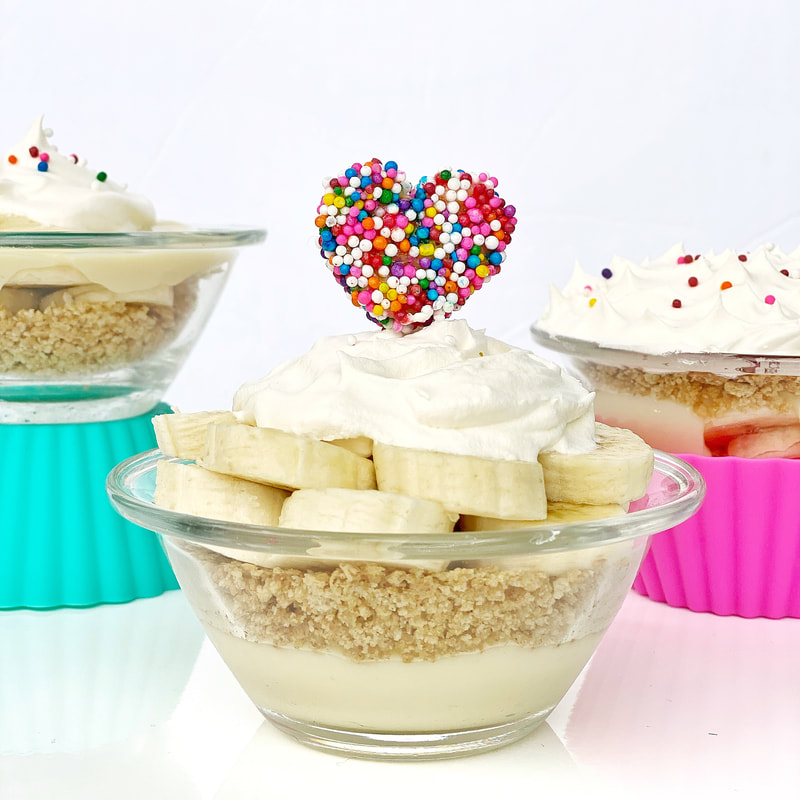
My banana cream pie recipe is lower in sugar than most recipes and way more fun because I portion the pie into mini glass bowls (mini mason jars work too) and top each with touch of sprinkles for colour!
To make the sprinkle heart: cut a slice of banana into a heart using a mini cookie cutter, dip in sprinkles, skewer with toothpick and place on top of dessert.
INGREDIENTS
FILLING
2 ripe bananas, sliced
1/4 cup organic cane or coconut sugar
2 1/2 tbls all-purpose flour
1/8 tsp salt
1 cup milk
1 egg yolk, beaten
1 tbls butter
1/2 tsp vanilla
CRUST (double recipe if making 1 large pie or buy a pre-made graham cracker pie crust)
1 cup crushed graham crackers
2 tbls butter, cold and cut into cubes
TOPPING (optional)
Whipping cream ( Which ever you prefer but I like the real whipping cream you have to whip yourself because it's made without preservatives and sugar)
Colourful sprinkles
DIRECTIONS:
In a saucepan, combine the sugar, flour, and salt. Add milk in gradually while stirring gently. Cook over medium heat, stirring constantly with a whisk, until the mixture is bubbly. Keep stirring and cook for about 2 more minutes, and then remove from the burner.
Stir a small quantity of the hot mixture into the beaten egg yolk to temper the egg (so that it doesn’t scramble). Immediately add egg yolk mixture to the rest of the hot mixture and mix well with a whisk. Cook for 2 more minutes; remember to keep stirring. When the mixture starts to thicken to a pudding consistency, remove it from the stove, and add butter and vanilla. Stir until butter has melted and mixture is smooth.
In a separate bowl mix graham cracker crumbs with cold butter using your hands until well mixed and crumbly. Divide mixture into 3 - 4 small glass jars and press down firmly to create a crust. Top with sliced bananas, cream filling and top with a dollop of whipping cream and sprinkles (optional).
Enjoy immediately
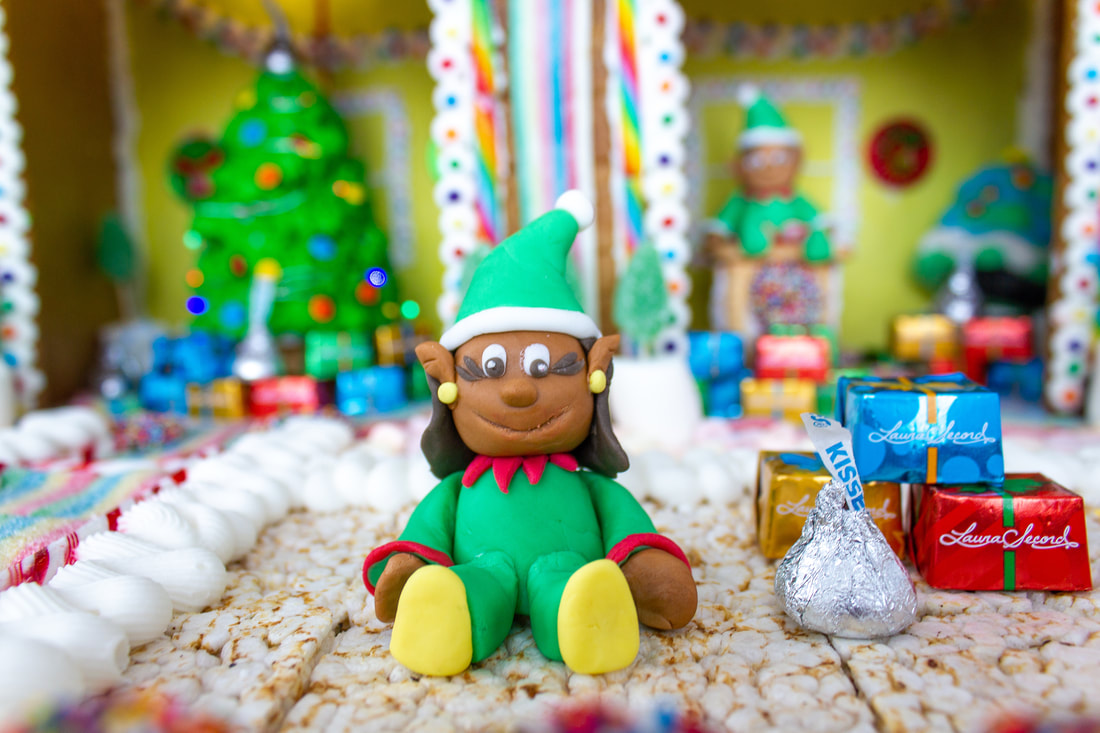
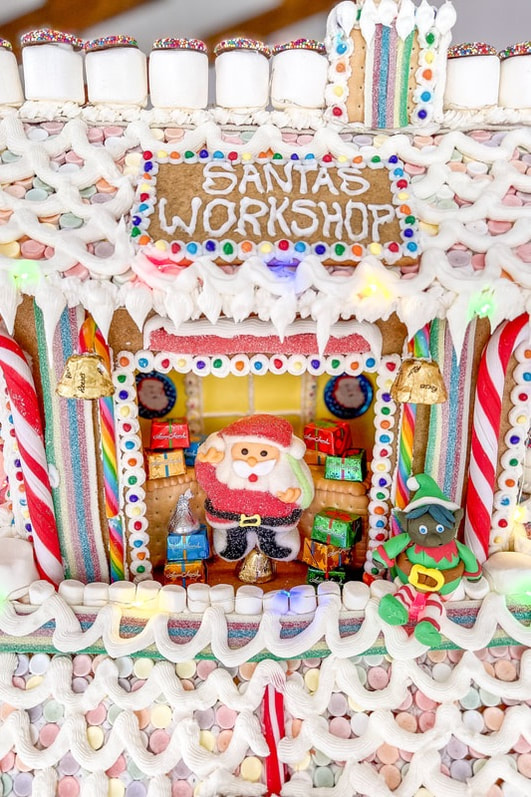
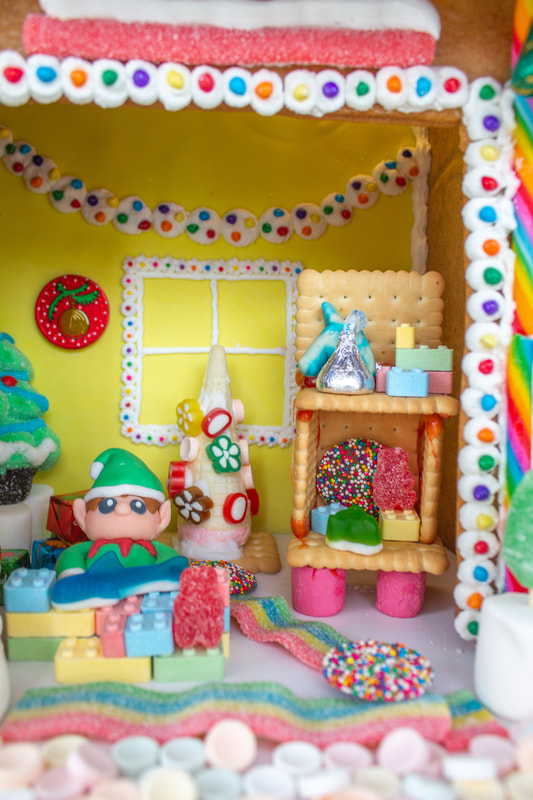
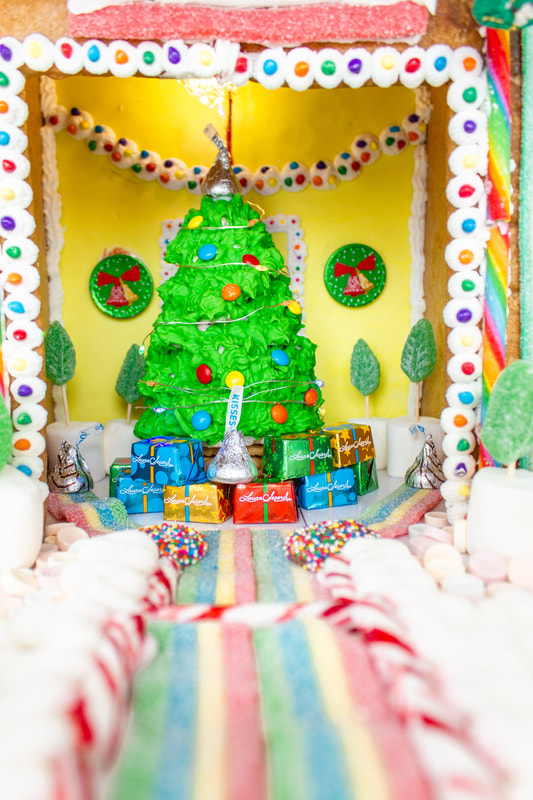
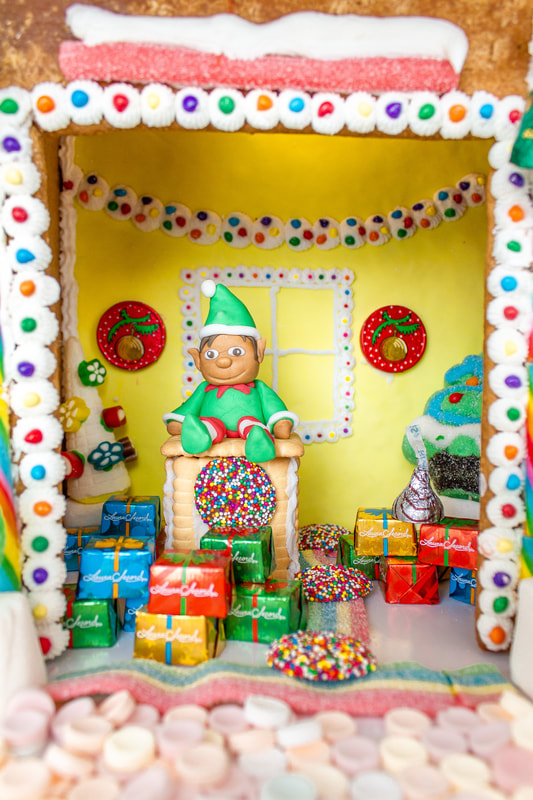
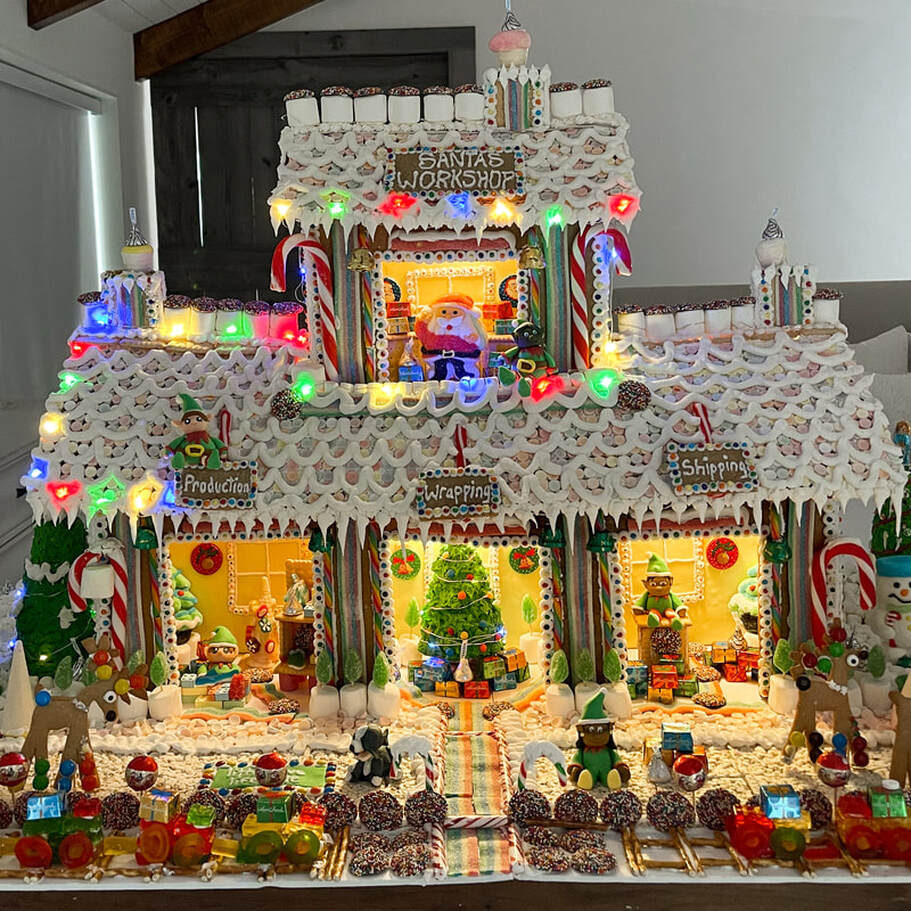
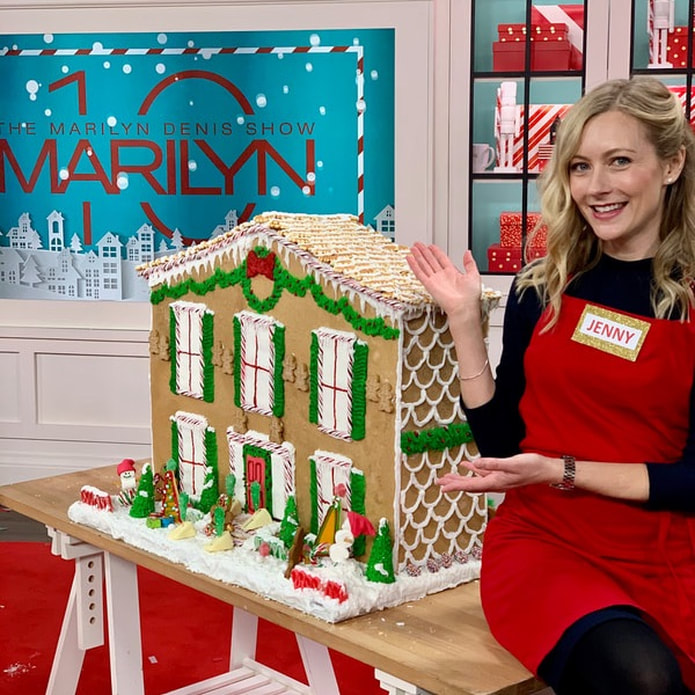
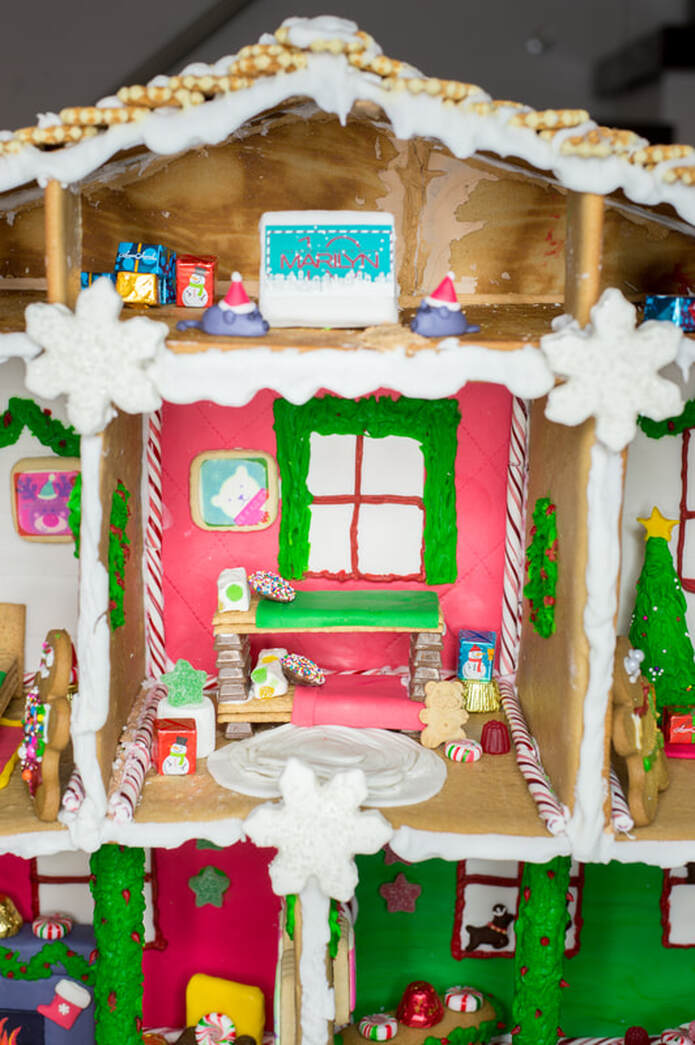
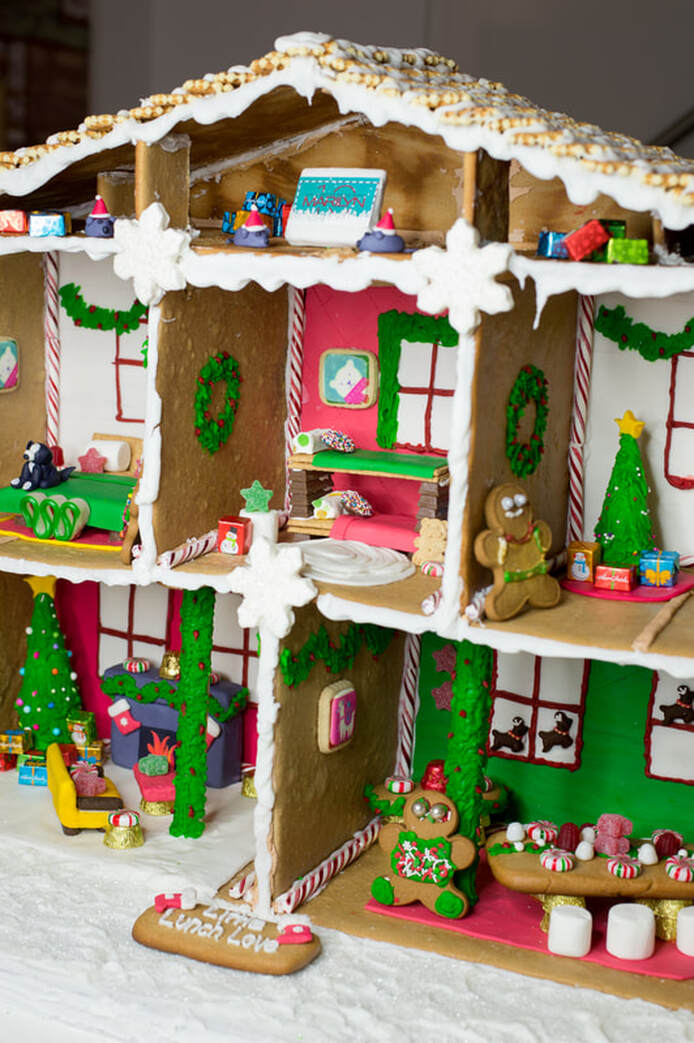
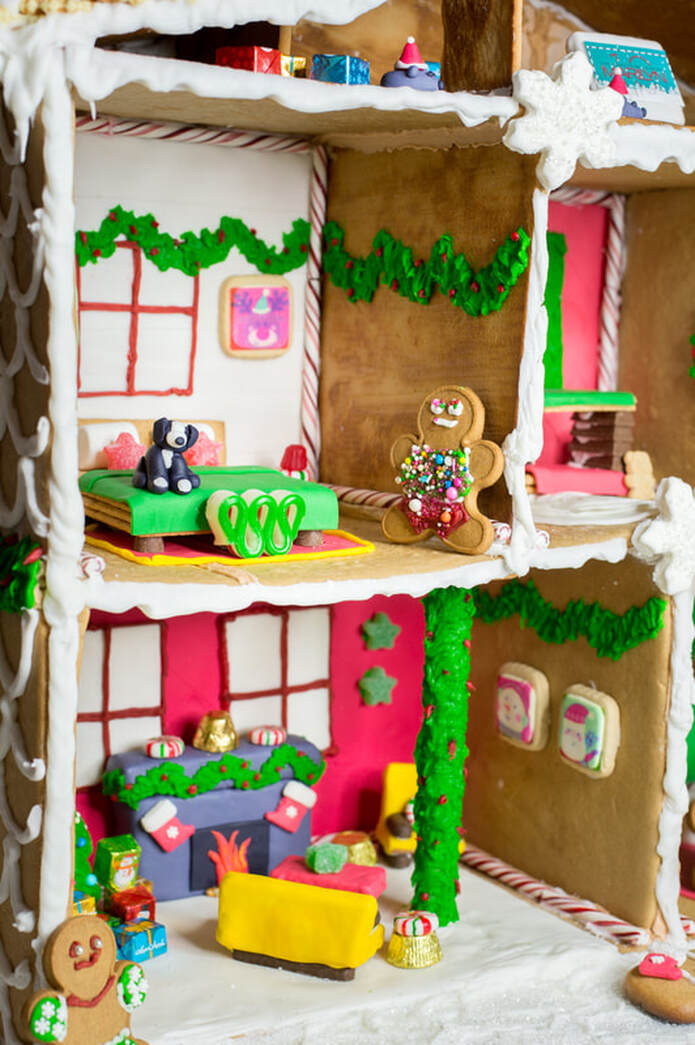
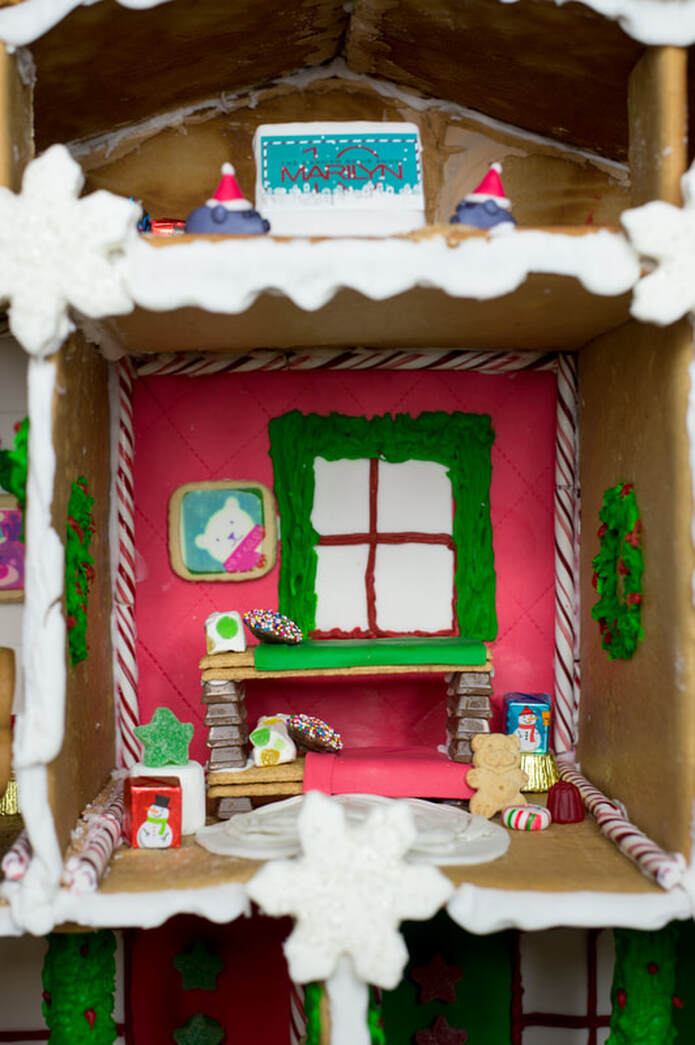
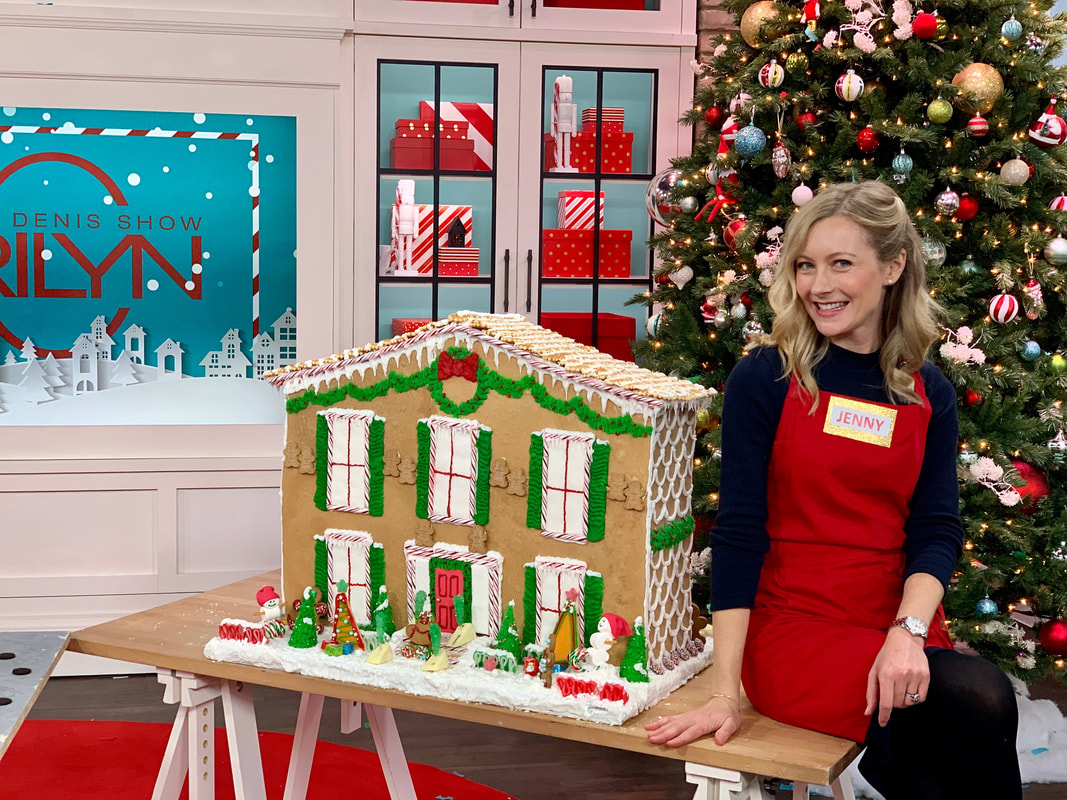
What’s the craziest thing you’ve ever done? I recently built a massive gingerbread dollhouse for the 9th Annual Gingerbread Showdown on the Marilyn Dennis show and it and was BY FAR the craziest thing I’ve ever done! Watch the show here.
 Me & Irene Matys
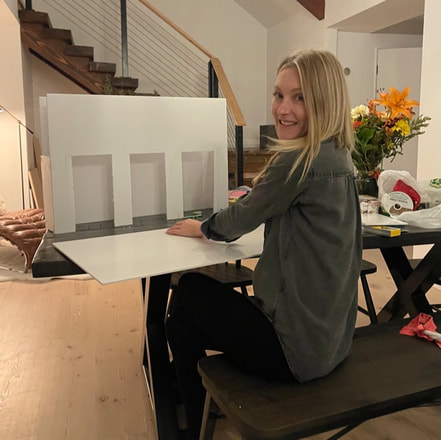
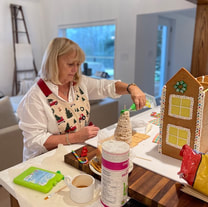
I used over 40 lbs of flour & 10 lbs of brown sugar to make the gingerbread cookie frame and it took me just under 1 week to complete from start to finish. I didn't sleep much that week but it was worth it! Watch the behind the scenes highlights in my instagram stories on @little_lunch_love
Why me? Well, the Marilyn Dennis show was looking for local influencers who would be up for the task of building a jumbo show stopping gingerbread house and my beautiful friend Irene Matys, a food stylist on the show (she's also an amazing recipe developer and food photographer) gave them my name!
I was absolutely up for the challenge and had to come up with an epic gingerbread house design quickly to land the show. The first idea that came into my head was a gingerbread dollhouse!! I knew my kids would love it (and me) and I thought the idea was super original and fun. I guess the show loved the idea too because they gave me the spot! Woo Hoo!
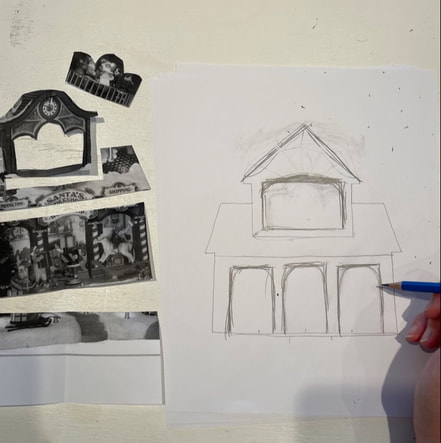
So I looked to my family’s favourite holiday movie ‘Home Alone’ for house inspo and called up Deron, a family friend who’s an engineer to help me with the design. I needed serious help making sure the structure could support itself and not crumble before or on the way to the show!
After the template was done I rushed home to get started with my baking. However, I couldn’t use just any gingerbread recipe. It had to be one that would be edible but STRONG! It also had to be a recipe without any leavening agents because I didn't want my panels puffing up in the oven.
After the template was done I rushed home to get started with my baking. However, I couldn’t use just any gingerbread recipe. It had to be one that would be edible but STRONG! It also had to be a recipe without any leavening agents because I didn't want my panels puffing up in the oven.
After a lot of research this was my recipe:
Ingredients:
6 cups all purpose flour
1 1/4 cup packed brown sugar
1 1/2 cup corn syrup
1 cup margarine
1 tablespoon cinnamon
1 1/2 teaspoon ginger
Directions:
In a medium size sauce pot, add your corn syrup, margarine and brown sugar and heat over medium until your margarine is melted. Stir well and set aside.
In a large food processor, add your flour, cinnamon and ginger. Pulse until mixed. Then slowly (very slowly) pour in your margarine/sugar mixture. Pulse or mix on low until a ball forms. Or if the food processor gives up... dump the dough out and continue mixing by hand until a big ball of dough forms. If your dough needs a touch more liquid (because baking is like that sometimes) feel free to add a tablespoon of water, one at a time, until the dough is your desired consistency.
Let sit for 5-10 minutes at room temperature then roll out on parchment paper into the desired size and thickness. Bake at 350 for 10 minutes. Check for any air bubbles in the dough at this point and if there are any prick them gently with a toothpick. Then continue to bake for another 5-10min (depending on the size of your cookie). You want the gingerbread to be baked through and slightly brown. If you under bake the cookie it could bend.
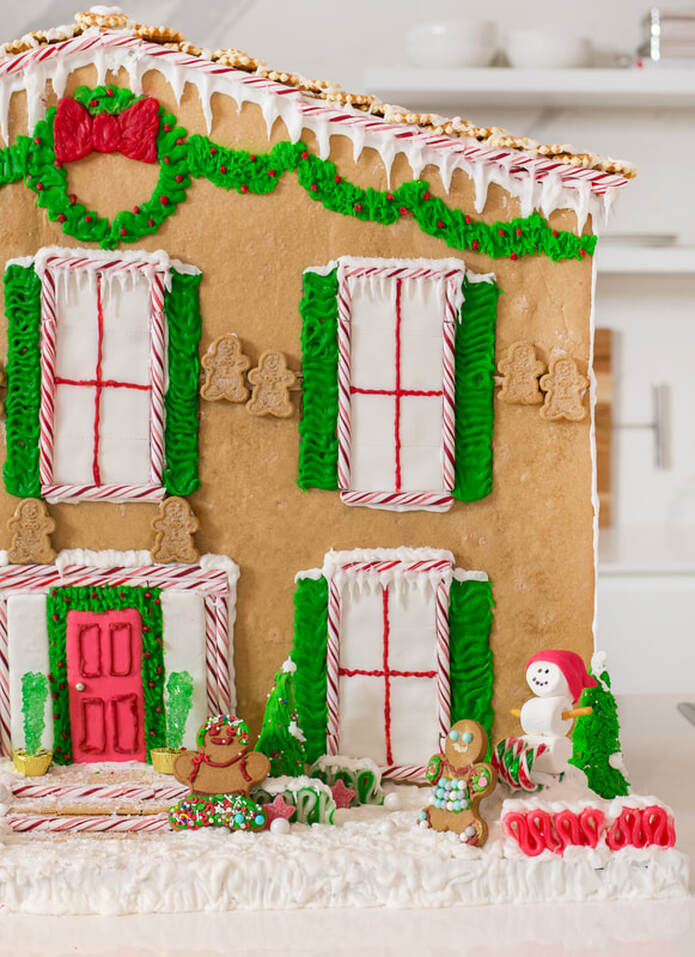
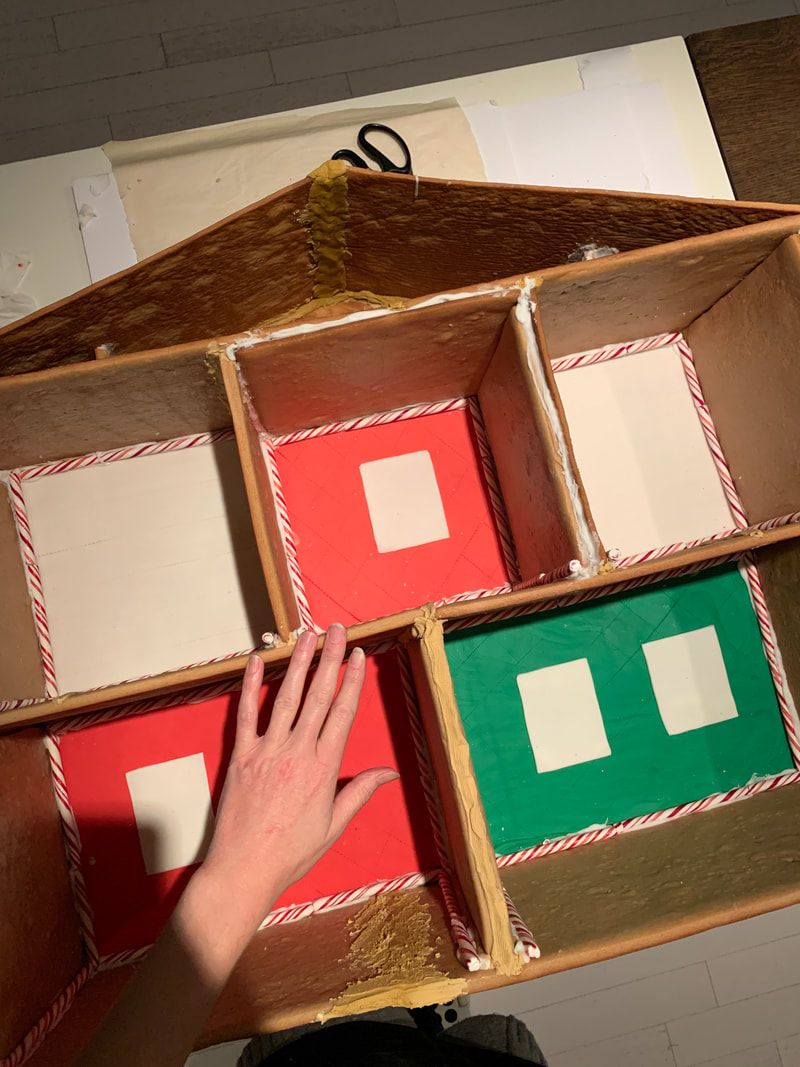
It took me about 2 days to bake all of the gingerbread for the gingerbread house. There were a total of 23 panels and they weighed a TON so I decided to build the house laying down to make it easy to glue together with icing. I used pre-made icing from Bulk Barn and tinted it with brown food colouring to match the gingerbread house.
It took me about 2 days to bake all of the gingerbread for the gingerbread house. There were a total of 23 panels and they weighed a TON so I decided to build the house laying down to make it easy to glue together with icing. I used pre-made icing from Bulk Barn and tinted it with brown food colouring to match the gingerbread house.
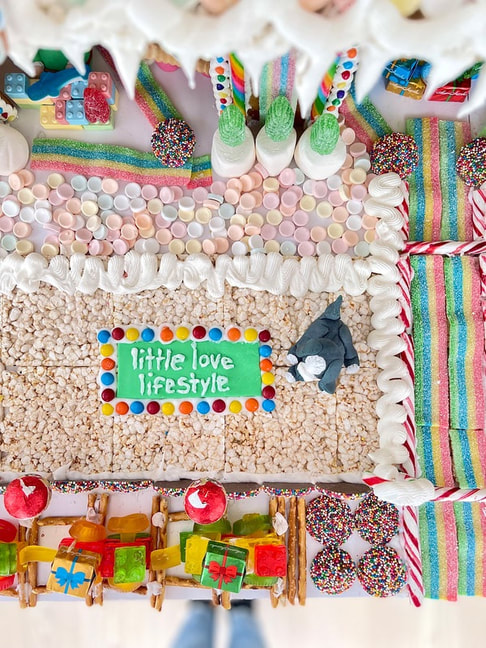
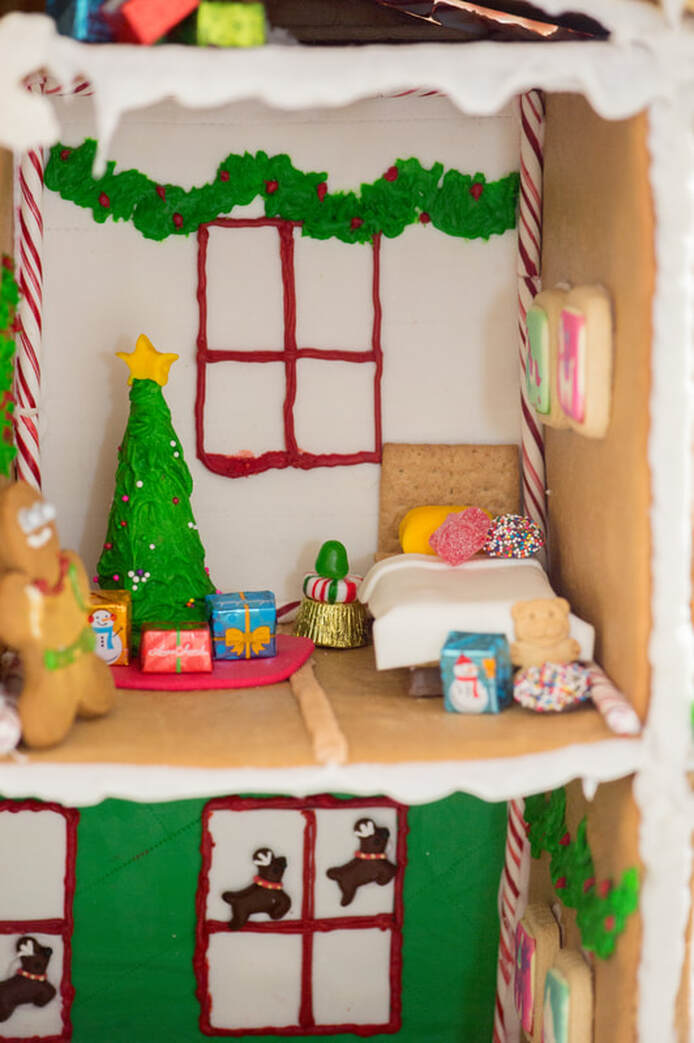
While the icing was drying on the frame I got to decorating the walls with fondant (for wallpaper) and icing.
I started making the furniture using graham crackers as the base and wrapped them with fondant.
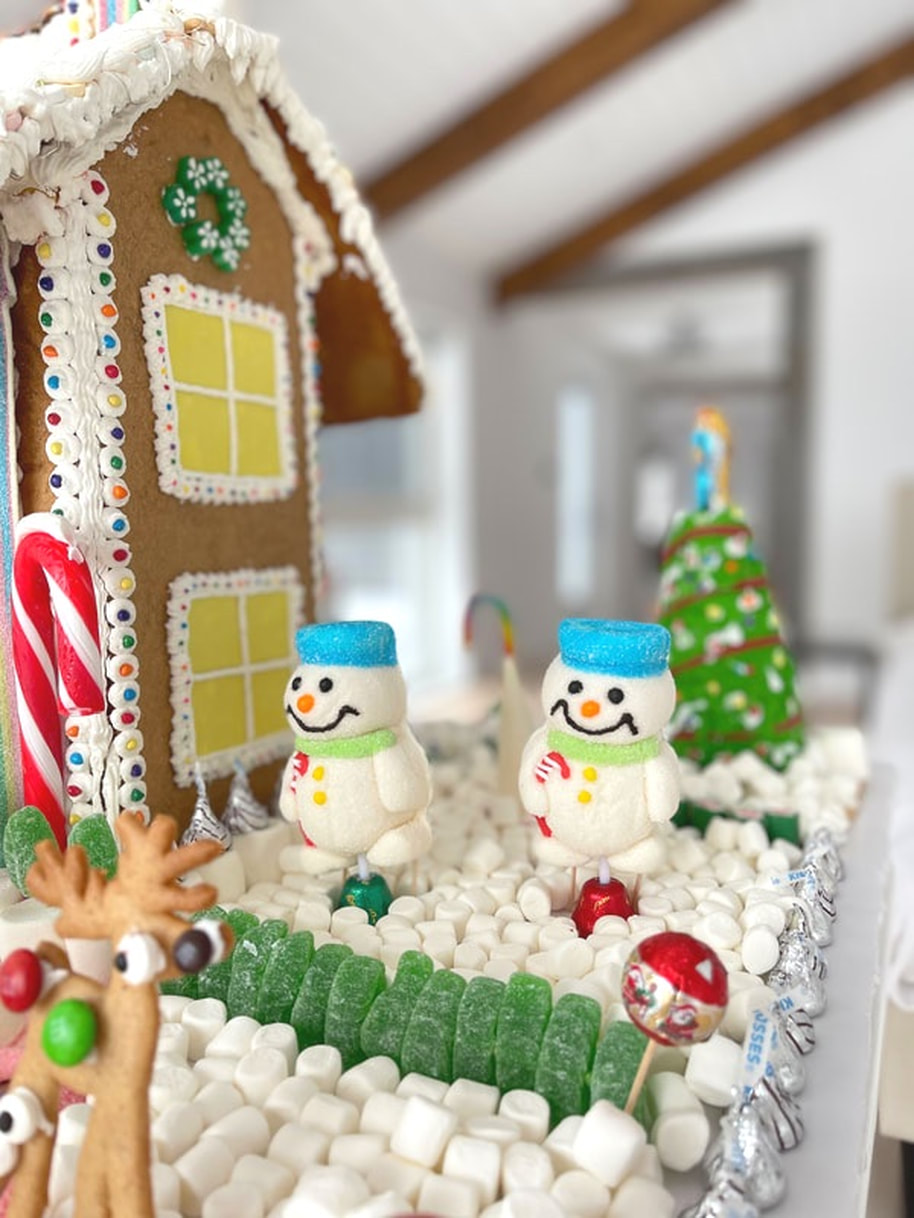
The Christmas trees were made from sugar cones decorated with icing and sprinkles.
Then I went to Bulk Barn to buy all the candy for the house. They had the most amazing selection of candy and icing. Some of my favourite purchases were:
- Candy cane sticks - I used them to outline the rooms and outside windows (show below)
- Foil wrapped chocolates that looked like presents - these went under the tree and around the house
- Holiday sugar cookies - the perfect size to use as wall art in the inside of the house
- Sour gummy stars - in red in green
- Graham crackers - for the furniture
- Waffle chips - for the roof shingles
- Pre-made icing - in red, green and white
- Fondant and food colouring - wall paper, carpets and bedding.
Now I had only two full days left to decorate and that meant I had to prop up the house. I was SO nervous but my husband and I carefully propped it up and it didn’t crumble! HURRAY!!!
Then I called my mom and a few friends over to help me finish up the house. Even my kids got involved! I was overjoyed at the love and support from everyone. I was super appreciative too because I could never have done this alone.
The gingerbread house was finally finished and I was in love!
Now it was time to pack it in the car and take it to the Marilyn Dennis show. My husband and I carefully lifted it up and carried it out of the house into my sisters car. It made for quite the spectacle on the street. Thanks for this photoTara Noelle!
Everyone loved the gingerbread house on the show and I'm happy to say it took first place. I am so grateful to the Marilyn Dennis show for giving me this opportunity. I had the most incredible time and learned so much. Thank you.
Special thanks to my husband Andrew for all of his patience, love and support while I made a complete disaster of our kitchen EEK! To my mama for cheering me on every step of the way (then stepping in and helping me finish it up). To my kids Brookson and Abi, mama is so sorry you couldn't eat or play with the house for the week. To my sister Jamie Kalynuik from Toronto Yoga Mamas for driving me and being with me at the show. Oh, and thanks for parking your car in the middle of the street during rush hour so that I had an audience when loading the house into your trunk - which you forgot how to open, then accidentally had loaded with a stroller! haha
To Tara Noelle for capturing all of these beautiful photos. To Bulk Burn for all of the candy and icing for my house. And to my beautiful competitor Betty from @stemsandforks This was a huge undertaking for both of us and we both walked away winners!
If you've read this far.... thank you! Your support means the world to me too and I appreciate it with all my heart.
Merry Christmas Happy New Year!
~ Jenny
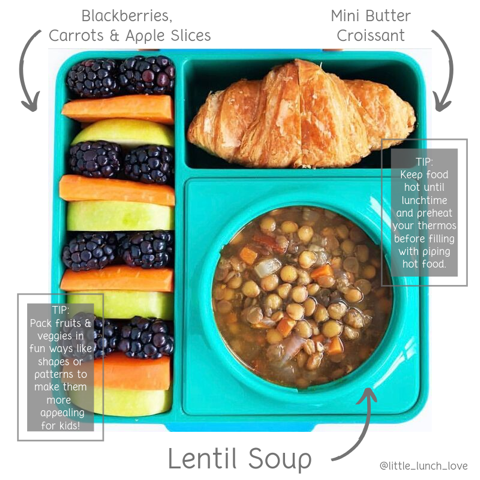
One of my favourite recipes to make in the fall is Lentil Soup. It's hearty, delicious, and always a hit with my littles!
When I make lentil soup, I always make a double batch so that we can enjoy it for dinner with crusty bread and have enough leftovers to enjoy for lunch the next day. Just reheat the soup the next day and pack it in your child's thermos. I love to serve a butter croissant and fresh fruit on the side.
Tip: Separate the lentils from the broth before storing it in the refrigerator overnight because the lentils will absorb all the broth and become too mushy.
Ingredients:
1 900ml Carton beef or chicken broth
2 540ml cans of lentils, drained & rinsed
1 medium carrot, diced
1/2 medium onion, diced
2 cloves garlic, minced
1/3 cup pancetta
2 sprigs fresh thyme
1 tablespoon apple cider vinegar
salt and pepper to taste
Instructions:
In a large soup pot over medium heat, fry the pancetta until golden and crispy. Remove from pan, set aside and discard fat.
In the same soup pot, cook onions until soft. Add garlic and cook until fragrant (about 1 minute). Add carrots, lentils, pancetta, broth, thyme, vinegar, salt & pepper and cook over medium heat 10-15 min. Taste and adjust seasoning to your liking.
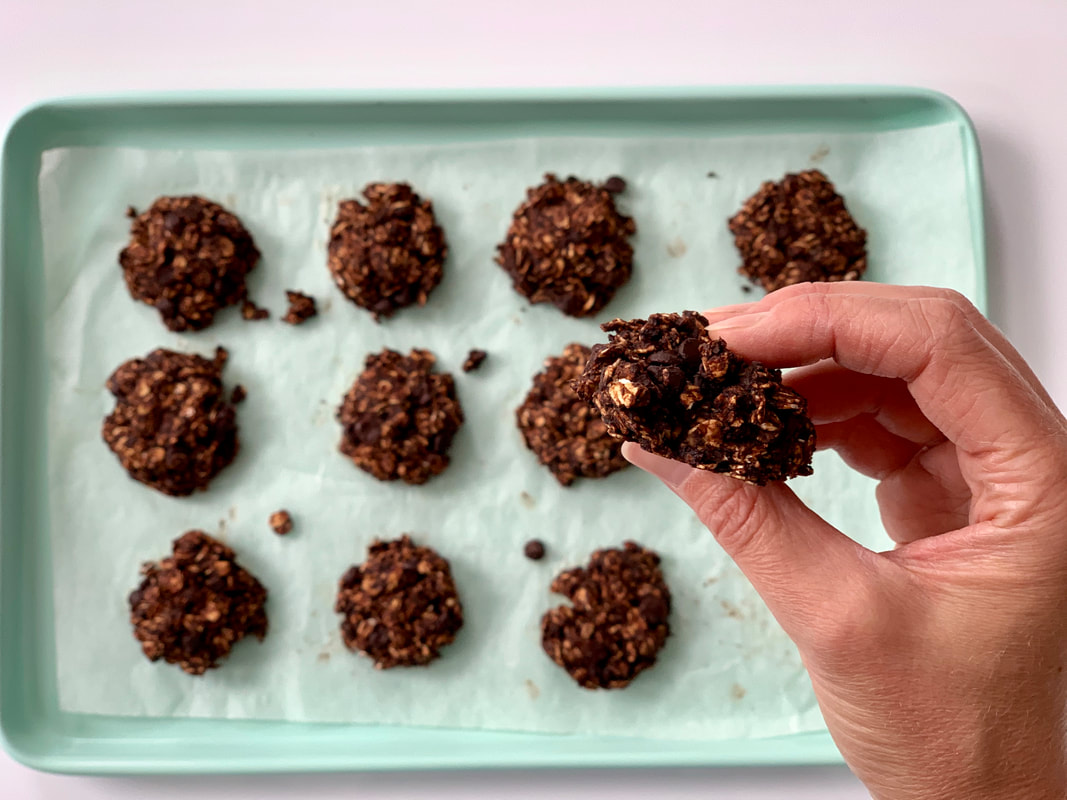
I’m so excited to share my FAVOURITE new fall cookie recipe with you!
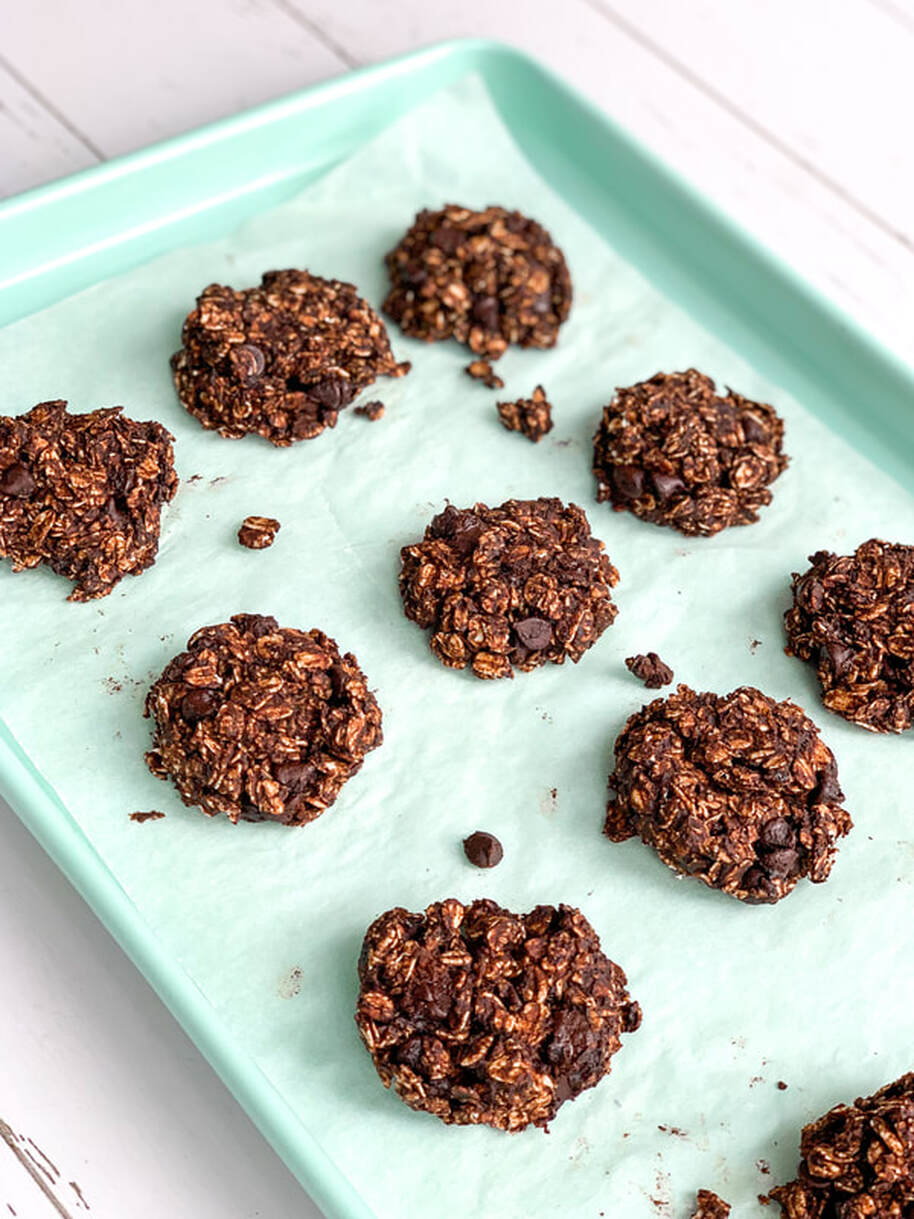
These soft, chewy and double chocolaty cookies with a hint of pumpkin flavour are quick & easy to make, naturally sweetened and totally kid (and mom) approved!
They pack perfectly in a lunchbox and freeze like a dream so make sure you bake a double batch!
Ingredients:
Instructions:
Preheat oven to 350°F. Line 1 baking sheet with a silicone baking mat or parchment paper.
In a large bowl, mix maple syrup, pumpkin puree and vanilla until well combined.
Add in the cocoa powder, cinnamon and salt and mix again until well combined.
Add in the rolled oats 1/2 cup at a time mixing batter each time to make sure oats are completely covered with chocolatey goodness!
Lastly stir in the chocolate chips.
Using a medium cookie scoop (about 2 tablespoons) scoop the cookie dough portions onto prepared baking sheet at least 1 inch apart. Gently flatten and shape cookies with your hands.
Bake 10-11 minutes and enjoy!
Note: You can sub the pure pumpkin with sweet potato, banana or any nut/seed butter.
These soft, chewy and double chocolaty cookies with a hint of pumpkin flavour are quick & easy to make, naturally sweetened and totally kid (and mom) approved!
They pack perfectly in a lunchbox and freeze like a dream so make sure you bake a double batch!
Ingredients:
- 1/3 cup maple syrup
- 1/3 cup pure pumpkin puree (not pumpkin pie)
- 1/4 tsp vanilla
- 1/4 cup cocoa powder
- 2 tsp cinnamon
- pinch salt
- 1 1/2 cups rolled oats
- 1/3 cup chocolate chips
Instructions:
Preheat oven to 350°F. Line 1 baking sheet with a silicone baking mat or parchment paper.
In a large bowl, mix maple syrup, pumpkin puree and vanilla until well combined.
Add in the cocoa powder, cinnamon and salt and mix again until well combined.
Add in the rolled oats 1/2 cup at a time mixing batter each time to make sure oats are completely covered with chocolatey goodness!
Lastly stir in the chocolate chips.
Using a medium cookie scoop (about 2 tablespoons) scoop the cookie dough portions onto prepared baking sheet at least 1 inch apart. Gently flatten and shape cookies with your hands.
Bake 10-11 minutes and enjoy!
Note: You can sub the pure pumpkin with sweet potato, banana or any nut/seed butter.
Wondering what lunches to pack your kids their first week back to school? Read this article for 4 easy and exciting lunch ideas.
My littles are back to school next week and I'm packing them special treats in their lunchboxes to celebrate!
I've chosen fun and colourful gummy bears, worms and jelly beans from Surf Sweets Organic Candies as their special treat because they're made with organic natural sweeteners and fruit juice and made without synthetic colours, and flavours.
They're also made in facility free of nuts and the top 10 food allergens which makes them the perfect sweet treat to pack for school!
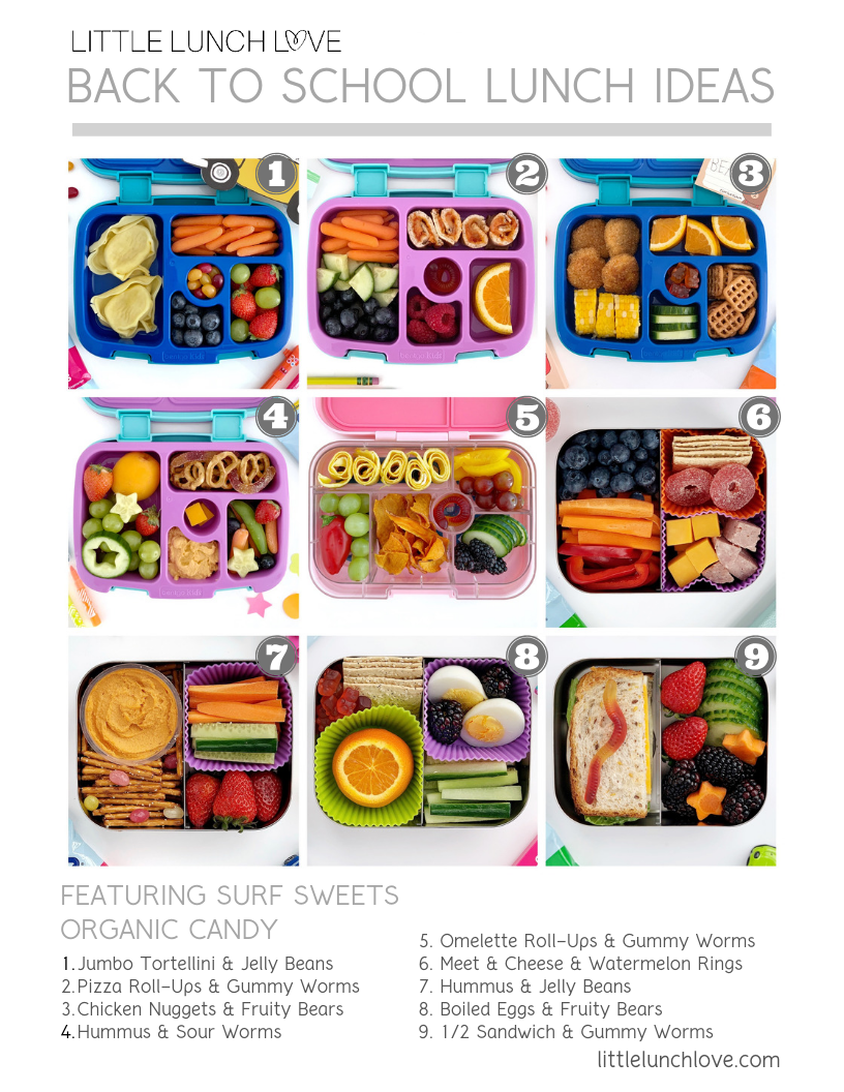
Chicken Nuggets
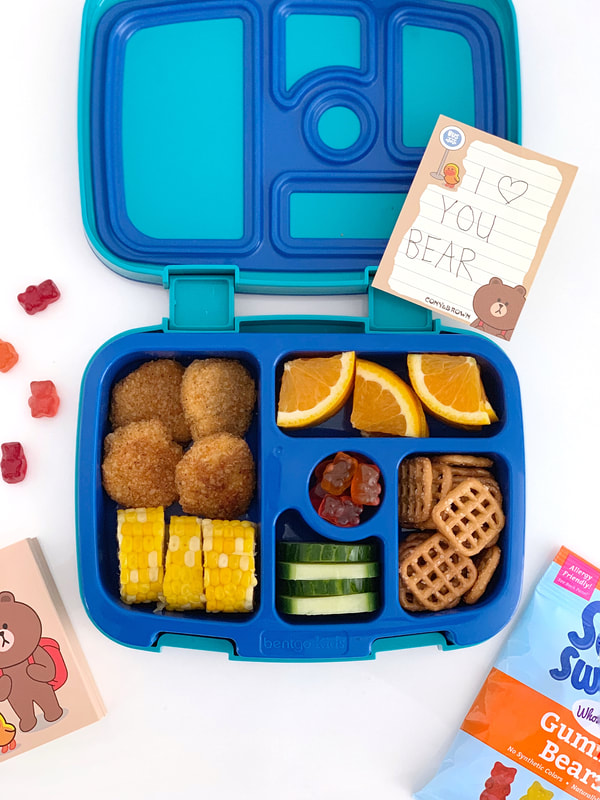
I love packing chicken nuggets because they're easy to make and always a hit with my kids. I serve them with fresh sweet corn (cut into rounds for easy eating), juicy orange quarters, cucumber slices, and waffle pretzels.
I've included Surf Sweets Organic Fruity Bears for a special treat and these adorable bears are made with organic fruit juice and organic cane sugar.
** Note: I pack chicken nuggets cold but you can serve them hot in a thermos. I recommend lining the thermos with a paper towel first to keep the nuggets from getting soggy.
Pizza Roll-ups
My kids love pizza but because a slice of pizza is difficult to fit in a lunchbox I've started making pizza roll-ups! These can be made with leftover pizza or you can make them from scratch using naan bread (recipe below).
They hardly take up any room in the lunch box which means you can fill the rest of the compartments with fresh colourful fruits & veggies and a Surf Sweets Gummy Worm for a super fun and special treat!
Pizza Roll-ups
Ingredients:
Naan Bread
Pizza Sauce
Mozzarella Cheese
Directions:
Spread Pizza sauce on naan bread. Sprinkle with mozzarella cheese. Warm in the oven until cheese melts. Let cool slightly then roll tightly into a cylinder shape and cut into bite size pieces.
Jumbo Tortellini
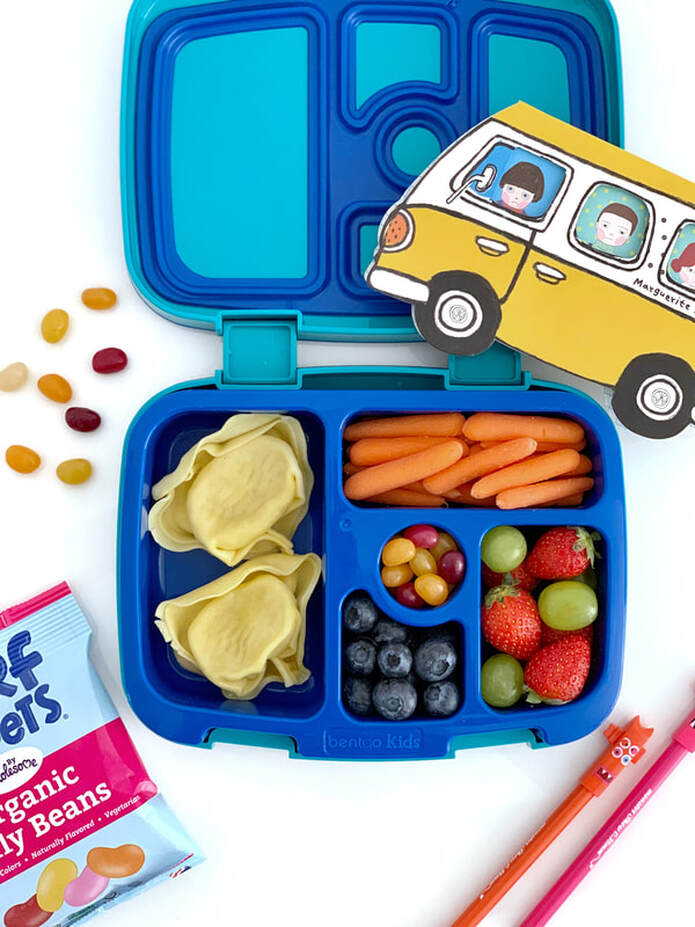
I love packing food my kids can eat with their hands! Here I've packed jumbo tortellini (no fork, no sauce, no mess) with baby carrots (no washing, no cutting), fresh grapes, berries and these colourful Surf Sweets Organic jelly beans!
These jelly beans are SO YUMMY because they're drenched with fruit flavour, and made with organic cane sugar and organic fruit juice.
These jelly beans are SO YUMMY because they're drenched with fruit flavour, and made with organic cane sugar and organic fruit juice.
Hummus
Hummus is an easy, healthy food to pack for lunch! I serve it with a variety of veggies and pretzels for dipping, fresh fruit, cubed cheese and one or two tangy and sweet Surf Sweets Sour Worms.
These super fun sour worms are made with organic fruit juice, contain no artificial colours or flavours.
** Tip: Mix fruits & veggies together to create a fun rainbow of colour.
These super fun sour worms are made with organic fruit juice, contain no artificial colours or flavours.
** Tip: Mix fruits & veggies together to create a fun rainbow of colour.
54 Quick & Easy back to school lunch ideas for kids
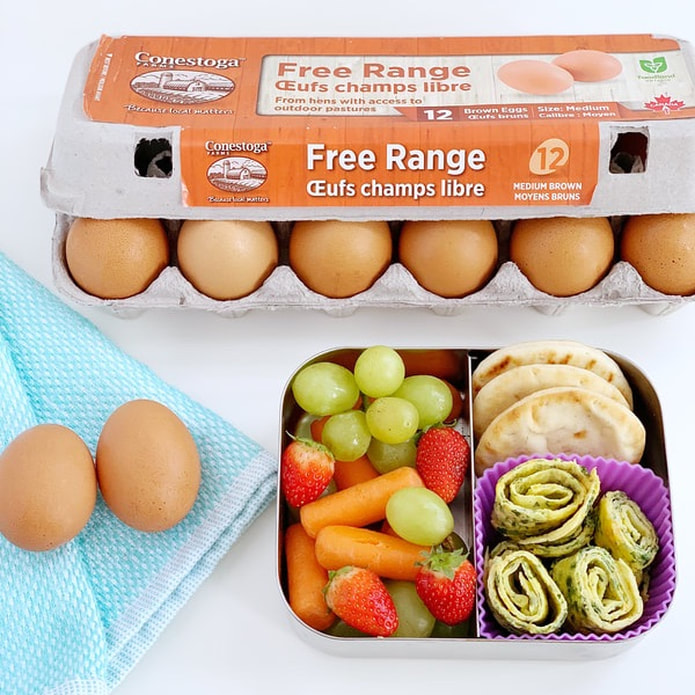
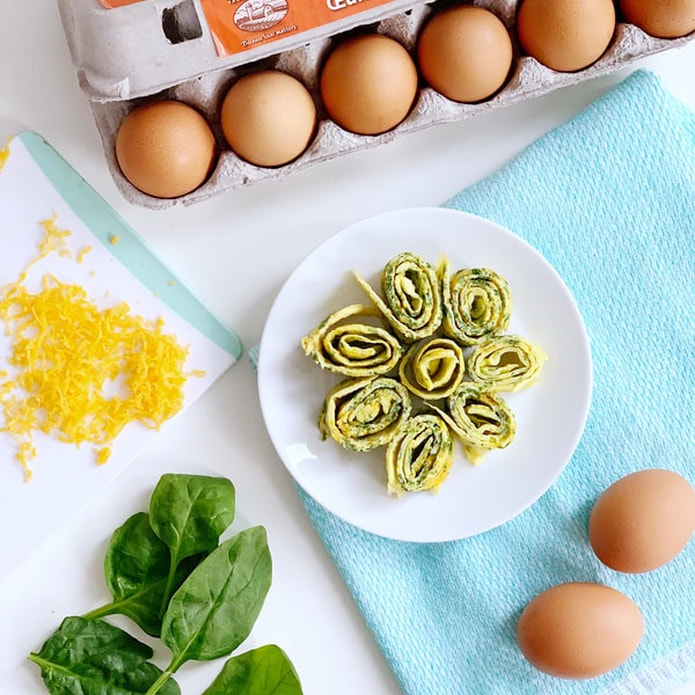
Eggs are easily one of the most versatile foods to pack in a lunch box. There are hundreds of recipes to choose from and most egg recipes are quick and easy to make like these yummy Spinach and Cheese Omelette Roll-ups.
I’ve used Conestoga Farms Free Range eggs for the recipe because they’re wholesome, local eggs produced by proud Ontario farmers and their families who’s hens have access to outdoor pastures. And because eggs are full of healthy fats and protein they will keep kids fuelled throughout the day. I pack them at least once a week for school in my kids lunch boxes.
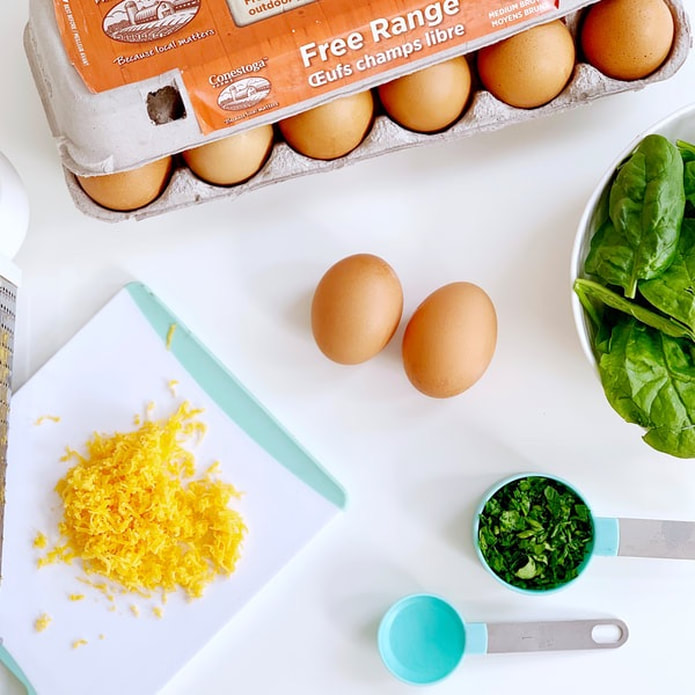
Ingredients:
- 2 Conestoga Farms Free Range Eggs
- 1 teaspoon water
- 1/4 cup spinach leaves, finely chopped
- 2 tablespoons shredded cheddar cheese
- salt & pepper to taste (optional)
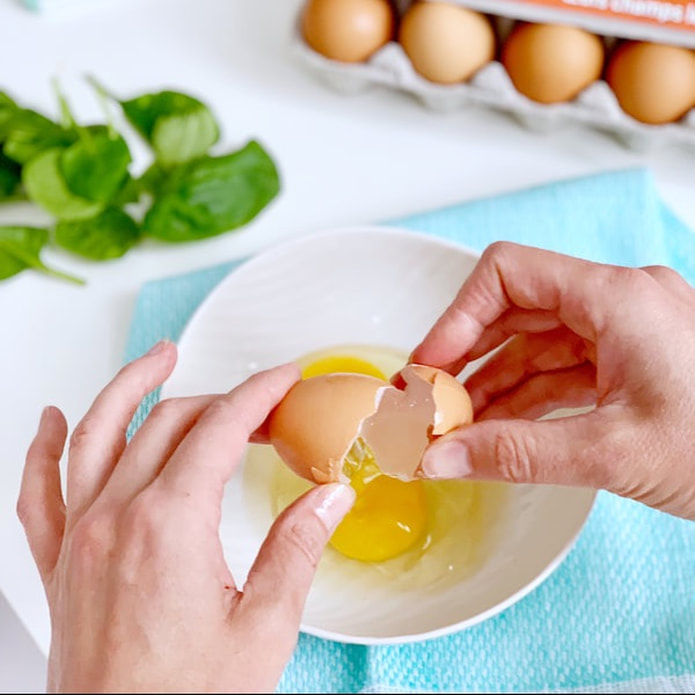
Instructions:
Whisk eggs and water together in a medium bowl until well blended. Stir in the baby spinach and cheddar cheese. Season with salt and pepper.
Heat 1 tablespoons butter in a large non-stick skillet over medium heat. Pour in the egg mixture and cook until eggs begin to set. Flip with a spatula, and continue cooking 2-3 minutes or until eggs are fully cooked.
- Transfer omelette to a cutting board and let cool for 2-3 minutes.
- Then roll omelette tightly into a cylinder shape.
- Cut into bite size pieces.
- Pack immediately in a lunch box and store in the refrigerator until you’re ready to send it to school. I recommend sending it together with an icepack in an insulated lunch bag.
Note: Omelette roll-ups can be stored in the refrigerator for 2-3 days.
Conestoga Farms egg farmers are proud to work with Gray Ridge Egg Farms in the distribution of eggs to fine retailers across the province. They’re also proud members of Egg Farmers of Ontario and Egg Farmers of Canada, ensuring safe, quality egg production practices from the farm to the carton and beyond.
Look for the Foodland Ontario logo on your carton to know that you’re supporting local Ontario egg farmers.

